Category Archives: Tutorials

Three Fast & Fun Birthday Cards (with tutorials)

Hi everyone! I have three birthday cards to share today, one cute and quirky, one bright and cheery and one just plain cute.  🙂

You can find step-by-step instructions with complete supply lists for each here:

3 Fast & Fun Homemade Birthday Card Tutorials

First I combined a couple different stamp sets, sentiments and dies to create this cute chick on a wire.  🙂

Michele Boyer - Paper Smooches

I used bright white X-Press It Blending Card for the background and Copic marker coloring of the chick.

Michele Boyer - Paper Smooches

Next I created a fun/festive card by embossing a background stamp then sponging over with bright inks.

Michele Boyer - My Favorite Things

I used coordinating colors to brighten the sentiment as well.

Michele Boyer - My Favorite Things

Lastly, I have a cute little 3-d cupcake with a bit of patterned paper.

Michele Boyer - Paper Smooches

Don’t forget the sprinkles!  🙂

Michele Boyer - Paper Smooches

Again, you can find a complete list of supplies and instructions on the Craftsy website following the link below:

3 FAST & FUN HOMEMADE BIRTHDAY CARD TUTORIALS

Thanks so much for stopping by!

Shaving Cream Oceans and Roses

Hi everyone! I’m squeezing in another Craftsy tutorial today. This time I’m revisiting the shaving cream technique.  Actually, I had never used this technique until writing THIS tutorial. It was fun!

I have one card with the more common swirled or marbled effect and on my second card I was able to create a pattern of roses.  Squeee! I  love how it turned out!  And I love that it’s “different.”   🙂

First I used Surf & Turf by Paper Smooches.

1-Final-Hey-Gillfriend650R2

My seahorse (colored with Copic markers) is surrounded by an ocean of swirly blue… and a tiny bit of green.  (The pearls were colored using a Copic marker.)

1-Final-Hey-Gillfriend-CU-500R

And then…the roses!  The sentiment is from Pretty Phrases also by Paper Smooches.

2-Final-thanks-so-much-650R

Here’s a close-up:

2-Final-thanks-so-much-CU-650

You can find my step-by-step tutorial for both cards HERE.

Thanks for looking!  🙂

Additional supplies/info:  Copic markers (BG13, R83, Y21), Darice gold Sparkle Tape (from Five & Below).  Gill-Friend card 4 1/4″ x 4 1/4″; Thanks card 4 1/4″ x 5 1/2″.


Baby Congrats – Tutorial

Hi everyone!  I have another tutorial on the Craftsy blog today.  I’ve added a simple twist to a double pocket card.  Hope you’ll check it out (here).  🙂

Congrats-MFT-WM-500

I used Lisa Johnson’s cute Beautiful Baby stamp set with coordinating dies along with Gingham Background by My Favorite Things.

The elephant is popped up on clear foam squares to add just a bit of dimension.

Congrats-CU-MFT-WMThe inside holds two surprise pockets for gift cards, a personal note, photos, etc.

Congrats-In-MFT-WM

Find out how to create your own hidden pocket card here.

Thanks for visiting!  🙂

Finished card size 5″ x 5″.

You Compute Me – Basic Copic Coloring Tutorial

Hi everyone!  Just want to let you know I have a basic Copic coloring tutorial on the Craftsy blog today.  Find out how I colored the image below with just five markers and the Colorless Blender – HERE.

Finished-Robots

I used cute robots from Taylored ExpressionsFar Out stamp set with small hearts from Love Monsters.

Finished-Robots-CU

 Thanks for checking it out (here).  🙂


Additional supplies/info:  Silver mini brads, Copic markers (B93, C1, Y21, R81, R85, Colorless Blender, black Multi-liner).  Finished size 4 3/4″ x 4 3/4″.

MFT Oct Release Rewind – Peaceful Snowflakes (and a tutorial)

Hi everyone.  Welcome to the second day of MFT‘s Release Rewind.  I have two cards to share today, plus a tutorial.  On both of my cards I used the gorgeous new Snowflake Fusion Cover-Up with Pierced Snowflakes Die-namics.  (I’m a big fan of both!)

First, I used Insulation Pink and Sweet Tooth card stock to create a soft “peaceful” holiday card.  I cut each of the circular openings, one layer at a time. The circle was cut from the snowflake panel first, then I marked that opening with a pencil onto the pink panel.  I die-cut that circle, then used that opening to mark the location on my white card base.  Once completed, all layers perfectly aligned.

Peace-Love-Joy-475r

My card features an acetate window tucked between the Sweet Tooth base and the Insulation Pink layers.  What I really like about this card is the gorgeous snowflake attached to the front of the acetate.  But how did I do that without adhesive showing on the other side?   I used this same technique on THIS blue card.   Here’s how to get a smooth, clean appearance on the back of the snowflake/other side of the acetate.

Cut a piece of X-Press It High Tack Double-Sided Adhesive Sheet slightly smaller than your card stock block.  (It’s perfect for this.  Super sticky.  It will not loosen or peel away.)  Here, I used Sweet Tooth for the snowflake.  

Snowflake-Window-1

Remove backing from adhesive paper and apply to card stock, pressing firmly in all areas.  I use a bone folder to apply even pressure across the surface.

Snowflake-Window-2

Flip paper over so the double-sided paper is on the bottom.  Tape die in place.

Snowflake-Window-3

Run stack through die-cutting machine.  I use THIS thin metal shim to add just a touch of additional pressure to the stack.  (It also helps to emphasize the embossed lines on some dies, and tiny negative pieces come out much easier when the cut is made with the metal adapter.  If you don’t have one, you need one.)

Snowflake-Window-4

Remove die-cut snowflake from die and remove adhesive backing.  Many of the negative pieces will stick to the backing.  Remove any strays and adhere snowflake to center of acetate block.

Snowflake-Window-7

Using double-sided tape, adhere acetate to back of Insulation Pink panel.  See how neat and clean the back of the snowflake is?  It doesn’t even look like adhesive.  ♥   

Snowflake-Window-8

 Adhere panel to card front, aligning circular openings and decorate as desired.

Peace-Love-Joy-CUr

Inside, I aligned a second snowflake with the one on the front so when the card is flat and closed, it cannot be seen.  Sentiments are stamped using Merry Messages and Sweet Tooth ink then white embossed.

Peace-Love-Joy-In

And because I love these two dies so very much, I created a second card, this time using Sno Cone card stock with Sweet Tooth, and Peace, Love, Joy Die-namics for the sentiment.  (My use of Swarovski crystals was inspired by Jody’s sample here.  So pretty.)

Peace-Snowflake-Fu475

 I adhered another of my favorite Pierced Snowflakes inside, along with a Merry Messages sentiment, stamped in Sweet Tooth ink and white embossed.

Peace-Snowflake-FuIn

Print

If you followed along with me all the way to the bottom here, THANK YOU!  🙂  I hope you’ll check out the rest of the design team’s Release Rewind samples.  You can find a full list of participating DT on the MFT Blog.  

Print

Just in case you haven’t finished your shopping or finalized your decisions, you can find all of the latest releases RIGHT HERE.

Thanks for stopping by!  🙂

Peace Love Joy card

Additional supplies/info:  X-Press It Double-sided Adhesive Sheet, acetate, Swarovski crystals, white embossing powder.  Finished size 4 1/4″ x 5 1/2″.
.
Peace card

Additional supplies/info:  Swarovski crystals, white embossing powder.  Finished size 4 1/4″ x 5 1/2″.

MFT June Preview, At the Office-Gift Card Tutorial

Hi everyone!  I have two more previews to share before MFT‘s June New Product Launch tonight at 10 p.m. EST.  On both,  I used new At the Office stamp set with Office Supplies Die-namics.

First, I used Office Supplies Die-namics to create a clipboard shaped card from Kraft card stock.  Notebook Paper Background was stamped onto Whip Cream card stock with Sno Cone ink then the left side was cut using Notebook Edge. The sentiment was stamped in Blu Raspberry and Razzle Berry inks.

Inside, I stamped a second sentiment from At the Office onto another piece of Notebook Paper Background.

Next, I created a card with gift card holder using Office Supplies Die-namics.  Here’s the front.

Here’s what I did:

Cut a 6 7/8″ x 4 1/8″ block of Safety Orange card stock.  Score and fold at 1 5/8″ and 4 7/8″.

Cut envelope “flaps.”

Adhere top flap, applying glue to left side only.  Adhere magnetic disc (+side) to inside flap as shown.

Adhere – side disc to + side disc.  Remove paper from adhesive side of magnet and close flap to center.  The + side magnetic should now adhere in proper position to inside of card.  Repeat with bottom envelope flap.

Cut card stock to fit inside (center) panel and adhere to cover magnets.  Die-cut Vertical Gift Card pocket.  Fold along score lines and adhere to inside of card.  (I used d0uble-sided tape.)   I used stamps from At The Office, stars from Sun, Moon & Stars Die-namics as well as gold enamel dots to decorate the inside.

Close card, and adhere two die-cut Brick Red circles to back of envelope, applying adhesive to left side only of lower circle.

Thanks so much for stopping by!  I’ll be back tonight at 10 p.m. EST for the New Product Launch!

Please note that links to new products will not be in effect until time of release, Tuesday, June 10, 10 p.m. EST.

Living the Happy Life

Hi everyone!  Moving right along with November previews from My Favorite Things, I have a card with a little tutorial today.

I’ve combined two new sets, Jumbo Abstract Art with one of Suzy Plantamura’s sentiments from Sweet Little Memories.  Along the sides, I added strips of Striped Background.  And the little PI artist is from You Color My World.

I wanted to color the sentiment and retain the vibrancy of the Copic colors while using the larger abstract background.  There is way too much detail for masking the usual way so instead, I pulled out my Liquid Frisket (“Incredible White Mask”). 🙂

First, I stamped the sentiment onto X-Press It Blending Card.

I colored with Copics, leaving some areas white.

Using a tiny paint brush, I applied the Liquid Frisket.  It goes on white and dries clear.  You can see in the photo below that the top was already drying by the time I reached the bottom.  It dries pretty quickly.

I inked the larger Jumbo Abstract stamp with Banana Split ink and stamped over the image.  (Now everything has a yellow tint to it.)

Using my finger, I rolled off the Liquid Frisket.  (It’s kind of like removing the sticky stuff from the back of gift cards.)

Now I have the background stamped over the image, but the brightness of the colors remains.  🙂

Liquid Frisket is available in two sizes.  Unless you’re planning to mask everything under the sun, you only need the small bottle.  It will go a long way.  I bought mine at Amazon.com.

Don’t forget to check out the MFT Blog for all you need to know about our November 12 release, direct links to more Countdown samples and info on how you can win a $75 prize!


days until our release!


Thanks so much for stopping by!  I’ll be back tomorrow!

Additional supplies not listed above:  Copic markers (E00, E11, BV000, Y21, E31, E35, R01, R29, R89, B93, B95, B97, V25, V09, YG03, YG17, YR21, YR24, E41, E42, E43, E50), red Baker’s Twine, Recollections brads, Liquid Frisket (Incredible White Mask).  Finished size 5 1/2″  x 4 1/4″.

Making the Most of Patterned Borders

I don’t know about you but I’ve been thoroughly enjoying the new My Mind’s Eye patterns, especially the Miss Caroline line.  The wood papers are amazing.  I especially love the one I’ve used here with the lace border.

I felt the wood and lace border created the perfect frame for these flowers from My Favorite Things’ Inspired by Flowers Set 4.   (The Happy Birthday sentiment is from Vintage Cameo.  Along the bottom I used Faux Crochet Border Die-namics.)  The paper is 6×6, but I found a little trick for shrinking the border pattern to fit my 4″ wide panel.  I’ll show you how in minute.  First, a closer look at the flowers and inside.

I stamped the image (twice) onto X-Press It Blending Card, then colored with Copics and cut out each.  The flower in the back is secured only in the center and along the stem (not the leaf), and the flower in the front is raised on foam boosters.

On the inside, I stamped a sentiment from Clearly Sentimental about Birthdays and used a second strip of Faux Crochet Border Die-namics along the bottom.

Now for my little trick…

Here is the paper as it comes from the 6×6 paper pack.

I cut the sheet into three separate pieces.  The key is to cut along one of the dark lines in the wood pattern.  Before cutting the second line, I paid attention to the pattern along the top, looking for a spot that would blend with the left piece.  (I was not concerned with the bottom as that portion was tucked beneath the sentiment panel.)

Small adjustments can be made once the pieces are placed together.  I used a dark brown marker to add in any spots where the dark brown line may have been cut away.

I applied tape to the back of one piece and adhered the two together.  The result is an invisible meeting of the two pieces.  🙂

Thanks so much for stopping by!  Have a great day!

Stamps:  My Favorite Things “Inspired by Flowers Set 4,” “Vintage Cameo” and “Clearly Sentimental about Birthdays”   Ink: Memento Tuxedo Black     Paper:  Papertrey Ink Dark Chocolate, X-Press It Blending Card, My Mind’s Eye Miss Caroline “Fiddlesticks”  (6×6)   Accessories: Copic markers (Y21,  YR23, E35, E79, YG91, YG93), MFT Faux Crochet Border Die-namics, foam boosters.   Finished size 4 1/4″ x 5 1/2″.

Seeing Spots and a Step-by-Step on Coloring Twisty Hair

Happy Saturday!  It’s challenge day with Kraftin Kimmie!  Today Kimmie is challenging us to use dots or spots on our cards.  I like dots.  🙂   If you’d like to play along, please post a link to your card here on the Krafty blog.  You could win a free Sabrina the Spinner image from Kimmie’s latest release!

Sending You Bear Hugs

I decided to use Goldilocks with her three little semi-scraggly (much loved) bears.  Since the image is a bit large, I kept the layout very simple, adding some crocheted trim, jute string and one of those border stickers I never seem to use.  I also hung a little bear charm from the bottom button.

I’ve had quite a few requests for a little “Twisty Girl hair” coloring tutorial so I took some pics as I went along.  Every time I explain how I color something, I feel the need to say that I am not an expert, there are others FAR more talented than I, and that this is just how *I* do it.  I hope it helps.

First, I always color the face/skin areas before anything else.  It’s an important area, and if I mess it up (i.e. too much color on the cheeks), I don’t want to have to start over.  Plus I use such light colors on the skin, I don’t want to risk pulling a darker color from the hair or other surrounding area onto the lighter color. 

First I added Y21 to the curls, leaving some of the areas uninked .

I then added YR23, covering most but not all of the Y21.

Then I added E35, again covering some of the YR23 but not all.

Next, I added more Y21, covering the previously laid colors to blend but still leaving some of the uninked sections exposed.

Lastly, I added tiny bits of E57 along the inside edges of each curl and then blended a bit more with Y21.

So basically, I always start with the lighter color, add shading a little at a time, then blend the edges using the lighter color (or one of the lighter colors).  When there are waves (as opposed to curls), I add the darker shading in the corners of the waves, touching my marker to the corner and “wisping” out, away from the corner.   I also try to darken the area on each side of the neck because that is always a naturally darker area. 

I hope that helps.  Eek!  🙂  Thanks for stopping by!  Have a great day!

Stamps:  Kraftin Kimmie “Gabrielle” (Moonlight Whispers)   Ink: Memento Tuxedo Black  Paper:  Papetrey Ink Kraft. Vintage Cream, Crate Paper Restoration Collection “Refinish”  Accessories: Copic markers (E000, E00, E11, E31, E33, E35, E57, BG0000, BG01, Y21, YR23, YG0000, W00, W1),  Prismacolor pencils, May Arts trim, natural jute string, linen thread, buttons, charm (source unknown), Crate Paper Restoration sticker strip, corner rounder.   Finished size 5 1/2″ x 5 1/2″.

MFT à la modes Previews, Day 2

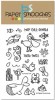
Hello.  🙂  Today the My Favorite Things design team is featuring the second of the two new à la modes sets, What’s Cooking?, available tonight at 10 p.m. EST along with this month’s WTG VIP.  I had a bit of fun with this set so please bear with me.  Lots of photos and a little tutorial. 

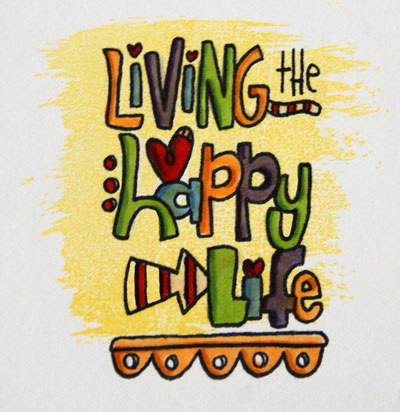
Happiness is Homemade

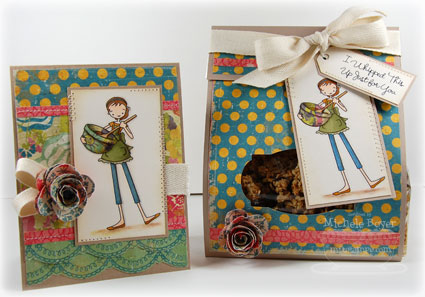
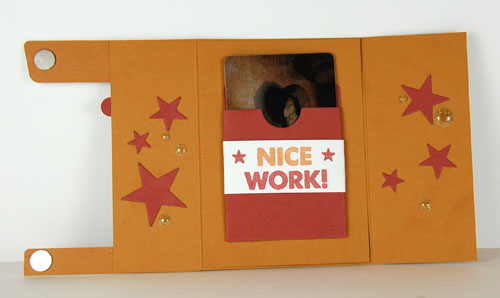
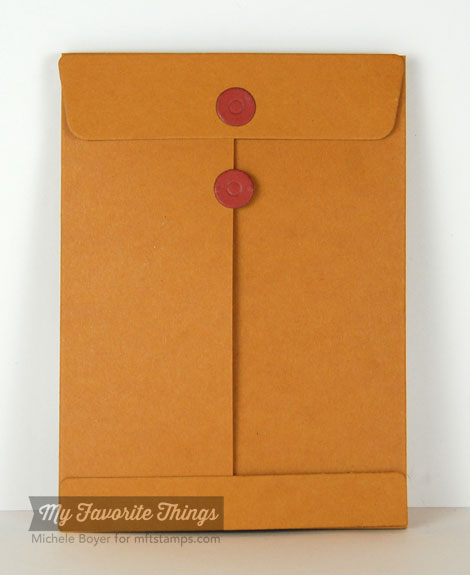
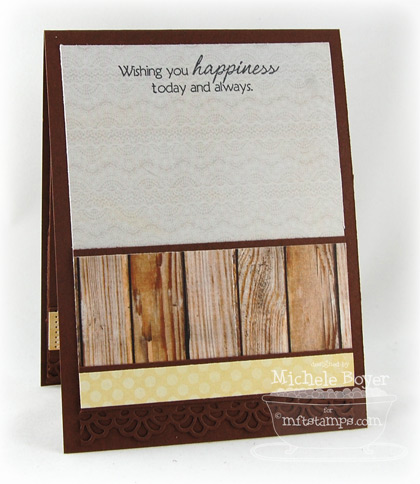
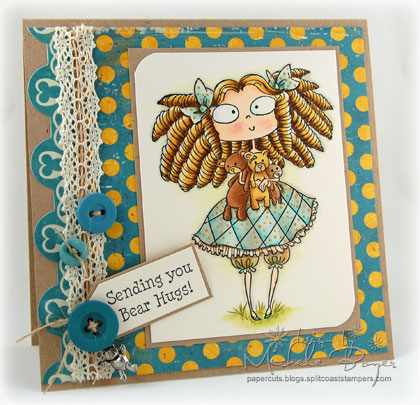
I created a card with a matching goody bag cover.  Inside the bag is some yummy granola.

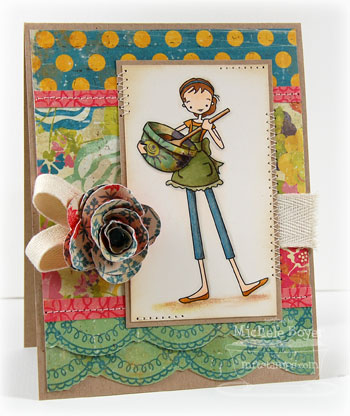
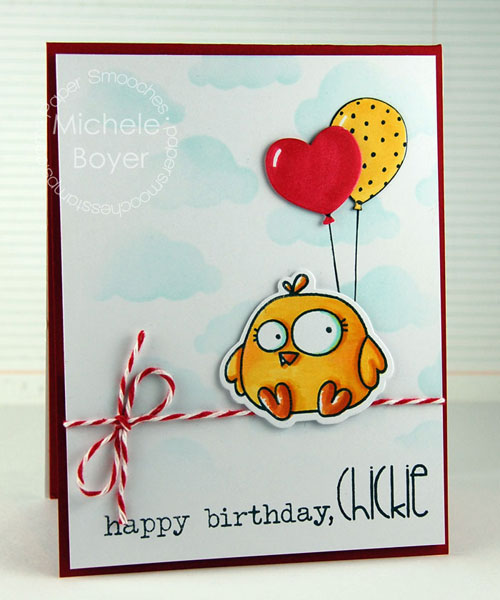
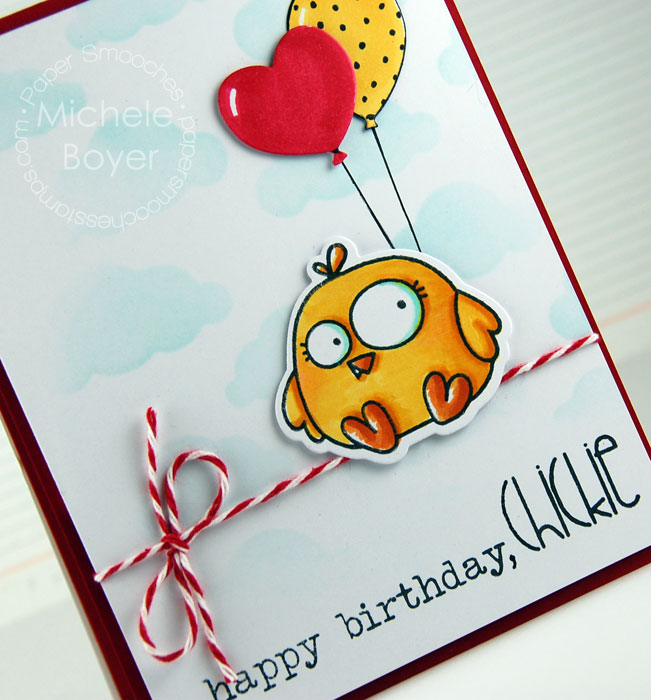
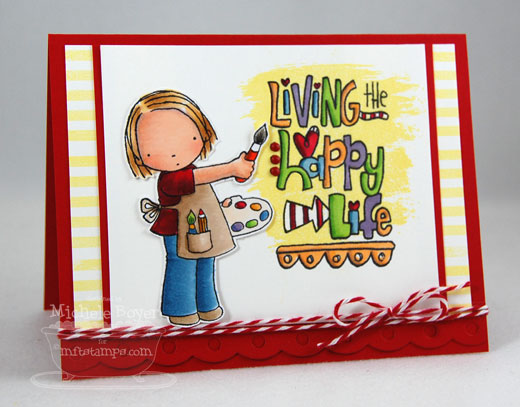
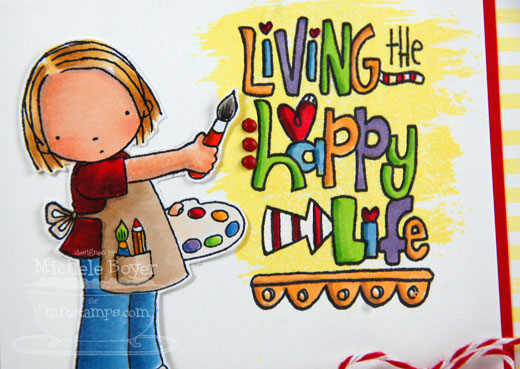
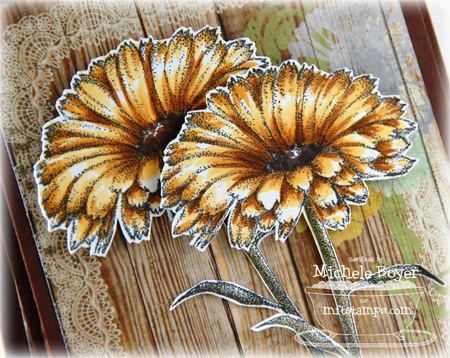
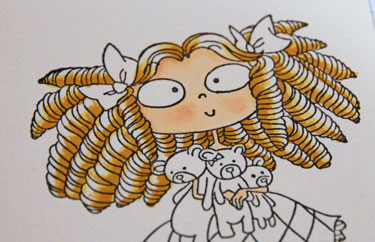
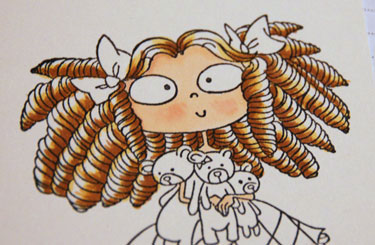
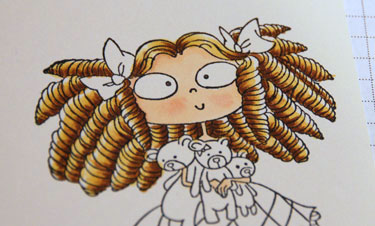
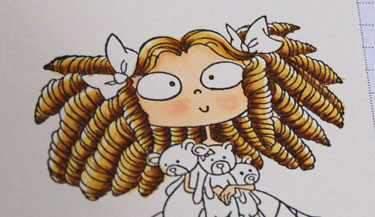
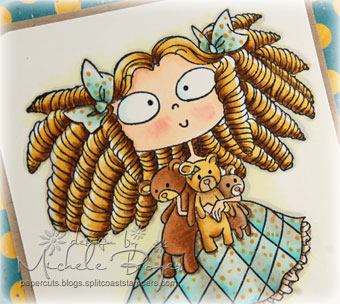
On my card, I colored the girl with markers and pencils, paper-pieced the bowl and added some straight and zig-zag stitches here and there.

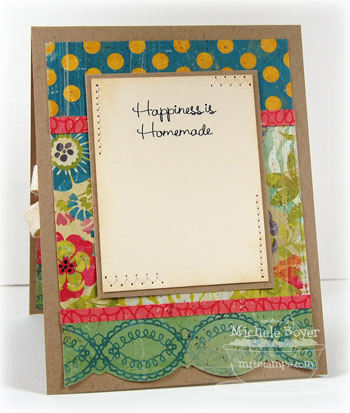
The inside was finished simply, adding bits of stitching to jazz it up just a bit.

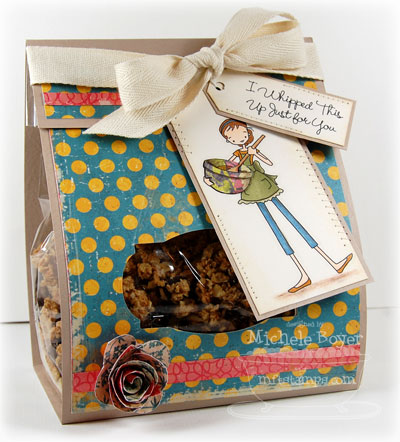
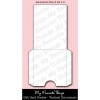
My bag cover was fit to wrap around one of MFT’s large Perfectly Clear flat-bottomed gussetted bags.  (It seems ‘small’ is the only size currently available, but the pattern can easily be altered to fit any size bag.)


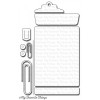
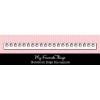
On the front of my bag, I used MFT’s Polka Dot Greeting Die-namics die to cut the window, and on the front of the bag and my card I used the Rolled Rose Die-namics die (currently out of stock).

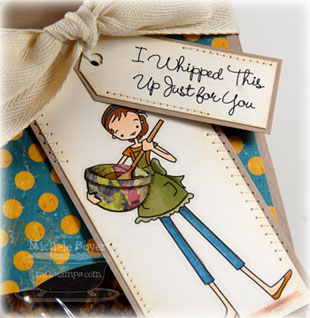
Here’s a close-up of my tag combo.  I added the stitches to the sentiment tag to give it a bit more of a homemade feel (and so it would match the other one).

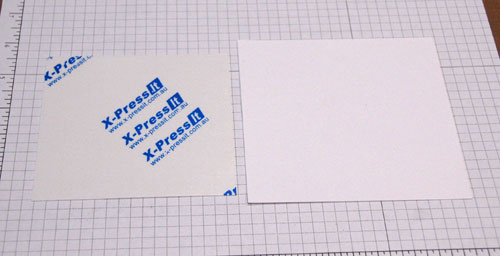
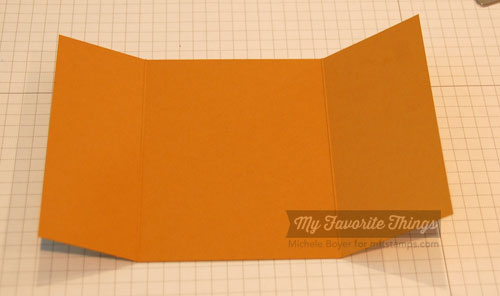
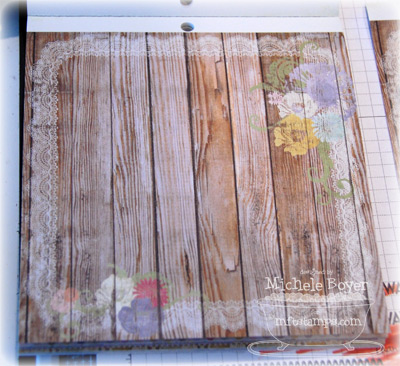
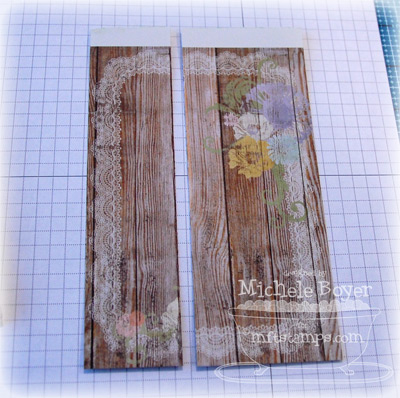
Here’s how I made my Goody Bag Wrap.  You’ll need two sheets of 8 1/2″ x 11″ cardstock.

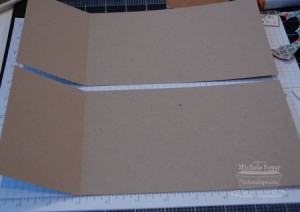
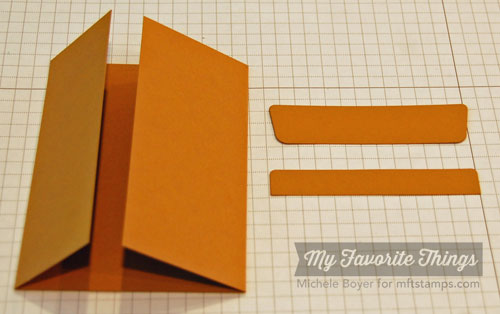
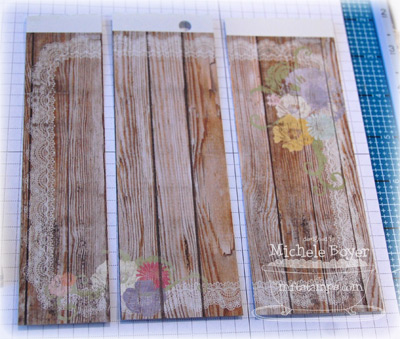
Cut two strips of cardstock to fit the width of your bag.  Mine was 5 1/4″.  Measure the depth of your bag bottom. Mine was 3″ so I scored and folded one end of each piece at the 3″ mark.

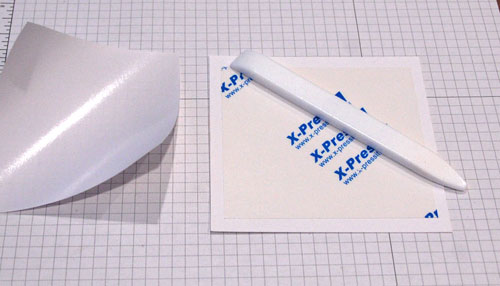
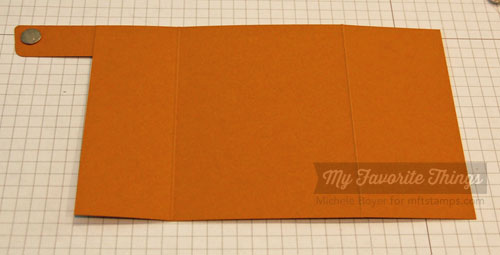
Place two rows of double-sided red-line tape on one of the 3″ ends and adhere the two pieces together, overlapping the 3″ ends. This will become the bag cover bottom.  At this point, you should have one long strip, 5 1/4″ wide, with a scored middle section 3″ wide.

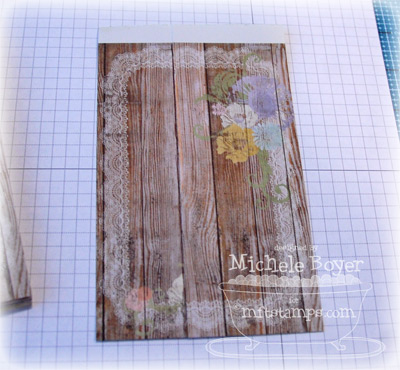
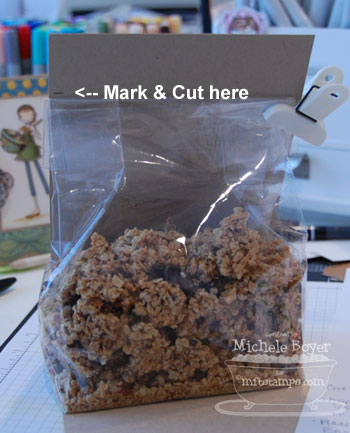
Place your 1/3 filled bag onto the center of the scored strip.  Bring up the front side and, holding the cardstock against the bag, mark the top of the bag.   Cut (remove) the area at that mark.

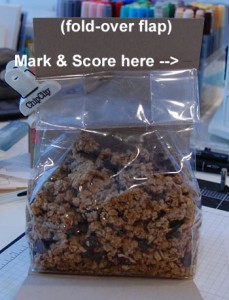
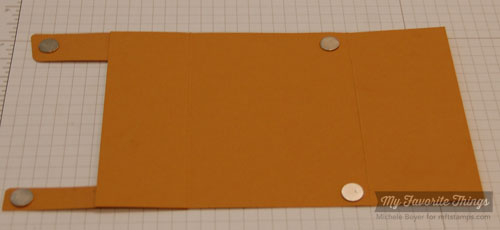
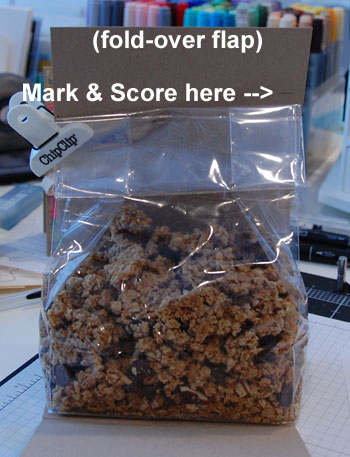
Place your goody bag back into the center of the strip.  Fold up the back and, holding the cardstock against the bag, mark the top of the bag again.  This will be your score line and will create the front fold-over flap.

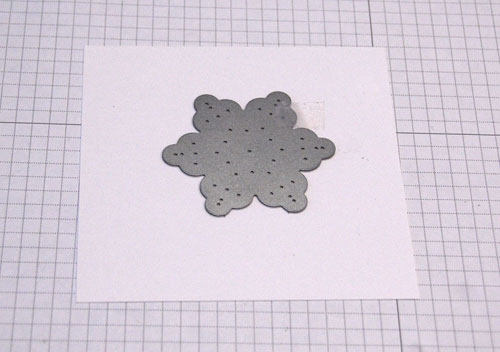
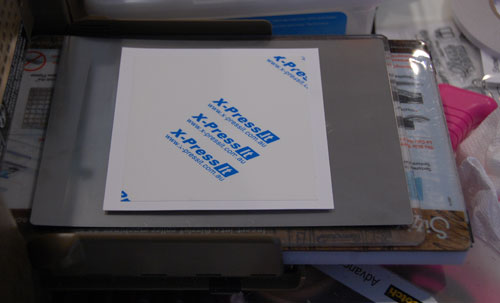
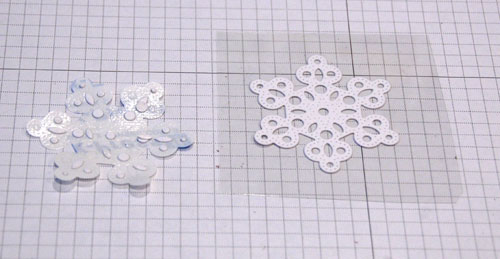
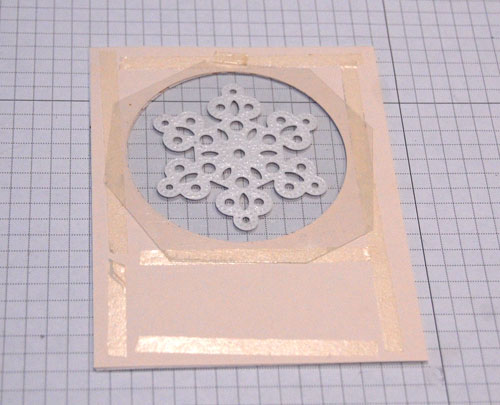
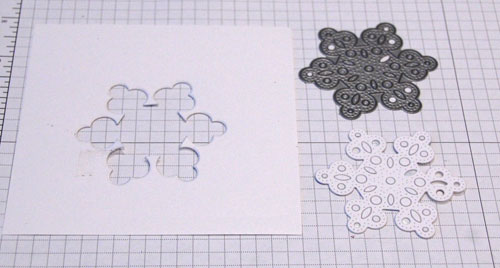
Now your goody bag cover is ready to decorate.    If you’d like to die-cut a window in your bag cover, simply position your die in the desired spot and run it through your die-cut machine.  You can mark the spot using light pencil marks if that helps.  And the Die-namics will easily cut through a sheet of cardstock layered with patterned paper so layer away!  🙂

To see more samples using this fun new set, please check out Kim’s blog HERE after 11 a.m. EST.  Then I hope you’ll come back tonight for our WTG VIP hop at 10 p.m. EST, at which time the two new à la modes sets as well as the WTG VIP package will be available.

Thanks for stopping by!  Have a great day!

Stamps: MFT “What’s Cooking?” (à la modes)  Ink: Memento Tuxedo Black and VersaMagic Wheat  Cardstock: Prism Kraft, MFT cream Perfect Paper Panel  Patterned Paper:  Crate Paper Restoration 6×6 paper pad  Accessories: Copic markers (E000, E00, E31, E33, E35, B95, YR23, YR24, YG93, YG91, W00, W1, W3, YR0000), Prismacolor pencils, MFT Polka Dot Greetings and Rolled Rose Die-namics, twill, sewing machine, sponge.  Finished card size: 4 ¼” x 5 ½”.  Finished Bag size:  5 ¼” x 6 ¼” x 3”.