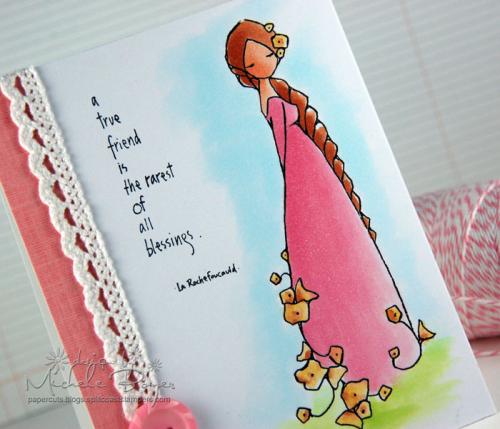
Category Archives: Tutorials

Coloring Flowers with Copic Markers

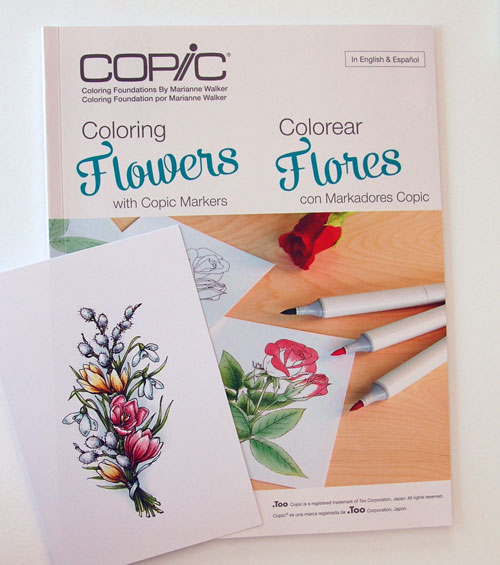
Today I have a step-by-step tutorial on coloring flowers and leaves with Copic markers. I’ve used many of the techniques found in Coloring Flowers with Copic   Markers published by Imagination International and written/illustrated by Marianne Walker. The book includes tutorials ranging from basic to intermediate as well as line art that can be copied/printed for practice.

Coloring Flowers with Copic Markers

The book covers smooth coloring and blending, showing depth through color, coloring skies, adding a soft haze around an image as well as different ways to use the Colorless Blender. It’s a great resource for beginners as well as those with more coloring experience.

Finished-500

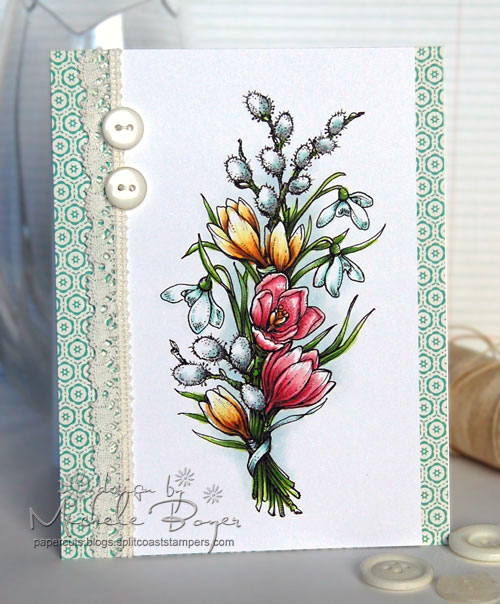
I printed this lovely Winter Pick Me Up digital image from Power Poppy onto X-Press It Blending Card. There is an accompanying sentiment but I chose to leave my card front sentiment-free. Continue reading

Stamp Positioner Comparisons, Tips and Tricks

1a Intro Photo

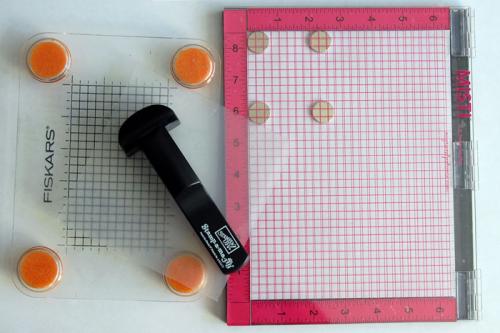
If you’re new to stamping, stamp positioners can seem somewhat foreign. What do they do? How do they work? In this post, I show step-by-step how I use three different stamping tools for positioning stamps and more. Here’s a quick overview.

Stamp-a-ma-jig

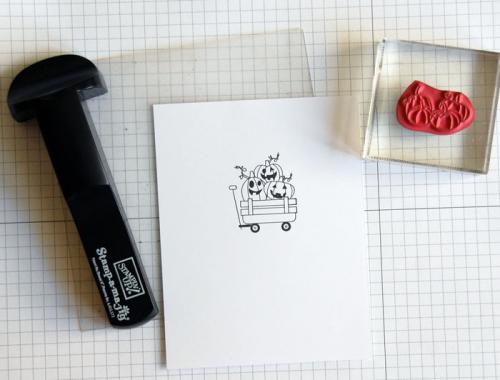
The Stamp-a-ma-jig, which consists of a black T-shaped handle and clear, reusable imaging sheet, is one of the most basic and least expensive stamp positioners.  An image or sentiment is stamped onto the imaging sheet then positioned over card stock for perfect placement. I also sometimes stamp an image or sentiment onto the imaging sheet to see how it might look in different locations on my project.

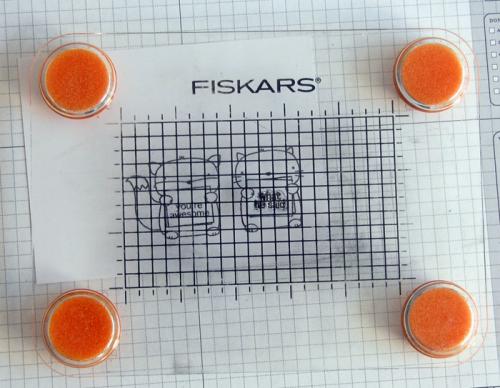
Stamp PressThe Stamp Press is another great tool to have on hand. It’s basically an acrylic platform on foam feet. As pressure is applied, the foam feet allow adjustments in any direction before pressing ink to paper. For me, it’s a “must have.”

20-MISTI-closed2

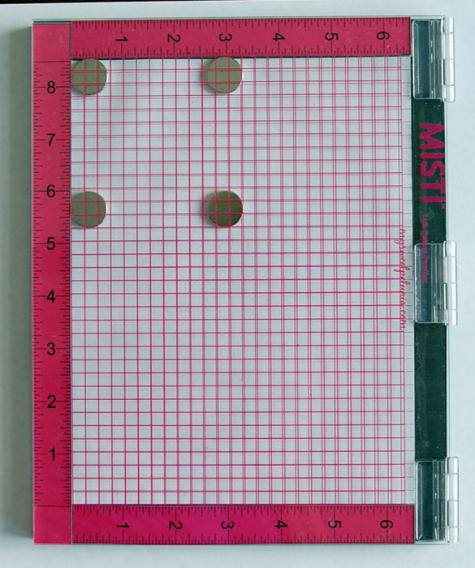
And then there’s the MISTI –Most Incredible Stamp Tool Invented, which can be used with both rubber and clear stamps.  The first time I used it, I’m pretty sure I heard angels sing.

I’ve always felt “solid image challenged” but with this tool, I can achieve perfect results every time.

Blog-photo-2

See? I love it.

But back to positioning stamps, I place my card stock inside, positioning the magnets to hold the paper in place. I lay my stamp on the paper in the desired location and when the MISTI is closed, the stamp then sticks to the inside cover. Once the stamp is mounted, it’s easy to tweak a little in any direction. Using the grid, you can be assured the impression will be straight and just where you want it.

33-Ink-stamp-and-close-to-transfer-ink

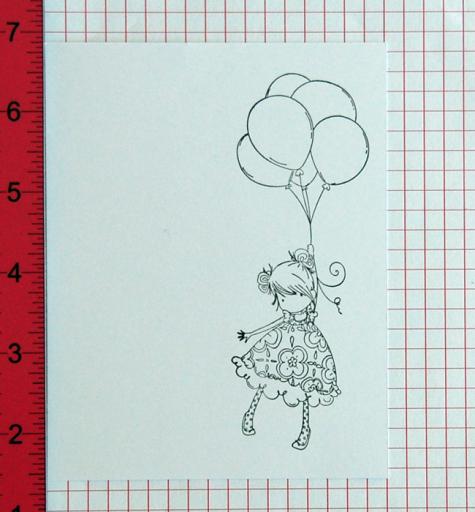
I also use the MISTI to stamp larger images. I find it much easier than using a wide or long acrylic block. As with solid images, if the impression is not perfect the first time, simply stamp it again. The image will stamp in the exact same place every time (unless you move the stamp or paper, of course).

I also use the MISTI to stamp portions of a sentiment in multiple colors, like this and the second card on this post. Because the stamp and paper stay in the same place, it’s super easy to just mask off and ink different portions of the stamp.

You can  see, step-by-step, how I use the Stamp-a-ma-jig, Stamp Press and MISTI HERE.

Thanks for visiting!

1amichele siggy

Product Focus – X-Press It Mask It and Adhesive Sheets

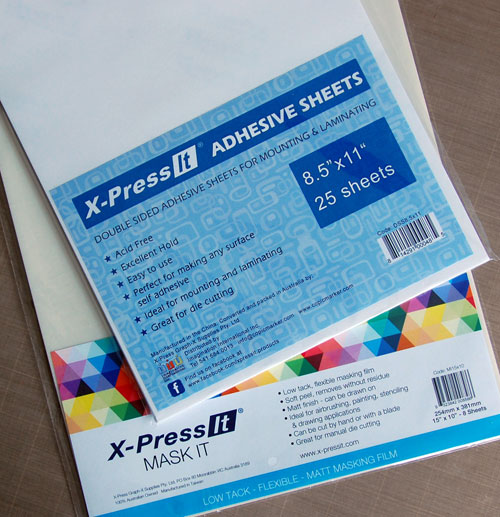
Hi everyone! Today I’ve created a couple projects using X-Press It Mask It film with a bit of Double-sided Adhesive Sheets, both by Imagination International, Inc, the U.S. distributor of Copic markers.
1-Photo

Mask It is totally different from what you may typically think of as a “mask” for stamping. It’s actually a low-tack adhesive film, perfect for layering color.  It’s easily die-cut or scissor cut to any shape and wipes clean. (That’s my favorite part!)

X-Press It Double-sided Adhesive Sheets are high-tack and also easily cut by scissors or die-cutting machine. The adhesive is smooth and clear which is great for use in places where the back is visible, like the little clear paint can I’ve used below or clear acetate cards like this or this.  I have tried many double-sided adhesive sheets in my stamping life and this one is by far my favorite.
Michele Boyer - Paper Smooches

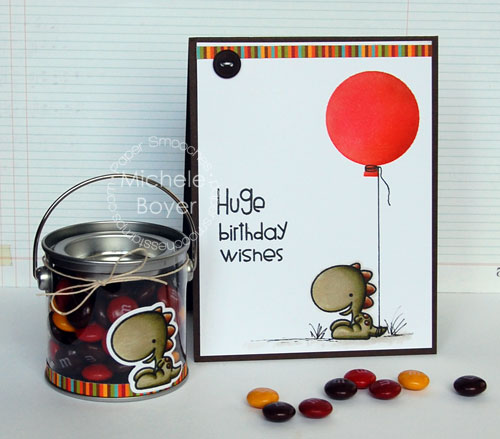
Party Posse and Big Balloons die by Paper Smooches

I used Mask It to blend color inside the balloon shape on the card above, and an Adhesive Sheet to adhere the dino and stripes to the clear paint can.

Creating a Mask for Inking
3-Steps-1-and-2

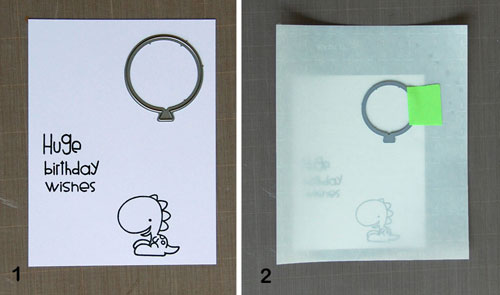
Step 1: First stamp your image and sentiment onto X-Press It Blending Card, keeping in mind where the balloon will appear.

Step 2: Cut a piece of Mask It larger than the Blending Card,  position balloon die and secure die in place with removable tape. By cutting the mask larger than the card stock, the adhesive backing holds the card stock securely in place while blending in color and there’s room on the mask to begin the blending into the open space.
3-Steps-3-and-4

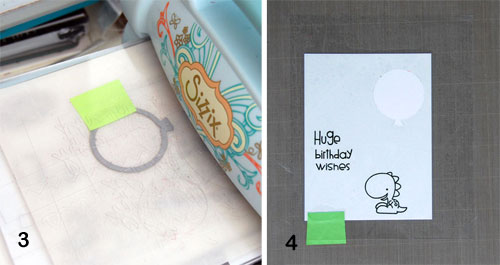
Step 3: Die-cut balloon from Mask It.

Step 4: Use a bit of tape to hold Blending Card in place. Remove backing from Mask It, position balloon opening and adhere over stamped panel.
3-Steps-5-and-6

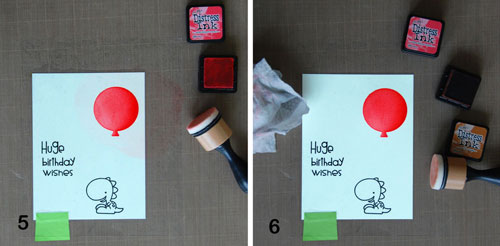
Step 5: Begin sponging ink (Ranger Abandoned Coral Distress ink) into balloon shape. Using a circular motion, begin blending on Mask It sheet, slowly moving into the balloon.

Step 6: Once the desired amount of ink is applied, use a baby wipe or damp cloth to remove excess ink from the mask. That is very cool!
3-Steps-7-and-8

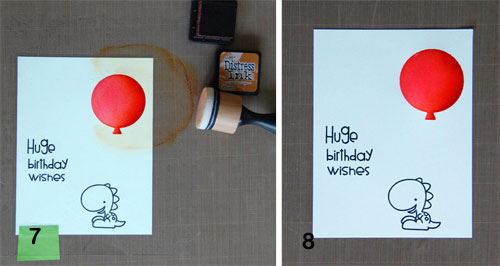
Step 7:  Blend in darker ink (Ranger Rusty Hinge Distress ink), beginning again on the mask and working in toward the balloon opening using circular motions. If you wanted to add another pattern over the sponged color, now is the time to do so (but wipe the mask clean before doing so).

Step 8: Wipe mask clean and carefully remove from Blending Card. The mask can be reapplied to the backing sheet and saved for future use if desired.

I used a 0.5 Black Multi-liner to add in the balloon string.
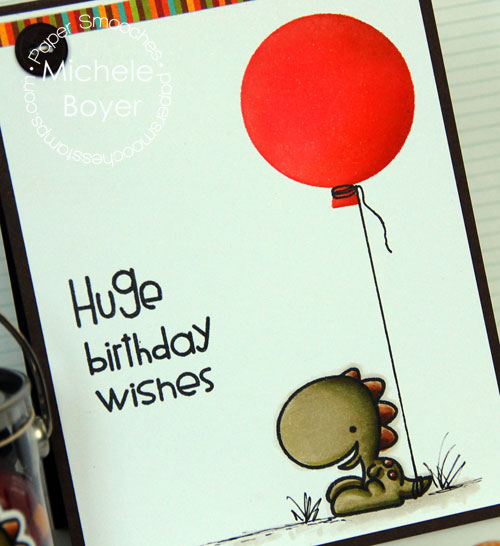
Michele Boyer - Paper Smooches

Super easy!  🙂

Now to create the little dino and stripes for the clear paint can.
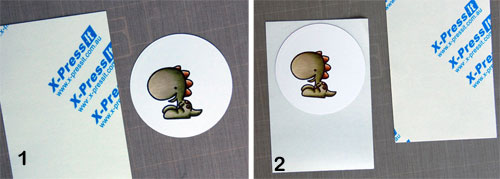
4-Steps-1-and-2

Step 1: Stamp and color image. (I just happened to have a spare die-cut circle on my desk so I used that.)

Step 2: Remove one side of the adhesive sheet backing and adhere colored image.  Use scissors to remove excess adhesive.
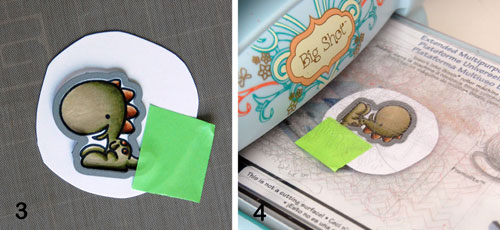
4-Steps-3-and-4

Step 3: Secure die in place with removable tape.

Step 4: Die-cut image.
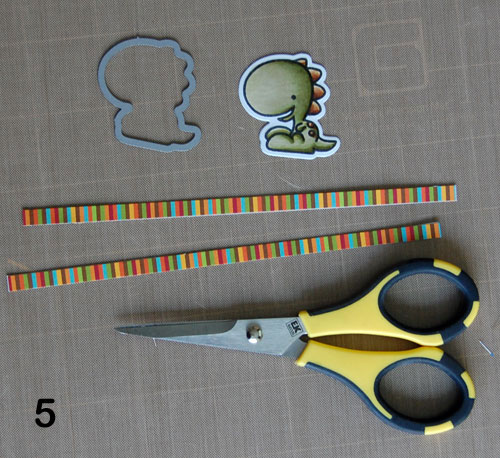
4-Step-7-Cut-strips-with-scissors

Step 5: Adhere two thin strips of patterned paper to adhesive sheet; trim with scissors. Remove backing paper from all and adhere to can.
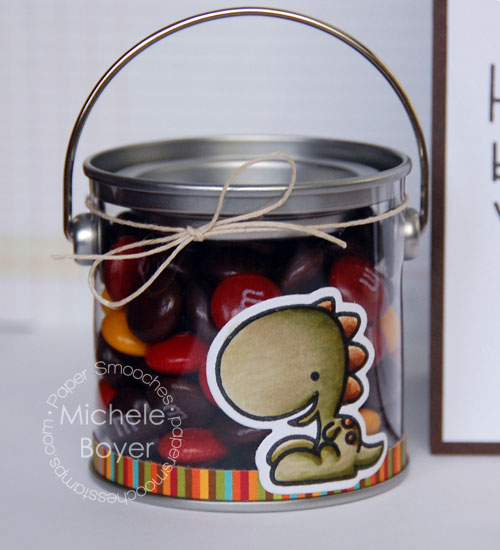
Michele Boyer - Paper Smooches

Copics used: E31, E33, E35, E37, YG91, YG93, YG95, YG97

Once applied to the can, the dino and stripes will not pull away from the surface. I love this adhesive paper. 🙂

Creating Masks for Stamps
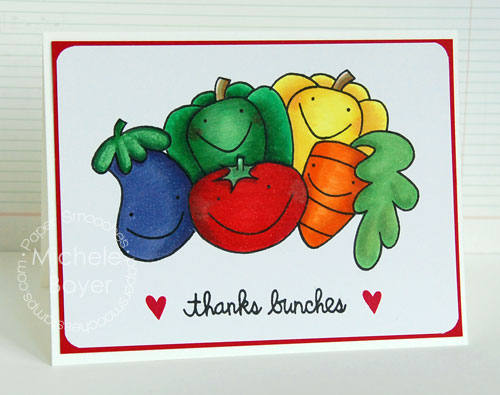
Michele Boyer - Paper Smooches

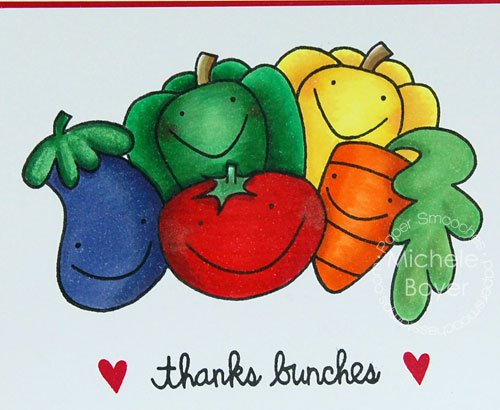
Vegtastic by Paper Smooches

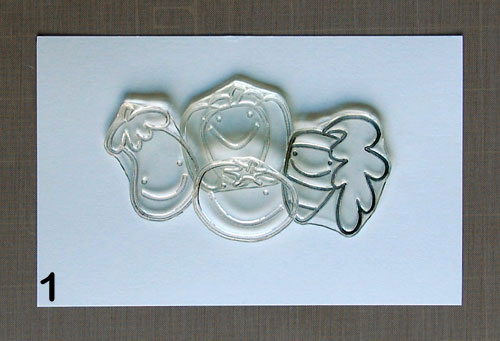
Since ink does not absorb into Mask It film, the process of creating masks for stamps is a little different. Here’s how to do that:
5-Step-1a-Lay-out-Stamps

Step 1: First decide how you’d like to layer your stamps. This will help to determine the order in which the images are stamped.
5-Step-2-and-3

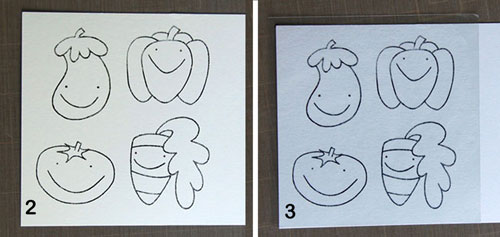
Step 2: Stamp each image onto scrap paper.

Step 3: Remove backing from film and adhere over images (all at once).
5-Step-4-Cut-out-and-carefully-remove-masks

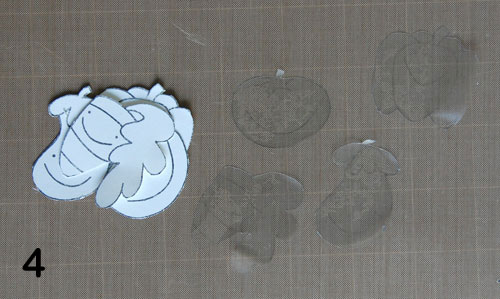
Step 4: Cut out images and carefully remove each mask.
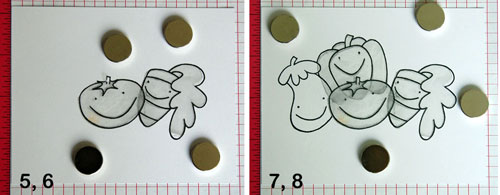
5-Step-5-6-and-7-8

Step 5: Stamp tomato and adhere mask.

Step 6: Stamp carrot. Before applying the carrot mask, I carefully lifted the right side of the tomato mask and wiped away the ink (from the edge of the carrot). Since the ink just sits on top of the mask, wiping away the ink helped me to avoid transferring the ink to my fingers and then onto anything else. Once the ink was wiped away, I added the carrot mask.

Step 7: Stamp eggplant, wipe away ink from edge of tomato and apply eggplant mask.

Step 8: Stamp green pepper, wipe away ink from top of tomato mask and apply pepper mask.

Since I had a bit of room left, I stamped an additional pepper above the carrot.
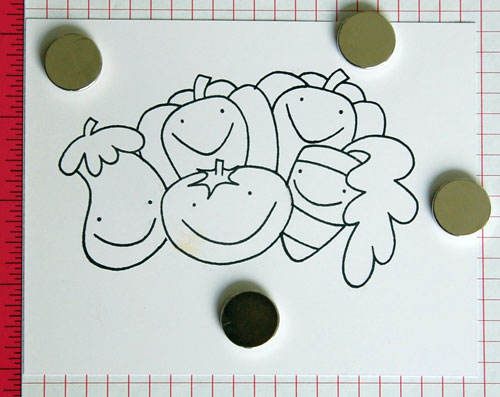
5-Step-8-Final-stamped-images

One big happy veggie family. 🙂

Michele Boyer - Paper Smooches

BV04, BV08, BV17, E31, E33, G03, G05, G07, G29, Y06, Y08, Y21, YR14, YR16, YR27

Thanks bunches for stopping by! ♥

1amichele siggy

Product Focus: Kirarina WiNK

Today I’d like to share one of my newest favorite products – Kirarina pens from Copic. For my project, I’ve used WiNK pens but there are three additional types as well so I’d like to briefly touch on each one. All are available individually or in sets.

  •  2win  – Water based/scented.  Each marker is duel-tipped and features a light and dark shade of each color as well as both chisel and fine tips.  Perfect for doodling. Works best on regular copy paper or stationery.
  • 2win Oil based – Double-ended/fine and round nib markers featuring two colors on one pen; for use on any surface.
  • WiNK – Multi-purpose/metallic pen works on a variety of surfaces and look great on light and dark surfaces.
  • Cute -3d, scented puff paint. Hand washable after 72-hour dry time. Can be used on paper crafts to add a bit of dimension to projects.

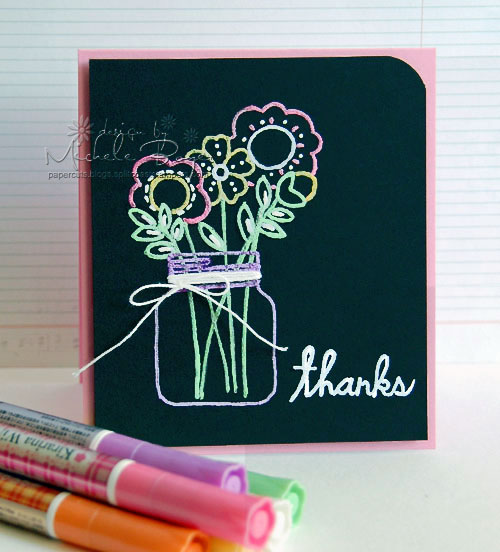
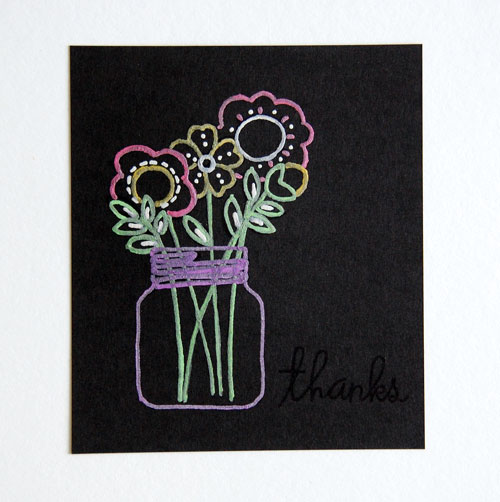
Here is my card using multi-purpose WiNK pens.

Final7

With a bit of a steady hand, this is SO easy.

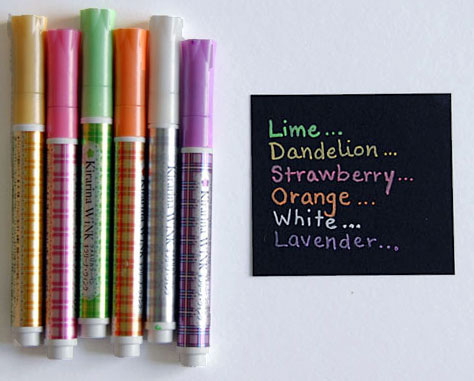
1-Pens3

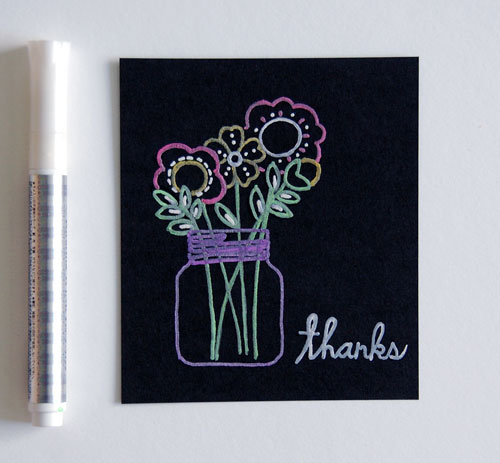
For my design I used Lime, Dandelion, Strawberry, Orange, White and Lavender.

The pens are similar to a paint pen. Shake several times (you’ll hear the ball rolling around mixing the ink and glitter), remove cap and press tip onto scrap paper a time or two to begin the flow of color. Because paper is porous, you’ll want to move the pen fairly slowly across the paper to achieve the best results. Re-cap, shake a bit more and re-press tip to scrap paper as needed to keep the color flowing.

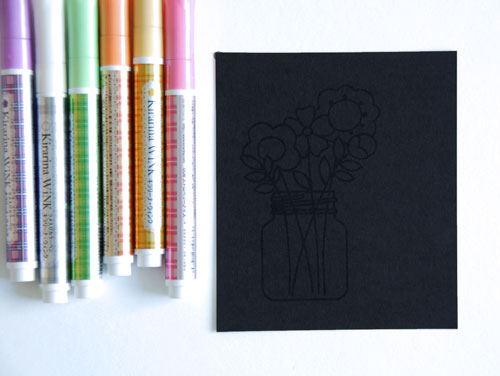
1-Stamp-Black

Using black dye ink, stamp image onto black card stock. Allow to completely dry. I tried black hybrid ink but as it dried, it disappeared into the paper, making it very difficult (or impossible) to trace.

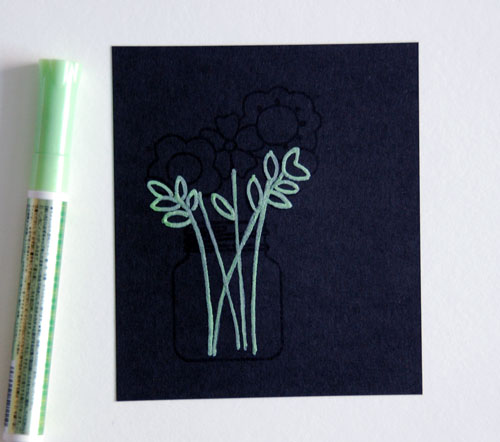
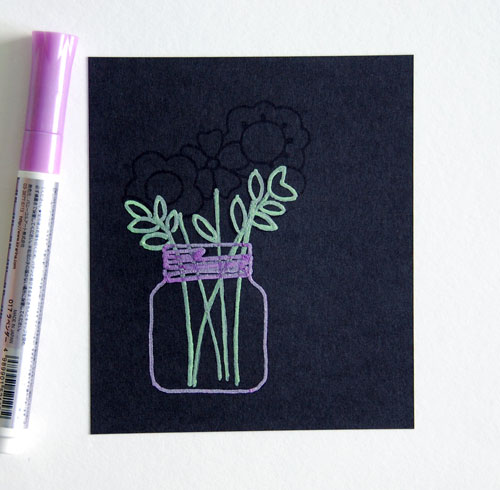
Before using the pens, examine the lines and objects within the stamped image. Since WiNK color can be layered, you’ll first want to trace the lines that fall behind others.

2-Green

The flower stems in the image I’ve used (Best Buds by Paper Smooches) go into the opening of the jar so they will appear “behind” the outline.

With the Lime pen, trace the stems and leaves.

3-Purple

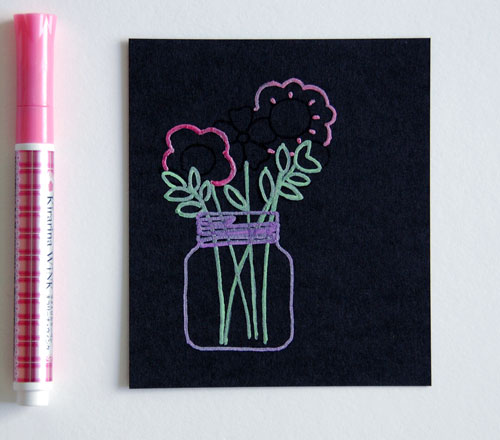
Trace the jar with Lavender, moving pen over the flower stems as necessary. The purple lines will cover the green as you trace over. (Cool, huh?)

4-Pink

Next, I traced two of the flowers in Strawberry.

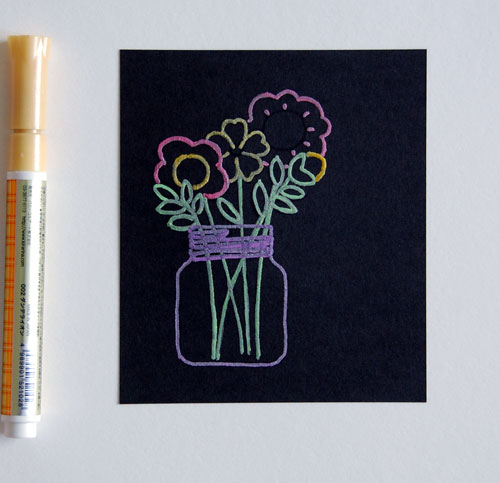
5-yellow

I then added a bit of Dandelion…

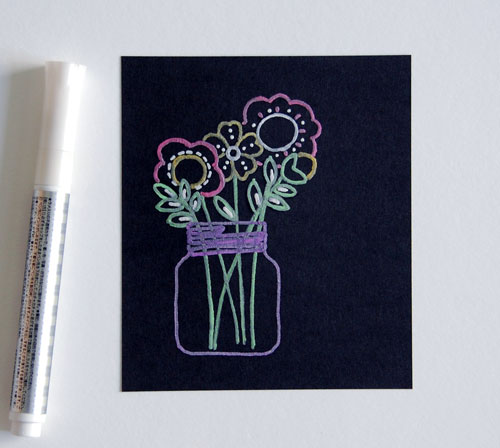
6-white

…then accents of white. I love all the WiNK pens but the white is my favorite. It is AMAZING.

7-stamp-sentiment

Stamp the sentiment in black ink. Wait a few minutes (or more) for the ink to dry.

8-trace-white

Trace using White.

One additional tip – I found that small mistakes can be carefully scraped away from the paper using a craft knife. The purple lines around the rim of the jar were a little close together in places so I used the point of a craft knife to scrape away a bit of ink from between the lines.

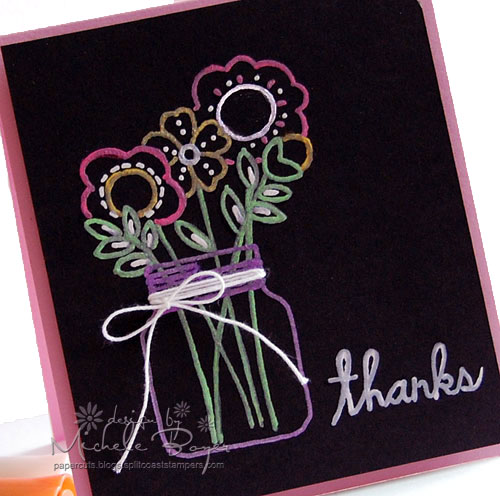
Close-up2

The Kirarina WiNK pens are so much fun to use. I want them ALL!  🙂

Thanks for stopping by today!

1amichele siggy

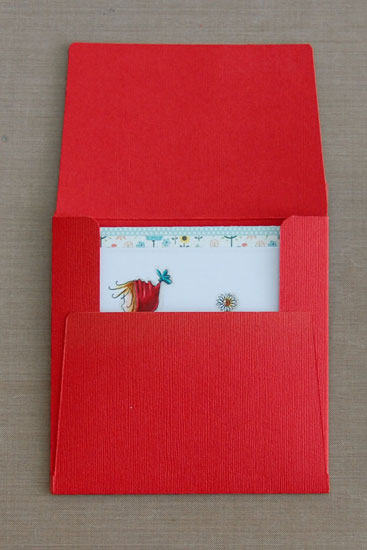
Handmade Matching Envelope — No problem

Hi everyone.  🙂

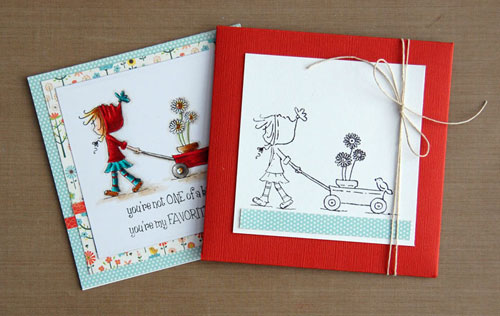
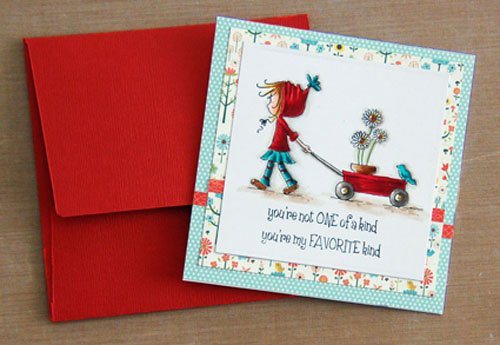
I thought I’d take my card making one step further and create a coordinating envelope. (Image by Stamping Bella.)

Final-w-card500

Did you know there’s one basic formula to create any size envelope? Your only limitation is the size of paper you have on hand.

Final-Tall-2-500

You can find a complete, easy to follow, step-by-step tutorial HERE.

Final Long500

Presentation counts, right?  Yes, sometimes it does. 🙂

1amichele siggy

Stamping Bella Ramona and her Wagon

Patterned Paper Echo Park Simple Life (6×6)

Bokeh over Watercolor (a tutorial)

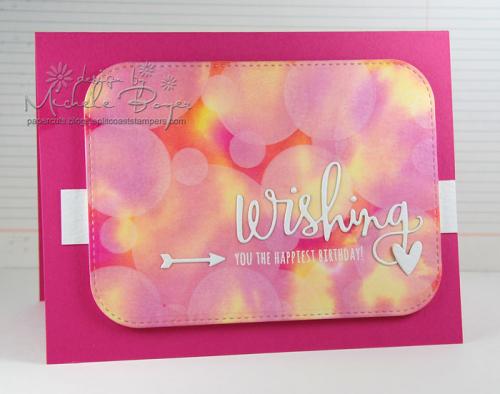
Hi everyone!  I’ve been playing around a bit with different watercolor techniques and decided this is definitely one of my favorites!

I created a bright watercolor background then added different sizes of white dots. It’s super cool (I think). 🙂

Finished-wcbokeh

I dropped vibrant pink and yellow inks onto wet watercolor paper, then tipped the paper to allow the inks to mix in some areas, creating bright spots of orange mixed in with the pink and yellow. Once dried, I sponged circles of white pigment ink over to create a bokeh appearance.

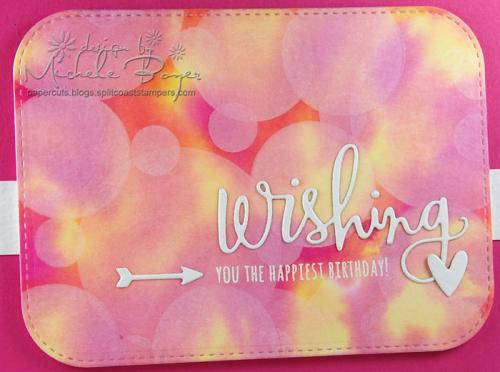
Finished-wcbokeh-CU

I die-cut and adhered “wishing” from Simon Says Stamp‘s Sending & Wishing and white embossed the remainder of the sentiment. The small arrow and heart were cut using Paper SmoochesTiny Hearts Dies.

If you’d like to try this technique, you can find a step-by-step tutorial HERE on the Craftsy blog.

Thanks for stopping by!

1amichele siggy 

hello (Pointillism, a tutorial)

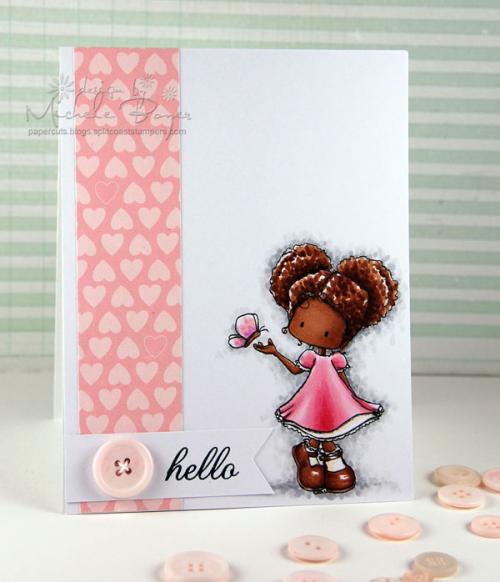
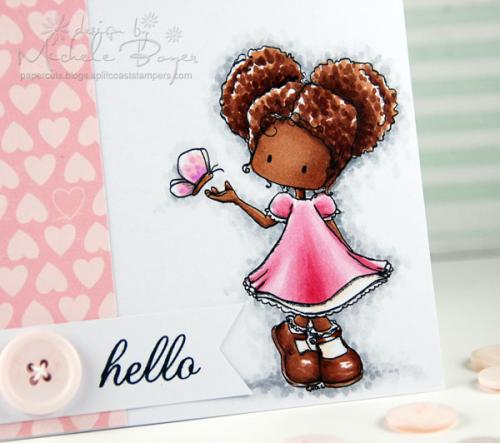
Pointillism is one of my favorite techniques for adding texture. It’s perfect for coloring curly hair and fur, and it’s even great for creating depth and shadow.  Pointillism can be used to color part of an image or even an entire image.

Finished-

In a nutshell, dots of varying size and color are used to create texture and dimension.  Here I used pointillism and Copic markers to color curly hair and add shadow around digi image Faythe Flies by Tiddly inks.

Finished-CU2

You can find a complete step-by step, start to finish tutorial using this technique HERE on the Craftsy blog.  If you haven’t already tried it, I hope you will!  Once you “get the hang of it,” it’s pretty quick and actually pretty easy too. Be sure to let me know!  🙂

1amichele siggy

Additional supplies/info: Copic markers (N0, N1, N3, E23, E25, E27, E29, R02, R81, R83, R85, E50, V04, Colorless Blender). Finished size 4 1/4″ x 5 1/2″.

DIY Magnetic Frame – a tutorial

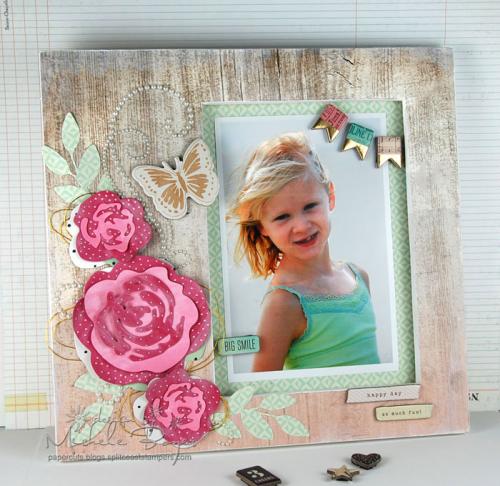
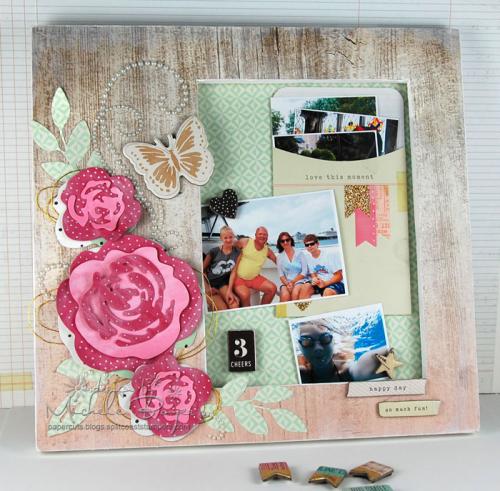
I have a fun project to share today using Crate Paper‘s Confetti collection and a plain wood frame.  🙂  (Tutorial HERE.)

MF-Final-Lrg3-K

I hid a thin metal sheet behind the paper background so photos and/or keepsakes can quickly and easily be switched any time.

MF9-Magnets

Coordinating chipboard accents were used to create cute magnets to hold photos in place.

MF7 CU1

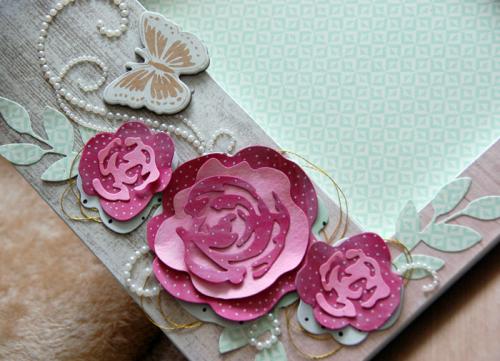
And Confetti dies were used to create big, beautiful layered flowers.

MF-Final-Collage3

For added versatility, I adhered a magnetic sheet to the back of an embellished pocket where additional photos, tickets or small flat keepsakes can be kept.

MF8 CU2

You can find a complete list of supplies as well as a step-by-step tutorial HERE on the Craftsy blog.

Thanks for stopping by! Have a great day!

1amichele siggy

Unraveling the Copic Code

Hi all!

My Craftsy post today focuses on the Copic numbering system.

Markers

You’ll find a simple breakdown of the letters and numbers, as well as how to find natural blending groups.

I hope it’s helpful.  🙂

1amichele siggy

Watercolor with Copics, a tutorial

Hi all.  🙂

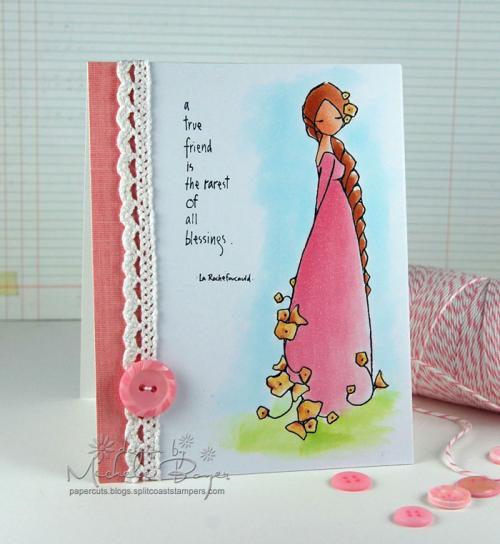
Today I have sweet Flower Maiden 2 by A Day for Daisies “watercolored” using Copics.

WC-Final2

The watercolor look is easy to achieve with Copics and Colorless Blender.  You can use the markers themselves scribbled onto a palette or acetate, or you can use Copic refills, otherwise known as Various Ink. I prefer to use Various Ink.

You can find a complete step-by-step tutorial on the Craftsy blog HERE.  I hope you’ll check it out. 🙂

WC-Final-CU

Thanks so much for visiting! Have a great day!

1amichele siggy