Category Archives: Tutorials

Easy Altered Christmas Ornaments

Hi everyone! While my Tommy Art supplies were on my desk (from this project where I altered candlesticks), I thought I’d alter a few simple ornaments.

Ornaments

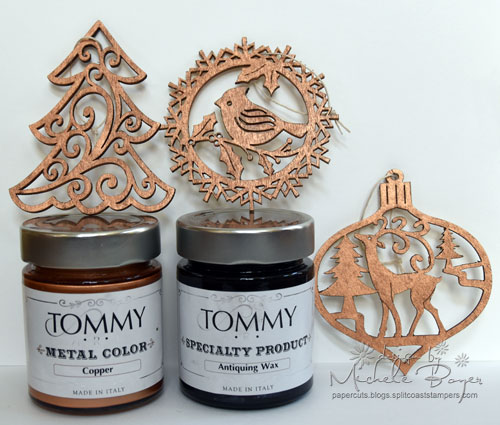
I used Tommy Art Copper metallic color and Antiquing Wax.

Tommy Art metallic colors are ultrathick, shiny metallic paints available in five gorgeous colors. They adhere to most surfaces without preparation and can be layered with Tommy Art colors or thinned with water for glazing effects.

Tommy Waxes a creamy, solvent-based beeswax that can be used to add color or to create a seasoned look (which is what I was going for here). Ideal for use with wood, plaster, and metal. Each of the four colors produce their own decorative effects. They are easy to apply and buff and are an excellent way to protect surfaces.

Ornaments-2

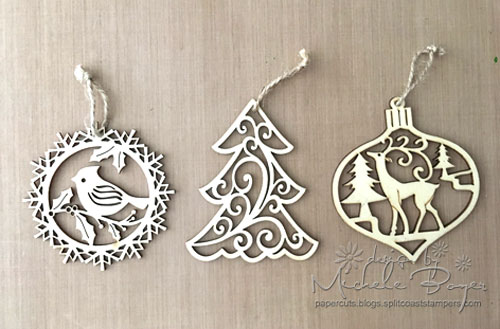
I purchased these three simple wood ornaments from Michaels for 44 cents each.

Ornaments-3

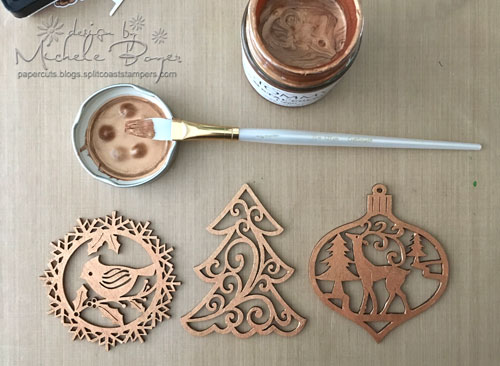
I first painted over the front and back with Copper Metallic color.

Ornaments-4

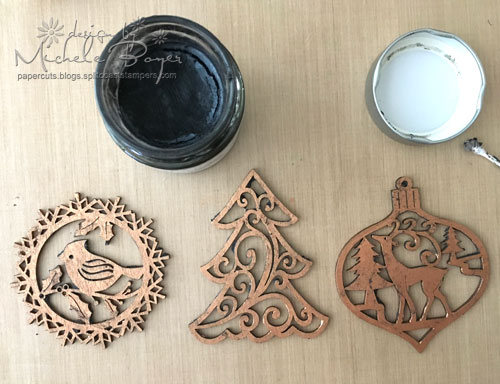
Once that dried, I applied a thin coat of Antiquing Wax.

Ornaments-5

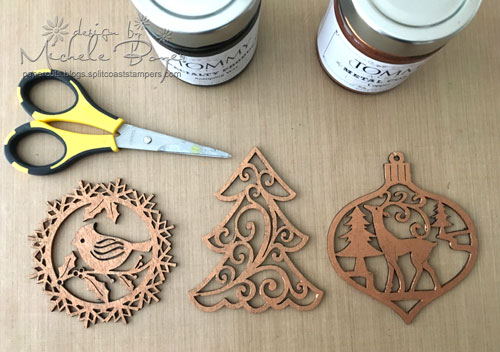
I let that dry for a few minutes then used a soft cloth to gently buff off of the flat surfaces. I used a toothpick or cotton swab to remove any small clumps of wax from small areas.  After tying on a bit of jute string, my ornaments were ready to hang.

My ornaments were super easy and I love how the darker wax complimented the copper paint. I may try this on a large frame in my dining room.  🙂

Thanks so much for stopping by today.

1amichele siggy

Harvest Blessings with Kirarina Wink

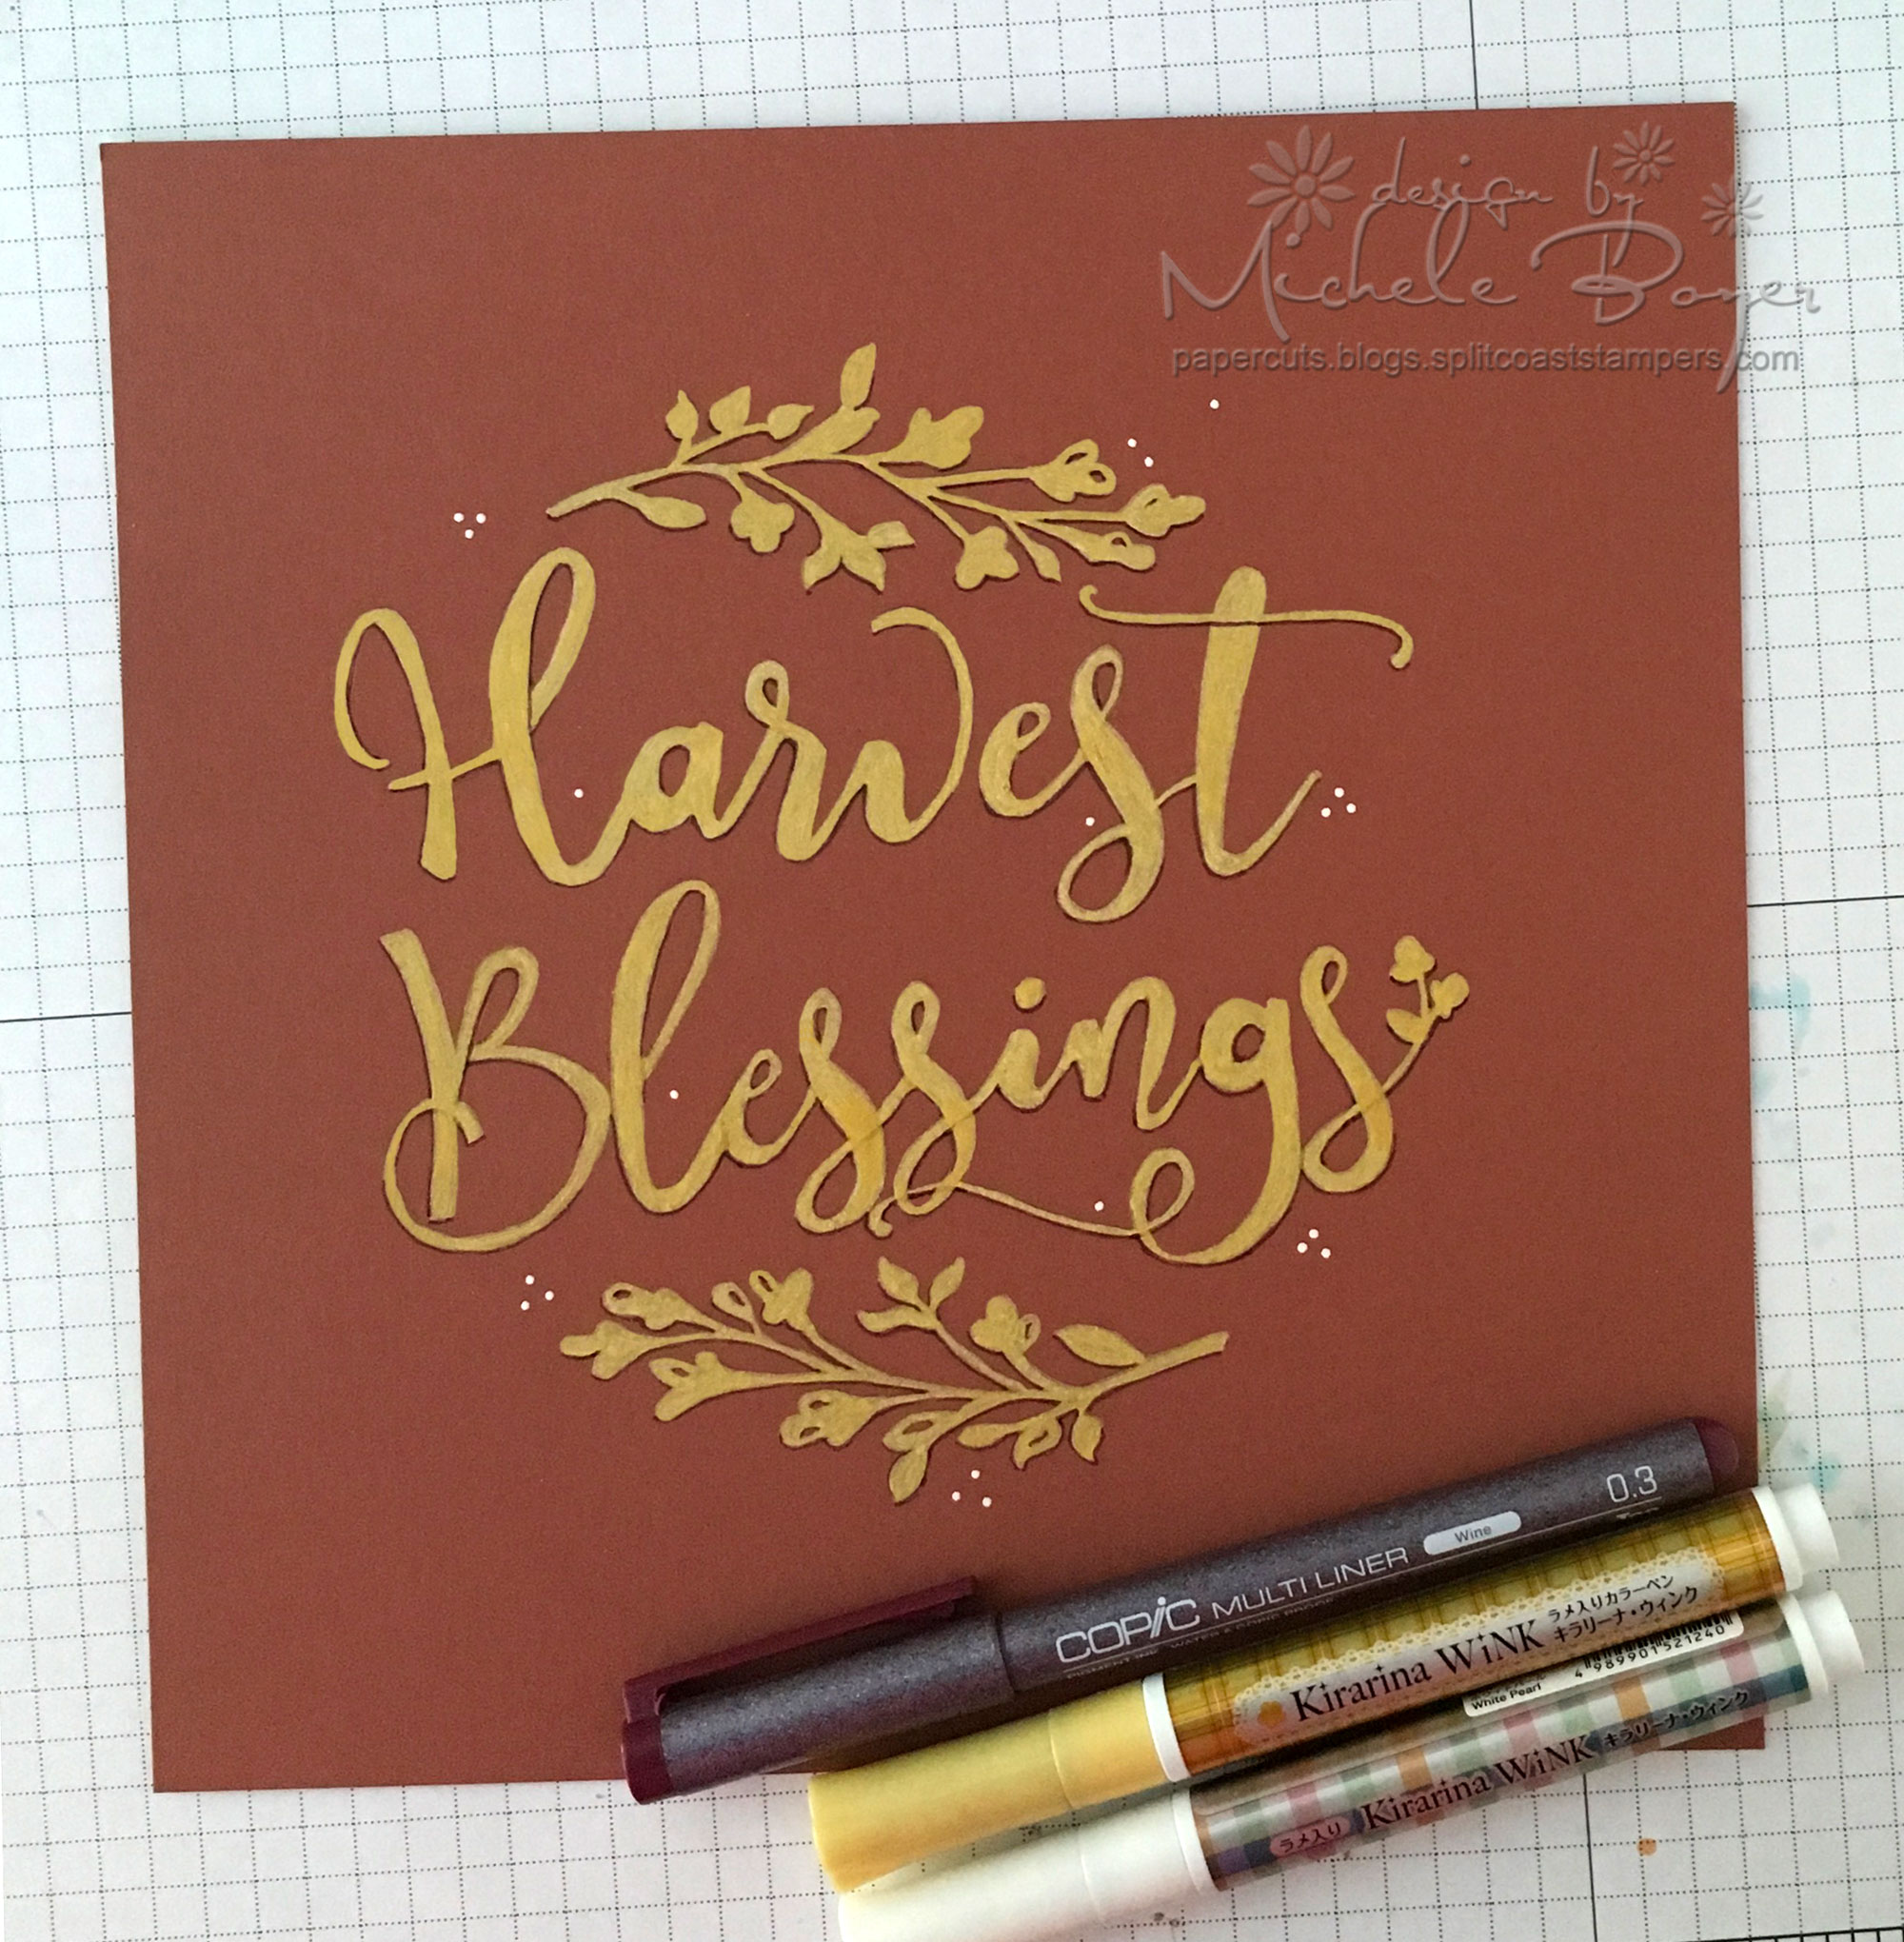
Hi everyone!  With the cooler weather finally arriving, I’m in the mood to create something “fall-ish.”  🙂  I decided to make a fall greeting for framing using darker card stock, Kirarina Wink metallic pens and this Harvest Blessings digital file from SVG Salon.

5 Finished-No-Frame-IG

I used Kirarina Wink Gold  for the greeting with small dots added using White Pearl. I also used a 0.3 Wine inking pen to add a bit a definition.

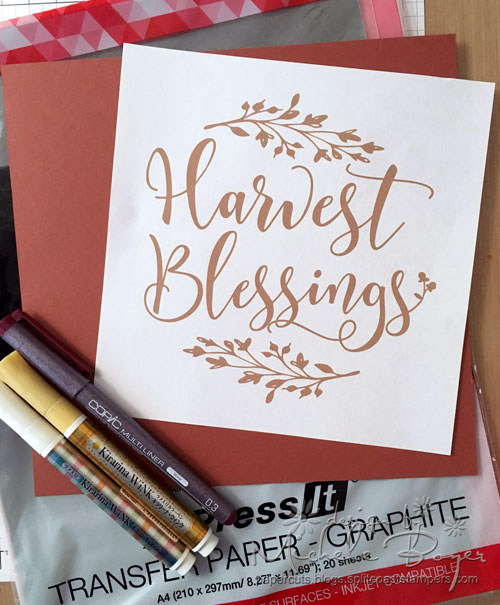
1 Supplies

I first printed the greeting onto regular copy paper.

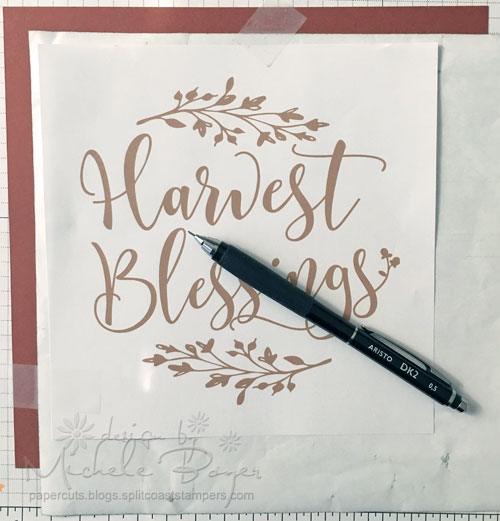
2 Trace-on-card-stock

I placed a sheet of Transfer Paper over my card stock and placed the printed greeting on top. Using removable tape, I held the layers in place then traced an outline with a pencil.  (Images can be printed directly onto the white side of the Transfer Paper. I chose not to do so because my printer is finicky and I wasn’t in the mood to battle.)

3 Trace-on-Trace-Oops-500

Tip:  When removing the transfer paper from the package, make certain you are only removing ONE SHEET. Otherwise, you will end up tracing your image onto the back of another sheet of transfer paper (shown above). eye roll emojii

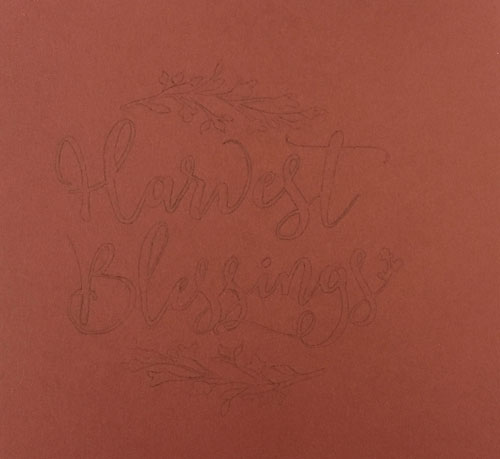
4 Traced-on-CS-500

Once traced onto the CARD STOCK (haha), I carefully filled in the areas with a Gold Kirarina Wink. Once filled, I added a bit of definition with a 0.3 Wine Multiliner then added some random scattered dots of white.

Closeup

While it can be kind of scary sometimes to share zoomed in shots, I wanted to show how wonderfully the Kirarina Wink covers darker card stock.  Also, it’s hard to capture in the photo, but the ink holds tiny specks of glass, creating a soft, shimmery appearance. The pens can work great on glass, wood, plastic and photos!

Now to find a frame!  🙂

Thanks so much for visiting today!

1amichele siggy

Creating Your Own Reusable Stencil

Hi everyone! It’s another Bellarific Friday with Stamping Bella!  This week the challenge was to create our own background.

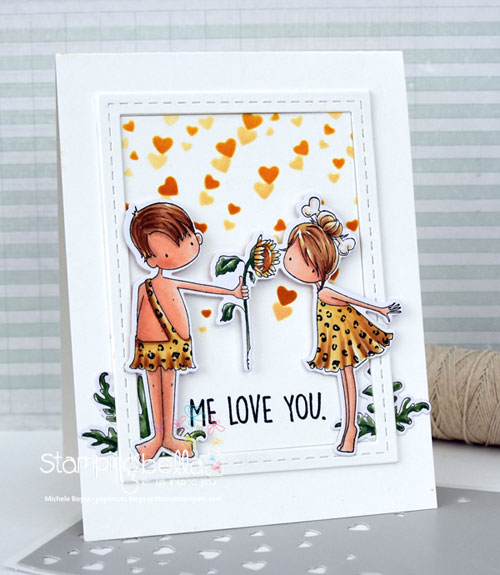
Stamping Bella Cave Couple w/close-up of stenciled background

Copic markers – E00, E01, E11, E21, E31, E33, E35, E37, G29, G46, R01, R02, Y21, YG63, YG67, YR15, YR23

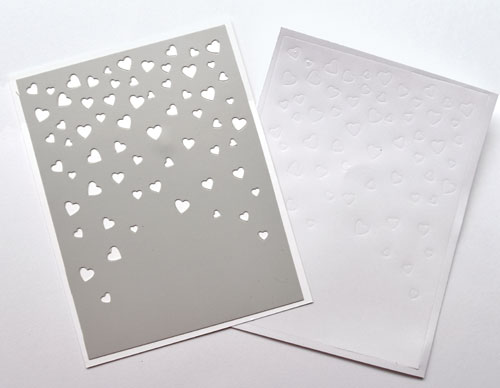
I used a Falling Hearts background die and an X-Press It Stencil Sheet to create a cascading hearts background for Stamping Bella’s super-cute Cave Couple. Seriously, how cute are they?? 🙂 ♥

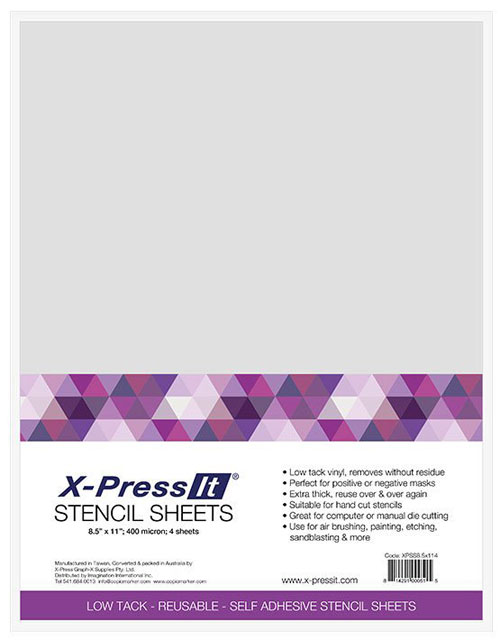
XPSS85x11

X-Press It Stencil Sheets are perfect for creating postive or negative masks. They are the perfect amount of low tack vinyl and easily cut with a die-cutting machine. They can also be used multiple times. They’re great for use with an airbrush, ink, paint, paste… even sandblasting (and more)!

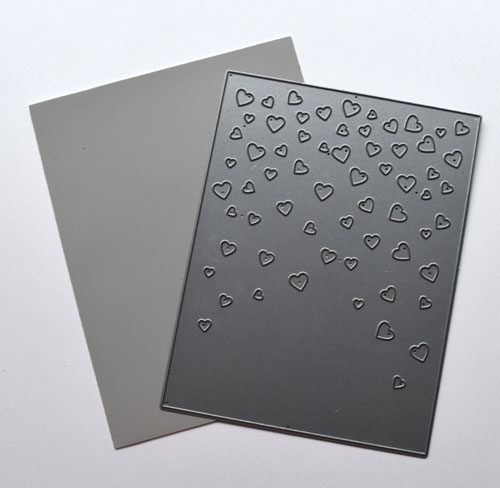
diecut

I first cut a stencil sheet slightly larger than my die.

remove-pieces

I die-cut the stencil sheet, running it through my Big Shot several times to ensure crisp, clean cuts. When I removed the die from the stencil sheet, almost all of the hearts came out with the die. Those that didn’t were easily removed from the stencil sheet with a straight pin.

adhere-to-card-stock

I peeled away the release paper from the back then adhered the stencil sheet to my card stock. With the low-tack adhesive, there is no shifting of the mask (at all) and no bubbles or little areas under which the ink can seep or bleed.

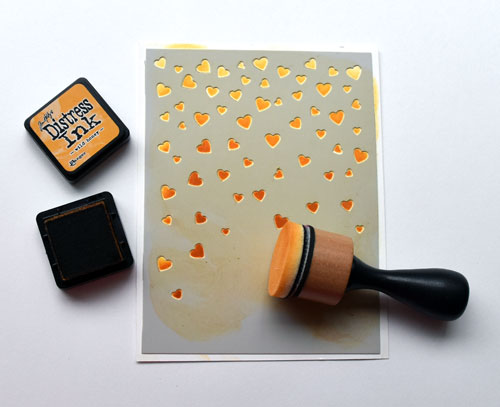
add-ink

After sponging Wild Honey and Scattered Straw Distress inks over the open heart areas, I peeled away the stencil, wiped it clean with a baby wipe, then re-adhered it to the release paper. I tucked the stencil in my clear storage pocket with the die for later use.  (I did not use the sponged card stock shown above as I decided to ink the hearts a little differently. But I used the same process.  And the same stencil!)

Stamping Bella Cave Couple

Once the Cave Couple was colored with markers, I die-cut with the coordinating die, added a stitched frame and tucked a few leaves (from Cave Kids Add Ons) along the bottom.

Next week’s challenge includes this fun inspiration photo:

small-Sept-22

Use any current Stamping Bella image then email your card to [email protected] by next Thursday to be featured on the SB blog and to be entered to win some Bella Bucks! (All challenge details can be found HERE.

Thanks so much for stopping by!

1amichele siggy

Stamps: Stamping Bella Cave Couple, Cave Kids Add-Ons  Dies: Stamping Bella Cave Couple and Cave Kids Add-Ons “Cut It Out,” Taylored Expressions Falling Hearts Cutting Plate and Stitched Rectangle Stacklets  Ink: Taylored Expressions Oreo, Ranger Wild Honey and Scattered Straw Distress  Paper:  X-Press It Blending Card, Taylored Expressions Sugar Cube  Other: Copic markers, X-Press It 1/4″ foam tape and Stencil Sheet, blending tool.

Watercoloring with Copic Various Ink

Photo-16

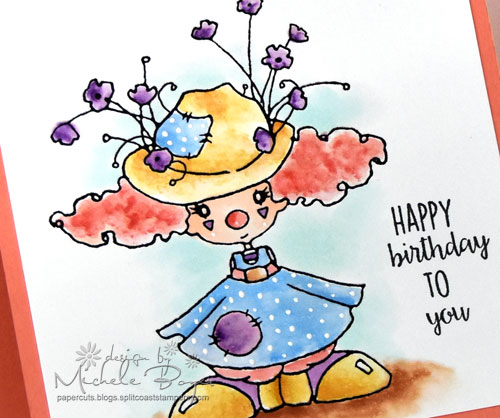
Hi everyone! Today I’m sharing how to create a watercolor look using Copic Various Ink. It’s a fun technique that mimics watercolor although there is no water involved.

I used several ink refills (B32, BG10, E00, E33, R24, R32, V09, Y21, YR23) and Colorless Blending Solution to paint Miss Polly Clown digital image by A Day for Daisies. I think the style of A Day for Daisies’ images is perfect for watercolor.
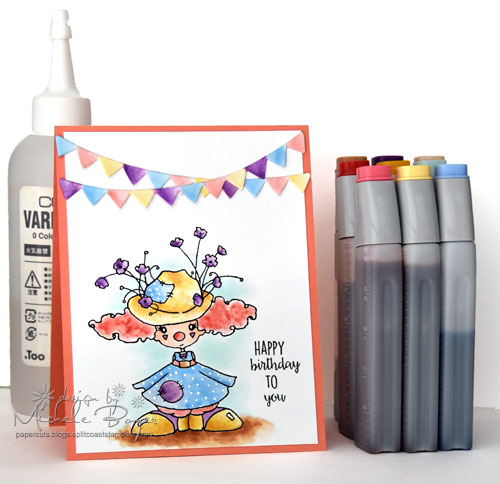
Photo-14

I simply applied a drop or two of ink onto one end of a large acrylic block then used a waterbrush filled with Colorless Blender to pick up the ink and apply to watercolor paper. I would have used a paint pallette but a certain (not so) little artist in my family is currently using it. At times throughout my coloring, I was not satisfied with the flow of Colorless Blender from my water brush so I dropped several drops of Colorless Blender onto the other end of my acrylic block and used the brush to pick up both (Colorless Blender first then the ink). In between colors, I cleaned the brush and acrylic block with additional Colorless Blender.

If you have no Various Ink on hand, the technique can be achieved with markers and Colorless Blender. Note that the color concentration will be less than that of the Various Ink so you’ll have to scribble a considerable amount of ink onto the acrylic block. Simply pick up with a Colorless Blender-filled waterbrush, or a paint brush dipped into Colorless Blender to apply.  Regardless of whether Various Ink refill or marker is used, the resulting color will be lighter as the amount of Colorless Blender increases.
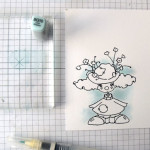
Photo-2  Photo-3  Photo-4

I started with the background, using BG10 to fill in color around the image. The Colorless Blender helps to fade the color out as the brush is moved further away from the image. Next, I colored the skin (E00) and then the hat (Y21).
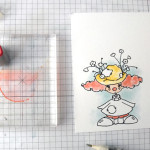
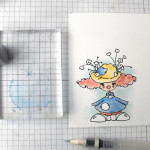
Photo-5  Photo-6  Photo-7

On the hair and britches, I used a base color of R32. After coloring the dress and hat patch with B32, I returned to Y21 to color portions of the shoes.
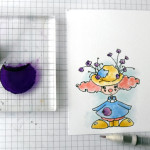
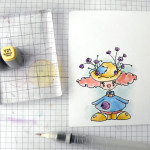
Photo-8  Photo-9  Photo-10

While V09 is a highly pigmented ink, the Colorless Blender allows for a very light application. I used only a tiny bit of V09 with the Colorless Blender on the dress patch, shoes and flowers. Once dried, I added a bit more color to create depth and variation. Next, I used R32 and Y21 to add a bit more color variation to the hat and hair, then used YR23 to create darker shadow on the hat and shoes.
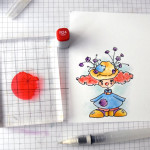
Photo-11  Photo-12

To add even more variation to the hair, I added a bit of R24 then grounded my cute clown with E33.

Photo-13

Once I was satisfied with the coloring, I used Copic’s Opaque White to add bright white dots to the dress and patch on the hat. I also added a tiny dot beneath each triangle on the cheeks.

To finish my card, I stamped a sentiment from Stamping Bella‘s Tiny Townie Birthday Party then die-cut (from watercolor paper) and colored a Taylored Expressions Skinny Mini Party Border.

I hope you’ll try this fun technique. When you do, please come back and comment below with a link to your art. I would love to see it!

Thanks for visiting!

1amichele siggy

Using Copic’s New Sketch Fine Nib

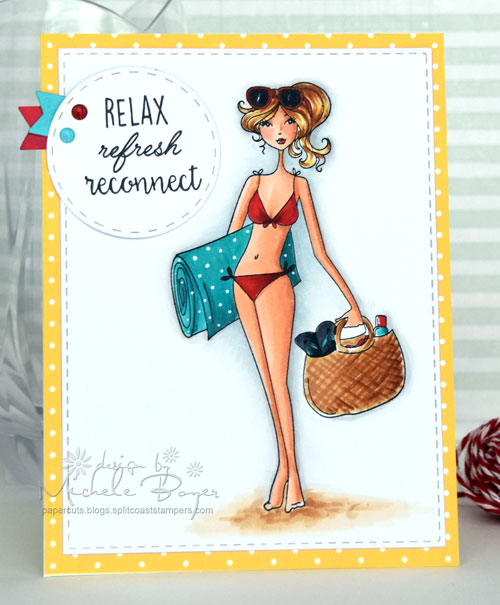
Hi everyone.  Today I am dreaming of vacation (and being thin enough for a bikini). 🙂  My card features Stamping Bella‘s Beachabella from the Bella 2.0 Collection.  I also used a new Fine nib for Sketch markers, now available from Copic.

Stamping Bella Beachabella (Bella 2.0 Collection)

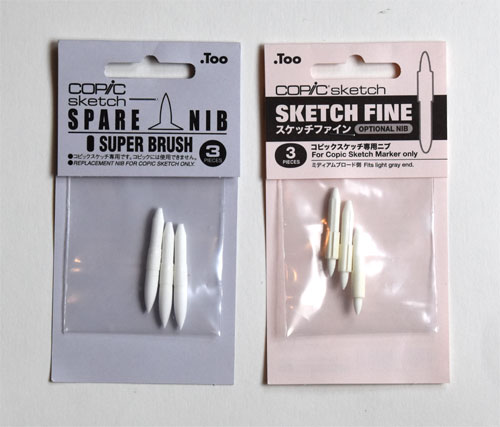
A bit about Fine nibs from the Copic website:

Fans of the popular Sketch marker now have a new, more precise nib to choose from. The Fine Nib is thin yet firm and leaves clean, consistent lines. The Fine Nib easily fits into the Medium Broad end of the Sketch marker and can be replaced as needed.

Relax-New-Sketch-Nib

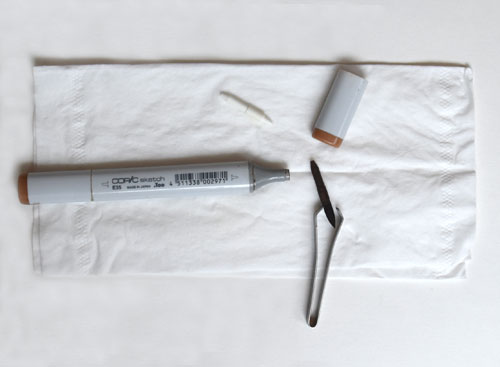
While the nib fits easily into the Broad end of the Sketch marker,  I tried it in the Super Brush end and it fit perfectly there as well.  I now have two E35 markers, one with the Super Brush and one with the Fine nib. (I chose to have two separate markers because I refill from the Broad end and didn’t want to risk damaging either a Super Brush or Fine nib in the removal/replacement process. And I chose to place the Fine nib in an E35 marker as I very often use E35 for hair and furr.)

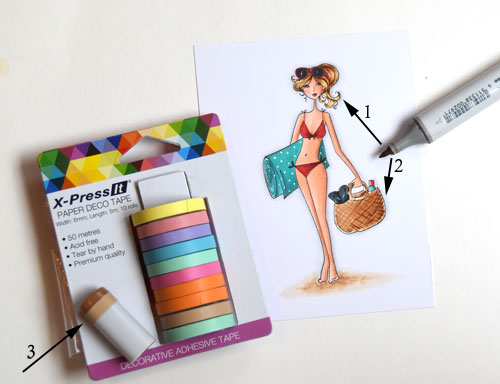
Stamping Bella Beachabella (Bella 2.0 Collection) with Copic Sketch Fine Nib

In the photo above, I marked where I used the Fine nib for (1) hair and (2) basket detail. To distinguish between my two E35 markers, I wrapped the Fine nib marker cap with deco tape (3).

Replacing with Sketch Fine nib; refilling marker

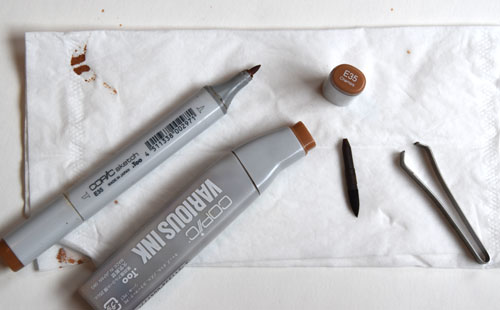
I used a nib tweezer to remove the existing Super Brush nib then simply inserted the new Fine nib.

Relax-Replace-Nib-Fill

Once the nib was in place, I removed the Broad nib from the opposite end, refilled as usual with E35 Various Ink then placed the Broad nib back in the barrel. So easy.

Stamping Bella Beachabella (Bella 2.0 Collection)

Copic markers – BG13, BG15, BG18, BG70, custom BG72, C00, C1, C3, C6, C7, C9, E01, E11, E30, E31, E33, E35, R20, R27, R56, R59, Y21; Copic Opaque White

I’m considering Fine nibs for my usual “go-to” skin marker choices as well. In which of your markers would you find a Fine nib helpful?

1amichele siggy

Creating Custom Copic Color for Petunia (stamping bella)

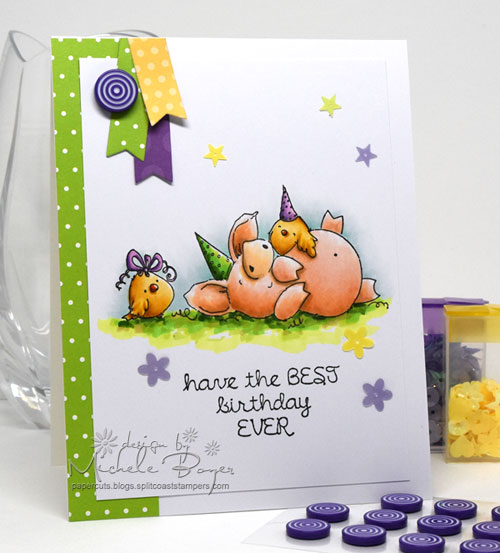
Welcome to another Bellarific Friday with Stamping Bella! This week the team is featuring July’s Stamp of the Month, Petunia has a Party which is 20% off through July 31.  I’m also sharing how to create your own custom color Copic marker using Various Ink and Colorless Blender.

Stamping Bella "Petunia Has a Party"

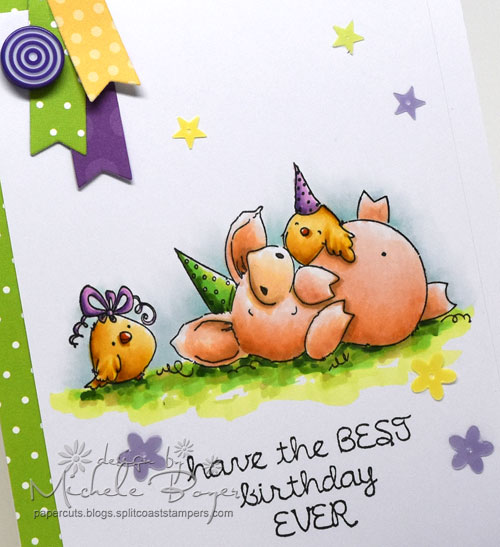
Sometimes I like to add a bit of blue or blue-gray around my images. BG70 is a very light blue-gray (or technically “blue-green“). It’s very nice for adding soft shading or bits of sky.

Stamping Bella "Petunia Has a Party"

Copic markers – BG70, custom BG72, E31, E50, E51, E53, G28, R00, R01, R02, V12, V15, V17, Y23, YG01, YG03, YG06, YG17, YR18, YR21, YR23

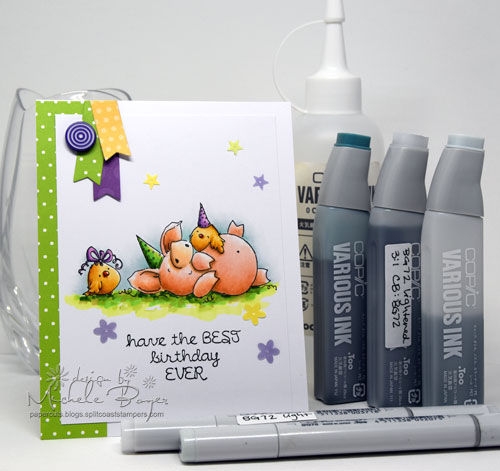
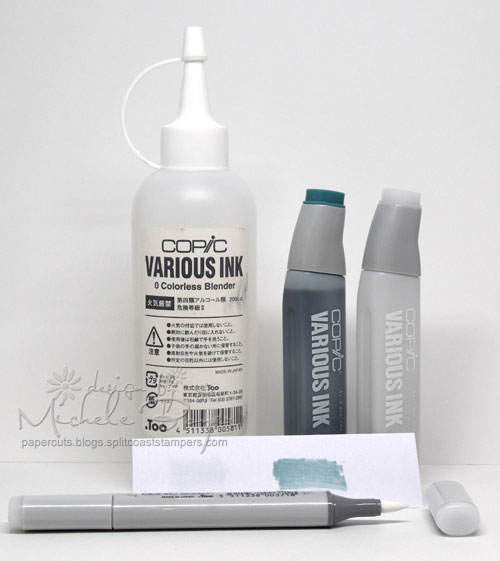
I wanted a slightly darker blue-gray for the areas right up against my image. BG72 is far too dark so I created my own custom blend of a lighter BG72, perfect for blending with BG70.

Comparison of BG70 to BG72

You can see on the swatch above just how much darker BG72 is than BG70. To create a nice “in between” color, I used Colorless Blender, an empty Colorless Blender Various Ink container and an empty Copic Sketch marker. Note that there is no number on the cap. (Empty Various Ink bottles are also available if an empty Colorless Blender refill bottle is not available.)

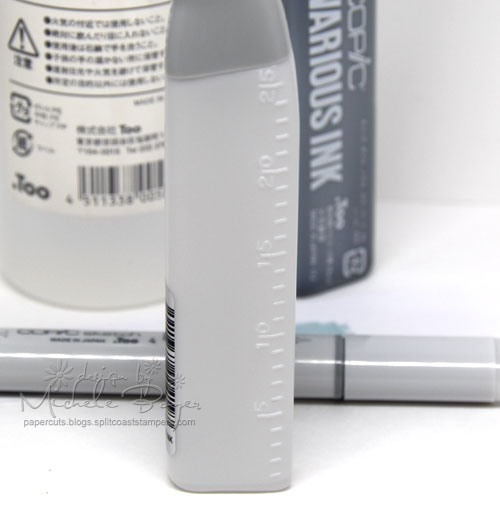
Close-up of measurements on empty Various Ink bottle

After removing the dropper from the refill bottle, I used the numbered measurements on the side of the container to add a ratio of 3:1 with three parts Colorless Blender, one part BG72.  Once mixed, I used a cotton swab to test my blend on paper. When experimenting on your own, the ratio may change depending on how light or dark you want your custom color to be. By filling only a portion of the bottle, room remains for any adjustments. Once you know the exact ratio needed to create your custom color, the whole bottle can be filled.

Custom color using Colorless Blender and BG72 to create lighter shade of BG72 to blend with BG70

Once I was happy with my custom color (indicated above as BG72L, L is for “light”), I replaced the dropper in the refill bottle then filled my empty marker and labelled it appropriately on the barrel as well as the cap. I also labelled the refill with the color as well as the formula so I can easily recreate it later.

Stamping Bella "Petunia Has a Party"

Once my card was assembled, I added a purple Lollies and sequins from Queen & Company. (Patterned papers are also from Queen & Company – Delightful Dots and Flirty Florals.)

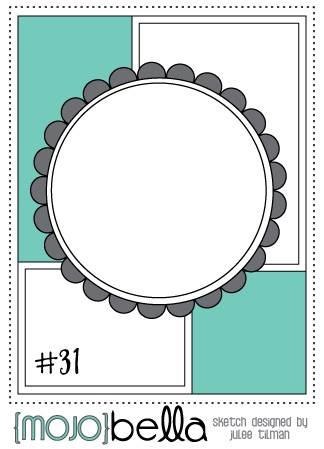
Next week’s challenge includes this sketch:

July 14

Use any current Stamping Bella image then email your card to [email protected] by next Thursday to be featured on the SB blog and to be entered to win some Bella Bucks! (All challenge details can be found HERE.)

Thanks so much for stopping by! 🙂

1amichele siggy

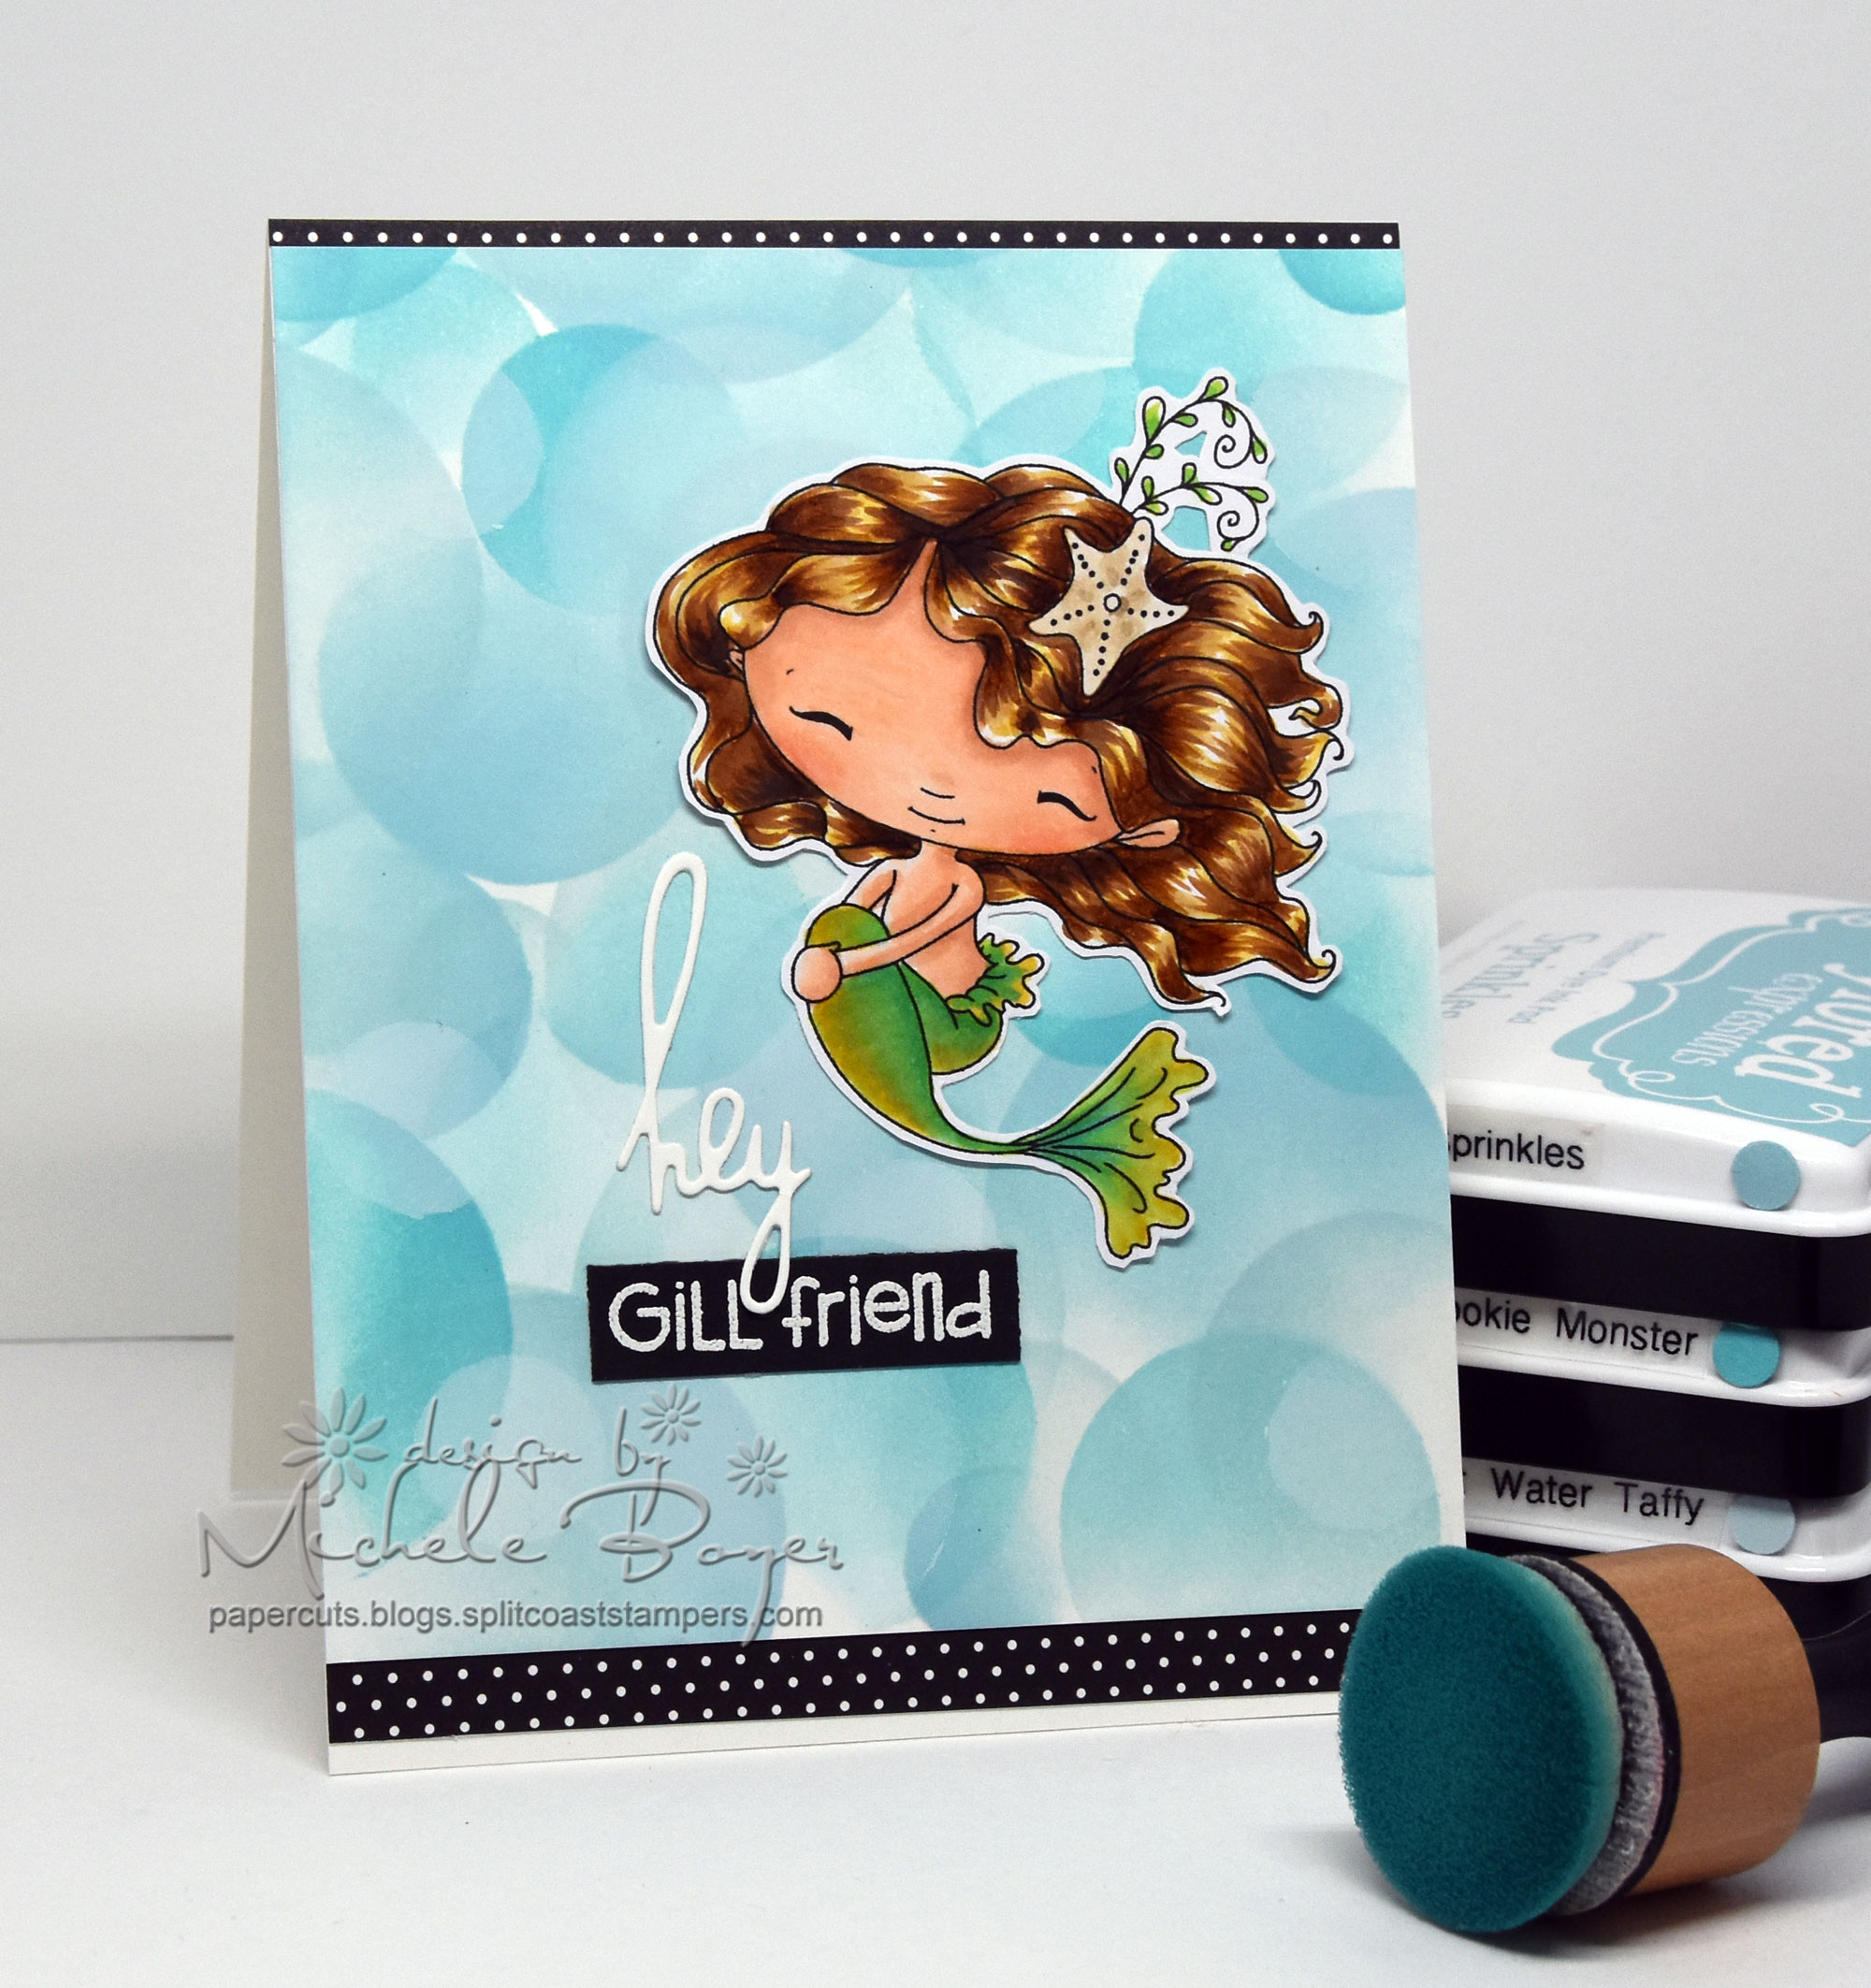
Creating a Quick and Easy Bokeh Background

Hi everyone! Today I’m sharing how I used X-Press It Mask It to create a quick and easy bokeh background for a super cute mermaid. (In searching for a link to this image, it seems the artist has closed her Etsy store. Sorry about that!)

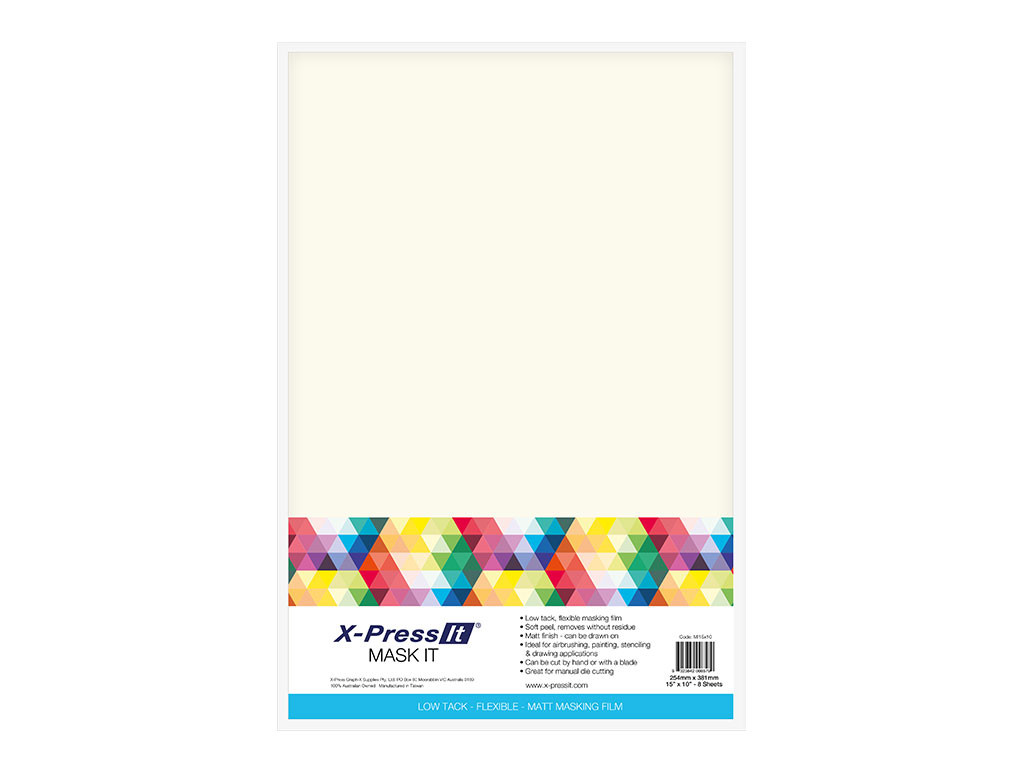
X-Press It Mask It to create a quick and easy background

X-Press It Mask It is a low-tack, flexible masking film with a matte finish, ideal for airbrushing, painting, stenciling, sponging, etc. The film is easily die-cut, leaves no residue whatsoever, and can easily be moved, reapplied and re-used multiple times.

X-Press It Mask It

It’s available in sheets HERE (which is what I use) or rolls HERE.

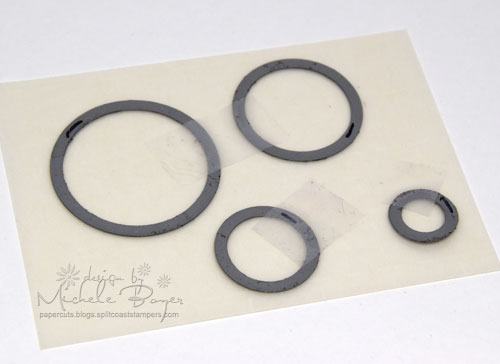
Step 1: Cut Mask It to size, tape circle dies in place

First, cut a piece of Mask It to size then tape several dies in place.

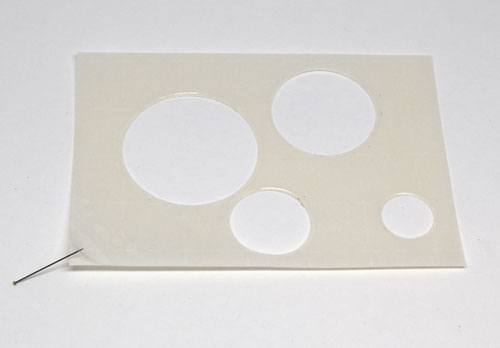
Step 2 Remove die-cut circles, carefully separate mask from release sheet

I recommend using a shim (like this) when die-cutting to assure the dies cut cleanly through the film. Once die-cut, remove the circles then separate the film from the release paper. I use a pin to help separate the layers.

Step 3 Adhere mask over card stock, begin to blend ink

Adhere the film over the card stock and begin blending in the open spaces. Once ink is blended, carefully remove the film and readhere, positioning the film as desired. So easy! 🙂  You can find more info on X-Press It Mask It HERE.

Close-up of Bokeh effect using X-Press Mask It

Copic markers – B02, E00, E01, E11, E31, E35, E41, E42, E43, E57, E79, Y21, YG07; X-Press It Mask It

The mermaid was printed onto X-Press It Blending Card and colored with Copic markers (as listed above).

Thanks so much for visiting today! 🙂

1amichele siggy

How to Transfer a Photo Image onto Card Stock for Coloring (Yes, you can do it!)

Hi everyone! Today I tried a new (to me) technique/product to create a Christmas card for my in-laws. It was so easy!

1a-compare


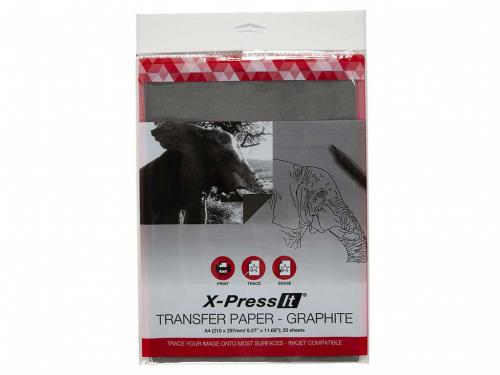
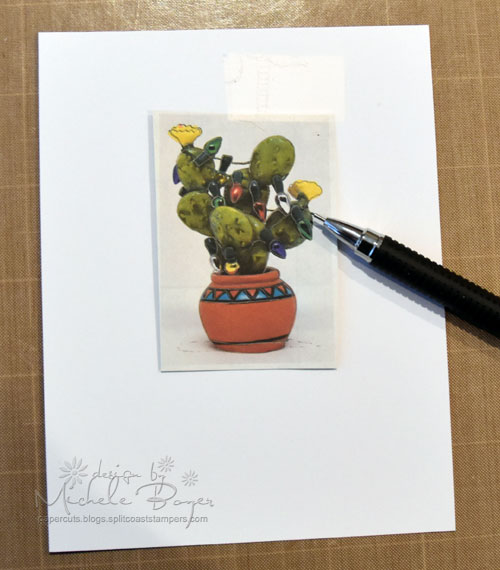
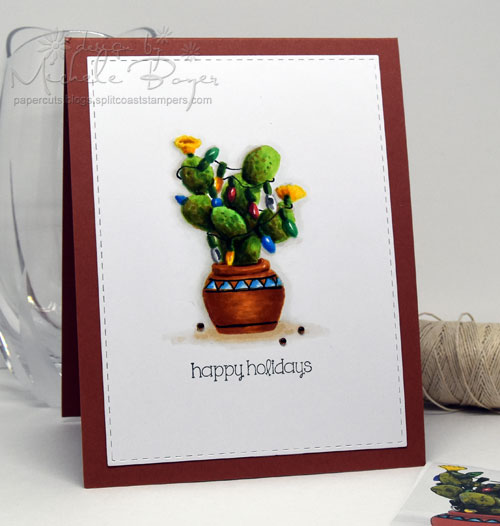
Using X-Press It Graphite Transfer Paper, I transferred a photo of the ornament shown above (left) onto the card (right).  I actually impressed myself. Haha.

X-Press It Transfer Paper - Graphite

Here’s how to do it:

1-Photo

First, take a photo of your chosen item. I used an ornament that I bought a few years ago for both my in-laws and myself. (We’ll see if they notice!)

2-Trace

Size the photo using your program of choice. I used Photoshop. Using an inkjet printer, print the photo onto the white side of the tranfer paper, then trim the image. Use a piece or two of removable tape to hold the printed transfer paper in place onto your Copic compatible paper. As always, I used X-Press It Blending Card. Trace the image using a stylus, pen or pencil.

If you do not have an inkjet printer, simply place the photo over the transfer paper and then trace your image.

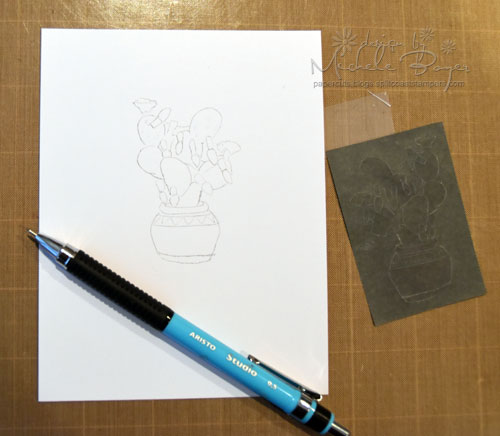
3-Remove-Graphite

If you’d like, you can add small hash marks to indicate shading or to mark any other areas of importance. Likewise, you can eliminate any areas you don’t want to use. I eliminated the ornament hanger and string.

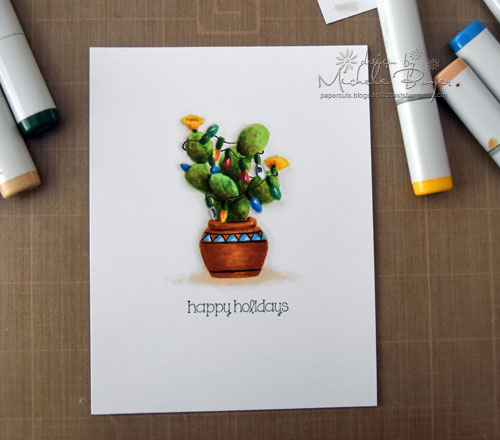
4-Color

Lastly, color with your Copics.  I used a 0.5 black Multiliner to add in the pot detail and strings for the lights.

If you can still see the graphite lines once coloring is complete, simply use an eraser to remove the lines. I like to use a WHITE eraser because sometimes colored erasers will leave marks behind (and noone wants that).

5-Final

X-Press It Transfer Paper is available in graphite or white, can be used on a variety of surfaces (i.e. paper, wood, metal, glass, fabric, canvas etc.), is acid free, wax free, erasable and washes out of fabric.

This was fun! I may try again while I have the supplies handy. 🙂

Thanks so much for stopping by!

1amichele siggy

Using Screen Tones to Create Quick and Easy Backgrounds

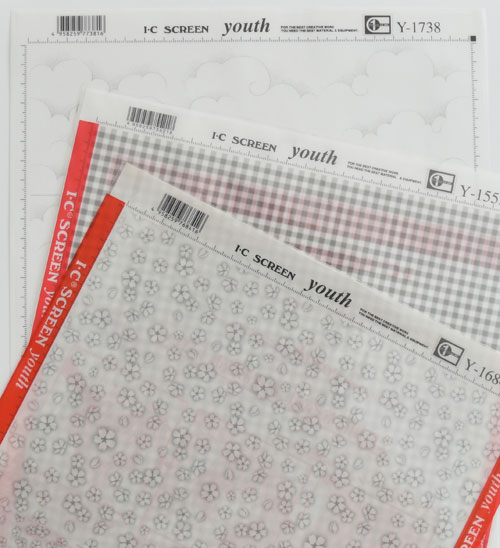
Hi everyone!  I tried a new (to me) product yesterday that I want to share. Available in the Imagination International, Inc. store are Screen Tones. In a nutshell, they are clear, printed stickers used to create backgrounds or to cover areas where you might otherwise stamp or sketch in designs.  They are transparent, repositionable, can be layered, mixed and matched and are incredibly easy to use! (You can find more detail HERE).

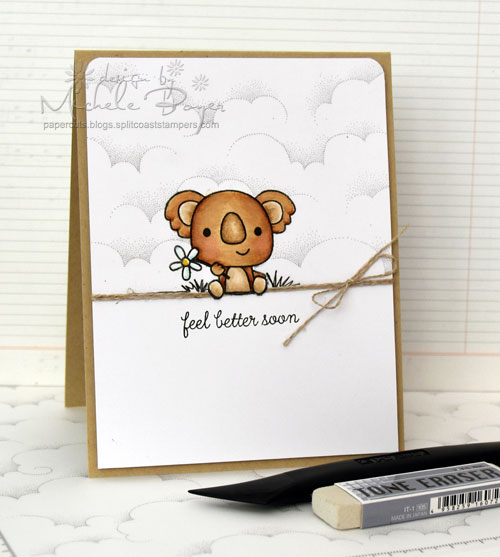
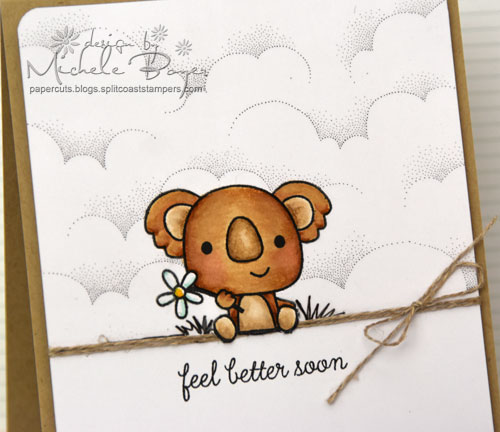
On my card, I paired a Sky Screen Tone with Reverse Confetti‘s cute Bear Hugs koala.

Michele Boyer - Reverse Confetti

Each screen tone sheet is 12.5″ x 9″ so there is plenty of area for use on many cards. You can check out the (over) 200 prints HERE.

Feel-Better-Soon-Screentones

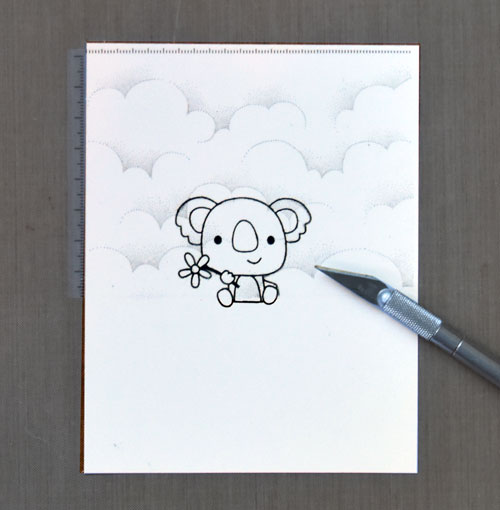
They are super easy to use! I first stamped my image onto X-Press It Blending Card then cut a piece of Sky screen tone to size*. After removing the backing, I applied the screen tone over my image, pressing just enough (very lightly) to adhere the sheet over my card stock. I then gently used a kraft knife to cut away the portion of the screen tone that covered my image. My knife blade cut very easily through the screen tone without cutting through the card stock.

* It is recommended that the screen tone be cut to size then layed over the image without removing the backing, using a knife to cut away the excess screen tone and then removing the backing and placing the screen tone over the card stock/image. I removed the backing, then cut, using a gentle hand with my knife and it worked fine. If I were using a screen tone on a more artistic/”special to me” piece, I would have followed the adviced instructions, leaving the backing in place to protect my artwork. If I had accidentally cut through to the card stock here, I could easily restamp the bear so I wasn’t overly concerned with cutting through (but I tried not to).

Feel-Better-Soon-ST1

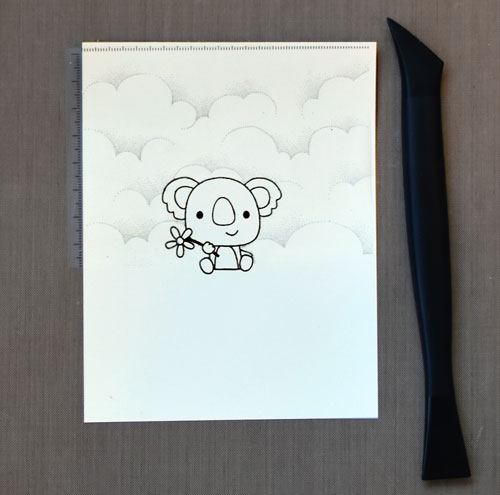
Once the outline was cut, I used the tip of my blade to peel away the portion of the screen tone covering the image. I then firmly adhered the screen tone to the card stock using a burnishing tool. There are different sizes available depending on the size of the are you want to burnish. You can see all HERE.  I used this one.

Feel-Better-Soon-ST2

I then colored my image with Copic markers and drew in some grass using a 0.3 black Multiliner. Multiliners can be used on top of the screen but the ink requires drying time or it will smudge.

Michele Boyer - Reverse Confetti

Copic markers – BG11, E31, E33, E35, E41, E42, E43, R20, Y19

There was a small area of cloud pattern at the bottom left that I did not want so I used a Tone Eraser to easily remove it.  I added linen thread to camoflauge the bottom edge of the screen tone and used my kraft knife to cut around the bear’s feet, allowing them to hang over the thread.

I’ll be back soon with another project using screen tones!  (They’re super cool!)

Thanks for visiting!
1amichele siggy

So Happy for You (Stamping Bella) and a Give-away

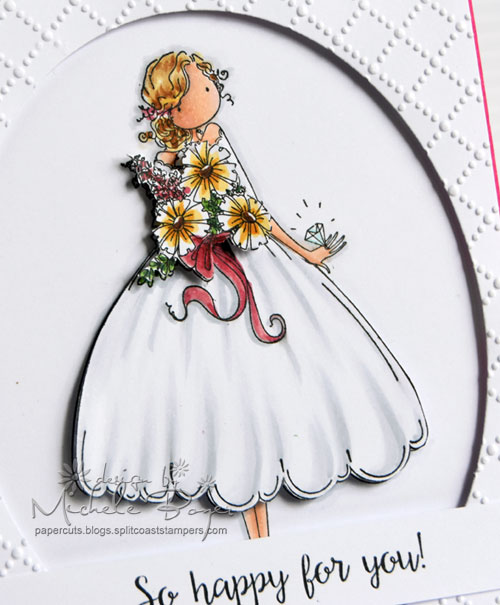
Hi everyone!  I’m on the Stamping Bella blog today sharing how I added dimension to lovely Uptown Girl Melanie the Modern Bride. You can find a complete step-by-step tutorial HERE.

Michele Boyer - Stamping Bella

Copic markers – BV000, BG11, C00, C1, C2, E00, E11, E29, E31, E35, G29, R39, R85, RV32, Y21, YG17, YR14, YR23

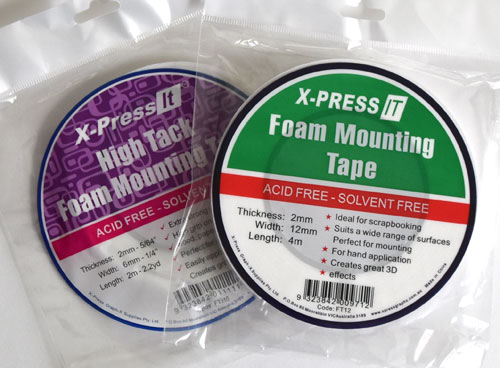
While I don’t want to duplicate the info found on the Stamping Bella blog, I do want to talk just a bit about one of my all-time favorite crafting products, X-Press It Foam Tape . I use lots of foam tape so I *always* ensure I have a healthy supply on hand.

foam-tapes

X-Press It Foam Mounting Tape (green label) is available in 1/2″ and 3/4″ widths. High Tack Foam Mounting Tape (purple label) is available in 1/4″ and 1/2″. For paper crafting, I use them interchangeably, depending on the width called for on my project. They are basically the same except that High Tack Foam Mounting Tape has an extra strong adhesive which works well on glass, wood, paper, plastics and fabric. Both are acid and solvent free and ideal for scrapbooking and card making.

Giveaway-3

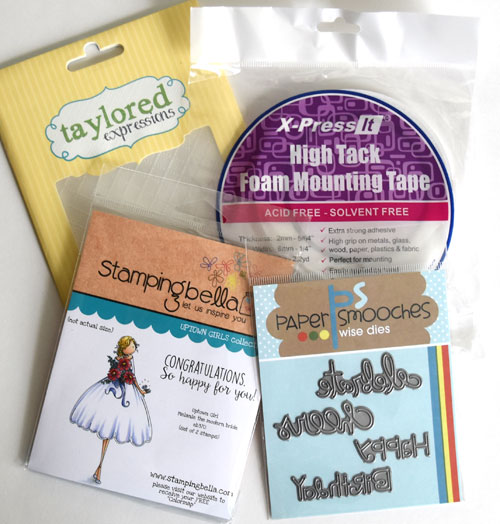
Three of the four products I’m giving away were used on my card today.  I have Stamping Bella’s Uptown Girl Melanie the Modern Bride stamp set, Taylored Expressions’ Dotted Lattice embossing folder, Paper Smooches’ Birthday Words dies and a roll of X-Press It Double-sided 1/4″ High Tack Foam Tape. Just leave a comment on this post by Tuesday, May 18, 11:59 p.m. ET. I will randomly choose a winner on Wednesday, May 19. The winner will be notified by email and I’ll post the winner’s name on my blog that day as well.

I hope you’ll check out my post on the Stamping Bella blog (here) to see my card in full as well as a step-by-step tutorial for multi-layer dimension.

Thanks SO much for visiting! 🙂
1amichele siggy