Category Archives: This and That

Emily, Our Forever Bella

Stamping Bella Tiny Townie Garden Girl Lily of the Valley, Friendship Sentiment Set

I’ve been sitting here staring at my screen off and on for three days trying to find a way to begin this post. I’m not very eloquent with words, but I want whatever words I do use to be deserving of Emily. I guess I’m still trying to accept the fact that she’s gone. And it’s hard. As difficult as it is for me, I can’t begin to imagine how difficult it is for her family and close(r) friends. My heart breaks for them. (For those unaware, please read this post.)

Copic markers – BG70, E000, E00, E04, E11, E21, E31, E35, E37, G28, R12, R20, R83, R85, W00, W1, W2, W3, Y21, YG63, YG67; Copic 0.05 black multiliner

One of the things I loved most about Emily was her sense of humor. We shared SO many texts that were FUNNY AS HELL. I would laugh until my face hurt.

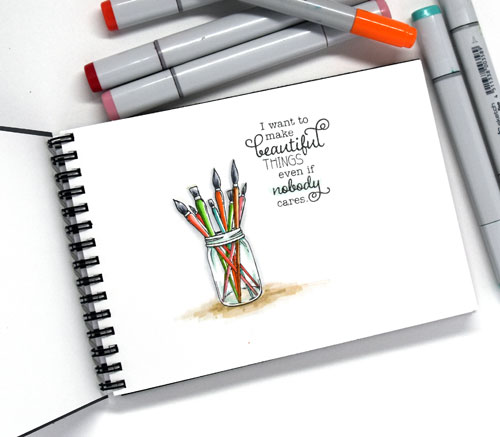
We shared a love of the creative process (obviously). Historical fiction. Our kids. (I always wished we lived closer so they would know each other.) Hockey. A while back, when my husband and I would go to a Capitals game and they’d play Montreal, we would arrive early just to stand by Montreal’s tunnel (out of place in our Caps jerseys) so we could take pictures of Emily’s “hockey boyfriend.” (Sorry, Ryan.) Once she insisted he was looking directly at my phone, just for her. Haha. When the Caps weren’t playing Montreal, I’d take pictures of Braden Holtby for Jayden. I’m sorry about the time I told you, Em, it was a live pic and if you touched it, you and Jayden could see him move. I didn’t know sounds of the entire Capital One Arena would go along with the photo. (Scared the crap out of her. Lol. So sorry!)

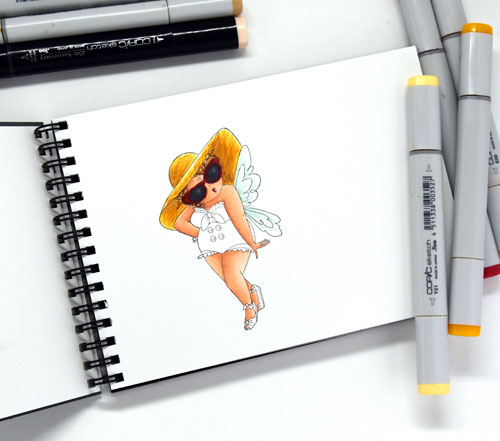
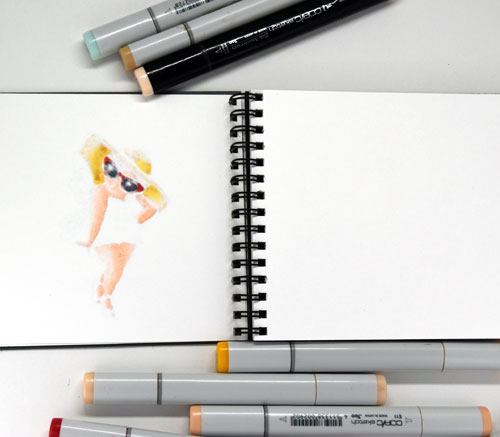
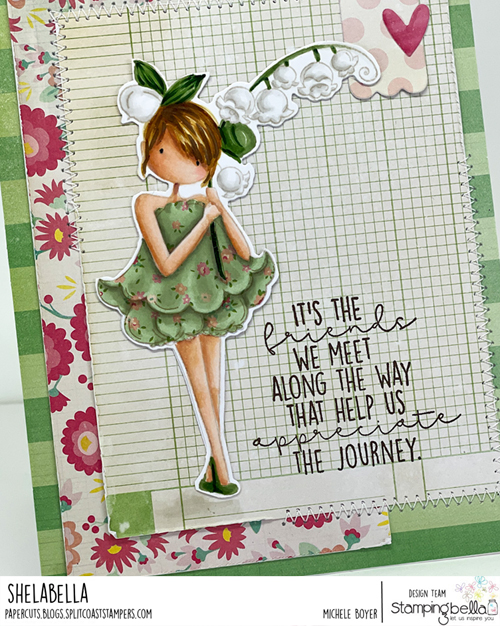
I had a bit of a hard time deciding which image to use for today’s post. Every Stamping Bella image reminds me of Emily. My entire stamp room reminds me of her. After some thought, I chose Tiny Townie Lily of the Valley because I know Lily of the Valley is Em’s favorite flower. I think of her every time I see one. And I forever will. I wish I had the chance to tell her one more time how much I appreciate her, how grateful I am for the privilege of being on her design team. But also I wish I could thank her once more for being a friend. For believing in me, even when I didn’t believe in myself.  For making me laugh, SO hard, so many times. And for sharing herself with me.  How lucky am I?

I love you Em. And I miss you.

Some of My Favorite Books at Great Prices

Hi everyone! I’m taking a side road away from papercrafting today to share some great reads at great prices on Amazon. borrow many digital books from my local library but sometimes they aren’t available for months and sometimes not at all so I keep a wish list in my Amazon account and check often for low prices. Today, Cyber Monday, I found some great deals and thought I’d share a handful of my favorites from that list. You can see a more comprehensive collection of my favorite novels HERE on Pinterest where I try to remember to add new (excellent) books as I read them.

One of my all-time favorite historical novels, Beneath a Scarlet Sky. WWII $5.99 (60% off) Not the lowest of prices, but one of my top five (if I had to choose).  🙂

Another at the top of my list, The Alice Network. WWII $2.99 (82% off)

Yet another favorite, The Rabbit Girls. WII $1.99 (87% off)

A family comes together as the father lies in a coma, each dealing with his decline in their own way. EXCELLENT. Trail of Broken Wings.  $1.99 (87% off)

Historical Irish fiction with a bit of time travel.  What the Wind Knows. $1.99 (87% off)

White Rose, Black Forest. WWII $1.99 (87% off) or FREE to Amazon Prime members.

A young journalist travels to India to uncover secrets of her family’s past. Loved it. The Storyteller’s Secret. $5.99 (60% off)

Somewhat along the lines of The Thorn Birds. The Memory of Us.  $1.99 (87% off) or FREE to Amazon Prime members

Disturbing but excellent, The Silent Patient. $4.99 (82% off)

Every girl should read this. Girl, Wash Your Face. $3.99

I purchased My Dear Hamilton ($2.99/82% off) and When Crickets Cry ($1.99/87% off). We’ll see if they end up on my all-time fave list.

If you have other favorites, especially historical fiction, please share below. 🙂

Thanks for visiting today!

1amichele siggy

Affiliate links may be provided where applicable. This means I receive a small commission from your purchase (at no cost to you) when my links are used. Thank you so much for supporting Paper Cuts!  


Hand Lettering (baby steps)

Hi everyone! Hand lettering has become so big and I’ve admired it for so long now. I’ve finally decided to plunge in myself. I really wasn’t sure where to begin. At this point, I didn’t want to spend money on a class since I wasn’t sure just how dedicated I would be, but in the meantime, I did find a few great resources I thought I’d share here.

Capture3

On the Imagination International blog, David Sorrell has created a wonderful post, Hand Lettering with Copic, which is full of tips and helpful hints. He lists common hand lettering terminology and explains why each is important.

Untitled-1

He talks about choosing words/phrases, how to plan the layout with spacing, balance and details, then walks the reader through each step. I highly recommend checking it out.

Handlettering-Sheets

As another resource, I found Lisa Funk of Hand Lettered Design to be very helpful. While she has some amazing classes, I have so far only taken advantage of her free mini tutorial. She walks through the basics and provides free lined printouts (shown above) for practice.  (Those are my scribbles. I’m not ready to share any actual “hand lettering” yet. It is so very ‘not good,’ haha.)

Capture4

Also available on the Imagination International website is a tutorial for faux calligraphy.  It’s so easy, using a Multiliner Brush Medium Pen, the Copic Multiliner 0.8 Pen and the Copic Multiliner 0.5 Pen.

Capture5

To create this easy hand lettered Father’s Day card, Melody How used X-Press It Graphite Paper, a white gel pen, a gold Kirarina Wink pen and 0.5 Black Copic Multiliner.  You can find the full supply list as well as step by step instructions and free card template here.

Capture6

For an easy hand lettered Mother’s Day card, check out Melody How’s tutorial here using X-Press It Graphite Paper, a few Sketch markers and a 0.5 Black Copic Multiliner. (Card template also available.)

Hand lettering can be as simple or fancy as you’d like.  I’m taking baby steps, trying to practice 15-20 minutes per day. This is going to be a long process but hopefully I’ll reach a point soon where I won’t be too terribly embarrassed to share progress. We shall see.  🙂

I definitely recommend starting with David Sorrell’s hand lettering post as I found it to be super helpful. If you have any helpful sites, or tips/tricks, please share below. I’d love to see/hear what has helped you!

Thanks so much for visiting today!

1amichele siggy

Tracking Copic Skill with a Sketchbook

Hi everyone! Today’s post is a little different from my norm. I wanted to share with you an idea I had on tracking Copic coloring progress. I am always trying to improve my coloring, whether it’s shadow, glass, skin, fabric, anything really.  So I have begun a Copic sketchbook where I will color any thing, any time, whether I want to practice a specific technique or just color for the sake of coloring. By the time the book is filled, I hope (and expect) to see improvement in my skill. 🙂

Copic Sketchbook by Imagination International, Inc.

I use Copic’s 5″ x 7″ sketchbook available from Imagination International, Inc. (Also available in 11″x 14″, 4″ x 6″, 5″ x 12″, 7″ x 10″ and 9″ x 12, ranging in price from $4.99 to $24.99.)   5″ x 7″  is the perfect size for my purposes and easily tucks into my purse or luggage.

Taylored Expressions "A Life She Loved"

Within the super-thick cover are 50 sheets of high quality (70 lb.) Japanese illustration paper, perfect for use with Copic markers and mixed media.

SB3

Stamping Bella “Edna Loves the Ocean”

Copic ink does bleed through to the back of the paper but did not bleed through to the next page. This may depend on just how much ink is applied, but even red did not bleed to the next page (as shown in the photo below). It may be a good idea to tuck a piece of scrap paper beneath when coloring, just in case.

SB4

When my book is filled, I will come back to share my results. Is anyone with me in this experiment? It will be fun!

Thanks for stopping by!

1amichele siggy

Copic Studiiio App – Beta Testers Needed

Studii!o Beta Testers Needed

Imagination International, Inc. would like to invite you to beta test Studii!o, a new app for managing your collection of markers and connecting with artists!  Simply answer a few quick questions to be one of the first users!  It will only take one minute, I promise!

Start HERE or click the graphic above. Thanks for helping!  🙂

1amichele siggy

Copic Marker Storage: Art Case with DIY Inserts

Hi everyone! Today I’m sharing Copic‘s new Art Carrying Case and how my handy husband created removable inserts for the markers. This sturdy, lightweight case holds all 358 Sketch markers with extra room for accessories and comes in four colors. You can read a bit more about it here.

Black Case

Plastic marker cases, available here, fit inside, holding the markers upright, in place and nicely organized with room to spare.

Case filled with cases

I, however, don’t have any of those cases. After chatting with friends and doing a bit of Pinterest research, I found that many folks use fluorescent lighting ceiling panels as the markers, both Sketch and Caio, fit perfectly within the squares.

Case-open

From one panel (<$20), my husband used a Sawzall with a fine blade to cut two pieces, (each is 26 x 19 squares) to fit the inside of the case. He also cut two pieces of foam core board to 17 1/8″ x 3 1/2″.

Case-supplies

One grid is placed on the bottom, the core board is placed along each long side with the second grid placed on top. A marker inserted at each corner holds the core boards and grids perfectly in place. My husband is so clever. ♥

Case-corners2

With 26 x 19 squares, I can hold 494 markers (haha).  I don’t have all 358 markers, but if I did, I’d have plenty of room to spare. With the extra space, I find it helpful to leave a bit of room between the color groups.

Case-top-view

I like that the panels are easily removable so the case is great for other items as well. When not in use, I store the panels, strap and keys inside.

Case-inserts-storage

Thanks so much for visiting! Have a great day!

1amichele siggy

12 Holiday Gift Tags That Take Packages From Ordinary to Extraordinary

Looking for some DIY holiday gift tag inspiration?  On the Craftsy blog today, you’ll find twelve amazing ideas to get those creative juices flowing!

BeFunky-Collage65-

Simple silhouettes, fun/quirky sentiments, beautiful mixed media, computer printables and more!

Take your packages from ordinary to extraordinary! Check it out!

Scrapbook & Cards Today Summer Issue Now Available

Hi everyone! Just popping in to let you know the summer issue of Scrapbook & Cards Today is now available in print as well as FREE on-line. You can find the on-line issue HERE.

SCT-summer-2015

Lovely scrap layouts and cards!

Congratulations-CU

Here’s a snippet of my card (using Paper Smooches stamps and dies) found inside.

I hope you’ll check it out.  It truly is a lovely publication.  HERE.  FREE.  🙂

Thanks for stopping by!

1amichele siggy

Scrapbook & Cards Today Spring Issue

Hi everyone.  Just popping in to share a link to Scrapbook  & Cards Today Spring issue, now available in print and on-line for FREE!

SCTSprngCover2

In addition to the release of their beautiful Spring issue, Scrapbook & Cards Today is celebrating their 9th birthday! Yesterday began the kick-off to nine days of celebration.  Check out their blog HERE to join the party (with LOADS of incredible give-aways)!

An Organized Crafty Stash, Day 5 of 5 – Inks and Refills

5Days_BlogHeader

Hi everyone! Welcome to the last installment of Five Days to an Organized Crafty Stash with My Favorite Things!  Today we’re sharing our ideas for managing ink pads and refills.  Prior to this week, my ink pads were pretty much a hot mess. Some were labeled, some weren’t.  My dye ink refills were with the dye ink pads but all of my hybrid refills were in a bag.  It was somewhat of a nightmare. I feel so much better now, labeled, stacked, categorized.  Ahhh…   🙂

On a shelf behind my stamp table, I have all of my MFT inks and some refills.  All ink pads are labelled and grouped by color. (You can find MFT labels HERE.)

All-inks-1-500

My dye inks and refills are stored on a little shelf organizer my husband made for me a while back.

Dye-ink-w-refills-500To the left of the dye inks are my hybrid inks and a handful of pigment inks.

Hybrid-Pigment-Inks-500Since there is no room for the hybrid refills, I store them in bins with a 1/4″ circle cut from the coordinating card stock glued to each top.  The refill with no card stock on top is black. Once I begin accumulating pigment ink refills, I’ll store them similarly but in a different color bin.

Hybrid-Refills-500

I’d love to take credit for the punched circles but I can’t.  Jody mentioned it to me long ago and I thought it was brilliant.

Hybrid-Color-Tops-500

Head on over to the MFT blog for a list of direct links to more ink organization! And be sure to leave a comment there on the MFT blog for your chance to win our GRAND PRIZE Package!  (It’s INCREDIBLE!)

5Ways_Prize5a


I hope you enjoyed our Five Days to An Organized Crafty Stash!   Thanks for stopping by!   🙂