Category Archives: Organization

Organization for Your Creative Space – Taming Your Tools

Hi everyone!  Today the MFT DT is sharing how we manage our tools. My photos are not neat or pretty, but I did straighten things as much as possible. 🙂

My main storage unit is a round-about I purchased from Michaels quite a while ago. In it I store four scissors, an assortment of foam dots and squares, sanding block, extra acrylic blocks, a mini-stapler, glue pens, piercing tool, kraft knife and my Stamp-a-ma-jig. On the side, I hang tweezers and pliers. I have a small jar in one compartment where I keep a few pens and pencils, and on those I hang two rolls of foam tape. There are also a few drawers where I place small miscellaneous “things.”

Tools-Caddy-500
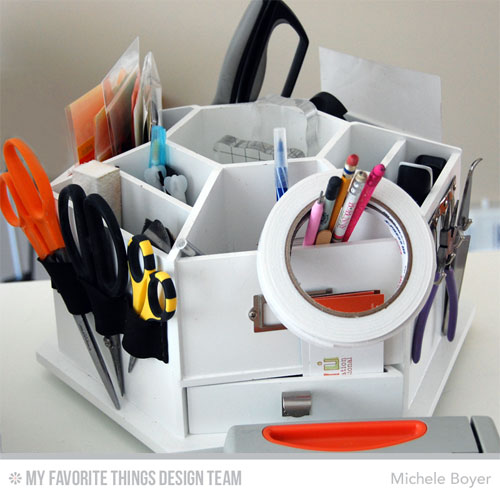
In front of the round-about is my most used paper trimmer.  Beside that I keep a variety of rulers – clear T-square, magnetic ruler, Tim Holtz Design Ruler and a short (6″) ruler.  Yes, I use them all.  🙂

Tools-Trimmer-Rulers
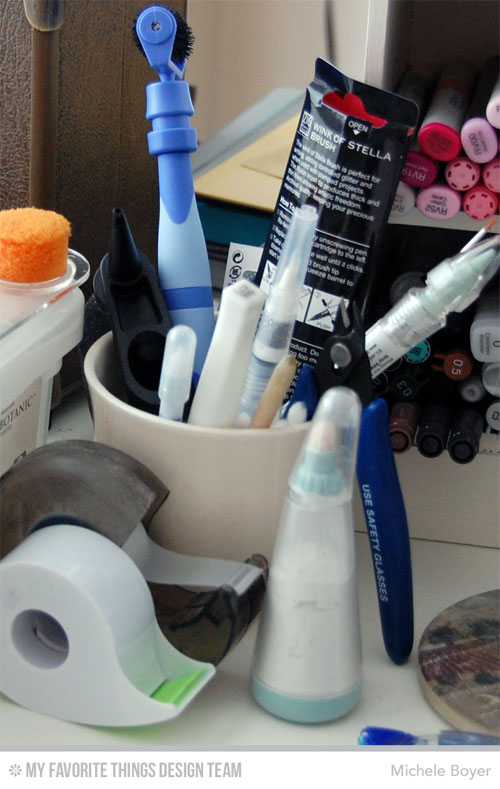
To the left of my stamp table I have this very unique tea cup in which I keep a couple of Wink of Stella glitter brushes, a small paint brush, steel nips (for cutting apart dies), a water brush, my QuickStik Pick-Up tool, a Tool n’ One, a spritzing tool, Fantastix and a tab of large sewing needles. In front of the cup is my valued powder tool along with low tack adhesives.  Are you snickering because the cup looks so ordinary? It isn’t.  🙂

Tools-Stamp-Tea-Cup
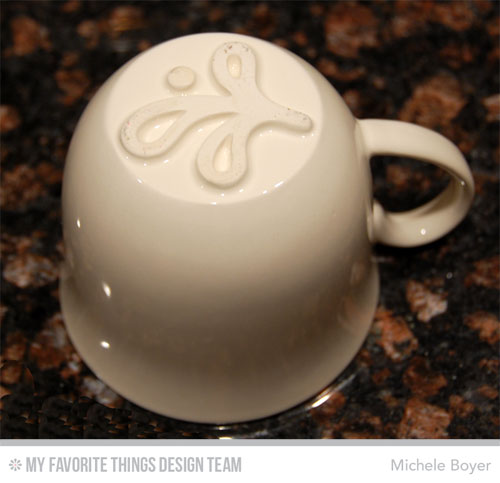
It’s a stamping tea cup.  In case you spill your tea, you can stamp your napkin…or whatever.   (Hee, hee)  I received a set of two, long ago, from a friend. Each has a different design on the bottom.  I have no idea who makes them or where she found them.  But they’re pretty neat.  🙂

Tools-Cup
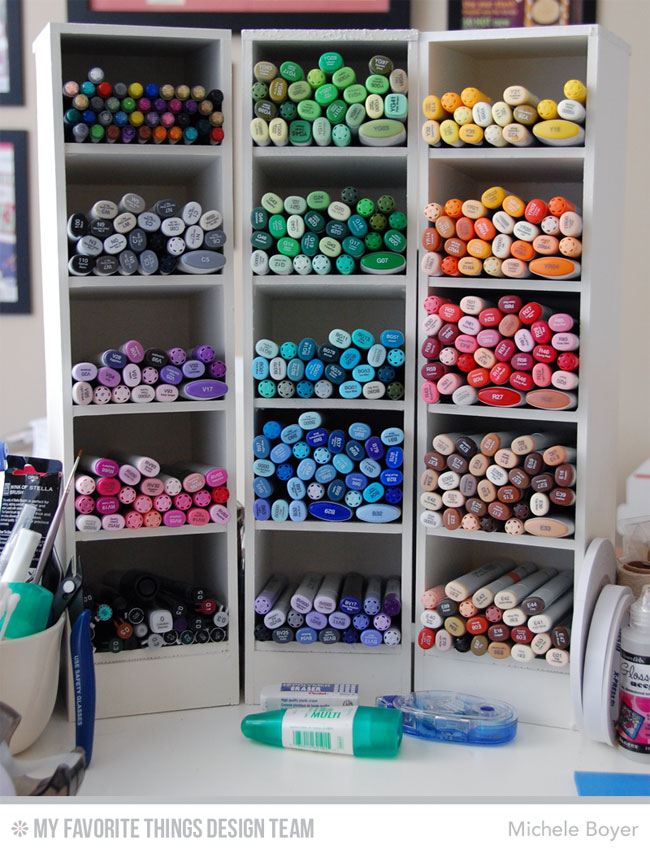
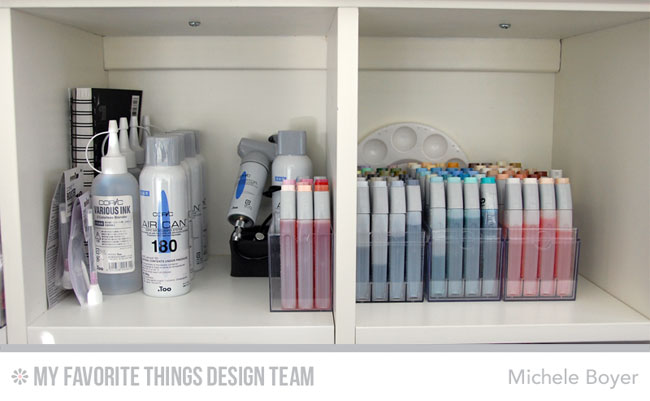
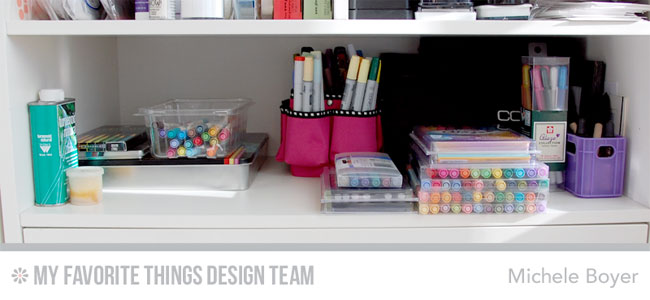
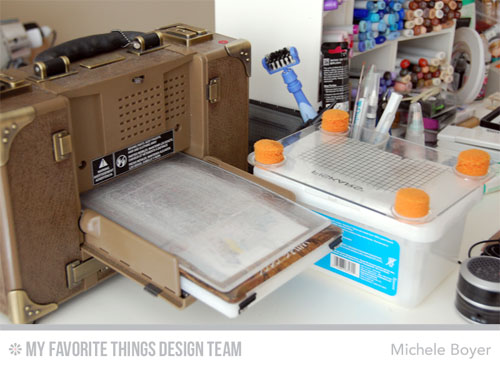
On the left side of my stamp table, I have a container of wipes, on which I keep my stamp press.  And to the left of that and behind just a bit is my Vagabond. Behind my Copics and next to my Vagabond is a stack of extra die-cutting plates, embossing pads and a metal shim. Barely visible to the right is my iHome portable speaker which I love.

Tools-Vagabond

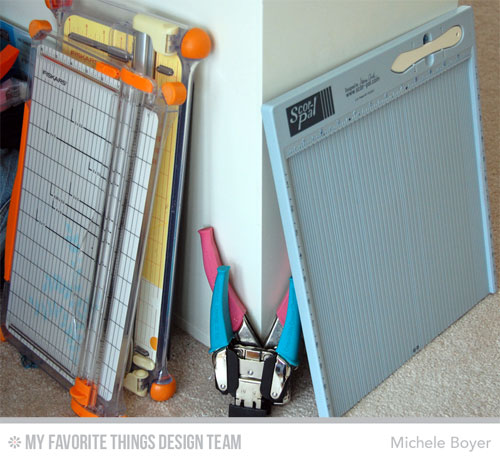
Below my table, I keep additional paper trimmers, a Scor Pal, my Crop-a-dile and Corner Chomper.

Tools-Cutter-ScorPal

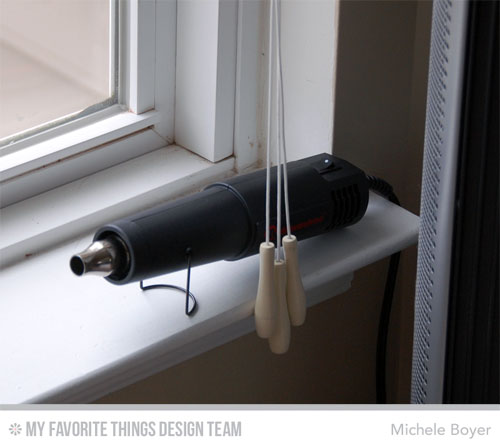
And lastly, I keep my  heat gun on my window sill which is just to the left of where I work.

Tools-Heat-Gun

None of my tool storage is fancy, but it’s definitely functionable and I suppose that’s what matters most.  🙂

Check out the MFT Blog for links to participating DT sharing their taming of the tools.  Thanks for stopping by!


Organization for Your Creative Space – Coloring Mediums

Hi everyone! I hope you’ve been enjoying MFT‘s organization posts.  I know each one has been good for me.  Bit by bit my stamp room is getting into tip top shape.

Today the design team is sharing ideas on how to organize your markers, pencils, pens, etc.  Any coloring medium.

My wonderful hubby, being the very talented guy that he is, built these three towers to house my Copic markers.  There was a similar product on the market, but when I was in need of the storage, the product was no longer available.

CM-Org-CopicsSince I use my markers so often, they are front and center on my desk.  Each cubby holds a different color category.  Additionally, at the top left I have a cubby for my Spica glitter pens and on the bottom left I have Multi-liners and a few other miscellaneous markers.

CM-Org-CopicsCUTo the left of my work space, I have a shelf which holds my Colorless Blender Solution, air cans for a compact airbrush and my Copic refills.

CM-Org-CopicsRefillsBeneath my work area, I have my treasured airbrush.

CM-Org-Air-BrushBehind my work area, I have a shelf that holds additional markers, pens and pencils.

CM-Pencils-MarkersOn the right are some Stampin’ Up markers, opaque, glaze and metallic markers and some sponge brushes and inks.

CM-Pencils-Markers2

And on the left are my colored pencils, blending chemical and distress markers. I use the small jar with the sponge to hold a bit of solution to blend colored pencils.

CM-Pencils-Markers3That’s a tour of my coloring mediums.  Be sure to check out the MFT blog for direct links to other participating DT.  Hope you get some ideas for your own organization!

MFT_OrganizeChallenge_Logo1_thumb[1]

Thanks for stopping by!


An Organized Crafty Stash, Day 5 of 5 – Inks and Refills

5Days_BlogHeader

Hi everyone! Welcome to the last installment of Five Days to an Organized Crafty Stash with My Favorite Things!  Today we’re sharing our ideas for managing ink pads and refills.  Prior to this week, my ink pads were pretty much a hot mess. Some were labeled, some weren’t.  My dye ink refills were with the dye ink pads but all of my hybrid refills were in a bag.  It was somewhat of a nightmare. I feel so much better now, labeled, stacked, categorized.  Ahhh…   🙂

On a shelf behind my stamp table, I have all of my MFT inks and some refills.  All ink pads are labelled and grouped by color. (You can find MFT labels HERE.)

All-inks-1-500

My dye inks and refills are stored on a little shelf organizer my husband made for me a while back.

Dye-ink-w-refills-500To the left of the dye inks are my hybrid inks and a handful of pigment inks.

Hybrid-Pigment-Inks-500Since there is no room for the hybrid refills, I store them in bins with a 1/4″ circle cut from the coordinating card stock glued to each top.  The refill with no card stock on top is black. Once I begin accumulating pigment ink refills, I’ll store them similarly but in a different color bin.

Hybrid-Refills-500

I’d love to take credit for the punched circles but I can’t.  Jody mentioned it to me long ago and I thought it was brilliant.

Hybrid-Color-Tops-500

Head on over to the MFT blog for a list of direct links to more ink organization! And be sure to leave a comment there on the MFT blog for your chance to win our GRAND PRIZE Package!  (It’s INCREDIBLE!)

5Ways_Prize5a


I hope you enjoyed our Five Days to An Organized Crafty Stash!   Thanks for stopping by!   🙂

An Organized Crafty Stash, Day 4 of 5 – Card Stock

5Days_BlogHeader

Hi everyone! Welcome to another installment of Five Days to an Organized Crafty Stash with My Favorite Things!  Today we’re sharing our ideas for managing card stock.  I have a lot so it’s stored in a few different locations.

Several years ago, I was doing all my stamping from my dining room table.  As you can imagine, I quickly outgrew that (plus it was an eyesore). During that time, I was offered a really big job, I worked hard, saved my money and bought a very nice project table with storage on each side.  I ♥♥♥♥♥ it. On this side, I keep a rainbow of card stock from which I pull on a daily basis.

Card-Stock-FrontI “file” my card stock packages with the label out so I can be certain of what I’m grabbing while flipping through.

CS-2-labelsI also open my packages from the bottom (near the label) so I can easily access the extra cut pieces I store in the package.  I’ve started writing the coordinating Copic color on the label as well.

CS-5-Lable-Opening

Since I use whites and black most frequently, I keep them on a shelf behind where I stand to stamp so they are very accessible.  (Yes, I stand.)  🙂

CS-3-Basic-ColorsOn the other side of my table, I use the bottom shelf to store all of my “extra inventory.” (I didn’t take a photo of the entire side because it’s not as pretty.)  😉

CS-4-Extra-StockHead on over to the MFT blog for a list of direct links to more card stock organization! And be sure to leave a comment there on the MFT blog for your chance to win one of two Prize Packages:

5Ways_Prize4a


Thanks for stopping by!


An Organized Crafty Stash, Day 3 of 5 – Die-namics

5Days_BlogHeader

Hi everyone! Welcome to another installment of Five Days to an Organized Crafty Stash with My Favorite Things!  Today we’re sharing our ideas for managing Die-namics. 

Necessary statement:  I attribute 90% of my stamp room organization to Jennifer McGuire and her incredibly creative and brilliant ideas.  I cannot thank her enough. (You can find her info on die organization here.) 

I purchased two of these refrigerator bins from Bed, Bath & Beyond. They’re a bit pricey (for bins) but worth every penny.  (Plus I had a coupon for each.) I use one bin for dies and a second for stamps.

Michele Boyer/Die-namics Organization

Here’s a close-up of my labels.  The categories are basically in order of most used. (I hate to dig through things.)

Michele Boyer/Die-namics Organization Labels

I use this label maker and tape to label my Blu Raspberry dividers. I’ll eventually switch the dividers out for something more sturdy but for now they work great!

I accidentally bought black on white tape once so you may notice a white label. I’m not picky enough to peel it off and replace, but I do prefer clear.  

ETA:  Free downloadable files are now available HERE for printing labels for MFT stamps, dies, stencils, etc.

Michele Boyer/Die-namics - Label MakerI purchase these magnetic sheets from my local Home Depot (about $4), cut to size and adhere to Sweet Tooth card stock to place in each sleeve.

Michele Boyer - Magnetic Sheets (Vent Covers)

I had originally used three types of sleeves for my dies but I’m transitioning down to two.  And they just happen to now be available here in the MFT store.  🙂

Here’s a sample of my dies on the magnetic sheets. *So happy*   

Michele Boyer - Die-namics Stored on Magnetic Sheets/Clear Pockets

I keep the label maker on my desk but everything else is stored in a basket on a shelf over my dies.

Michele Boyer/Organization Supplies Storage

I cannot begin to tell you how great this system works for me. It took a while to get organized as I already had a LOT when I started but it was worth every minute, every penny. I already thanked Jennifer once, but I will thank her again.  And again. And again. ♥

Head on over to the MFT blog for a list of direct links to more Die-namics organization! And be sure to leave a comment there on the MFT blog for your chance to win one of two Prize Packages:

5Ways_Prize3a

Thanks for stopping by!


An Organized Crafty Stash, Day 2 of 5 – Stencils

5Days_BlogHeader

It’s Day 2 of Five Days to Organizing Your Crafty Stash with My Favorite Things!  Today we are focusing on stencils.  They don’t take up a lot of room, but when you have quite a few, it’s better to have them organized than in one thick pile, hooking into each other.  🙂

I have lots of shelves in  my stamp room and quite a few baskets.  I use a small square one for stencils as well as stencil-related supplies.

Stencils-1-500

I used Berrylicious card stock to create a few dividers for my stencils, using my handy label maker to label each. (Now available are free downloadable files to create your own labels for MFT stamps, dies, stencils, etc. HERE . YAY!)

Stencils-2a-Label-Maker

I have some perfectly sized clear pockets on the way.  I look forward to using them as side-by-side stencils get hung up on each other and would be so much easier to browse and remove if “individually packaged.”

Stencils-2-Files

For now, they are at least organized.  🙂

Stencils-3-Basket-Extra-Room

Since there’s so much extra room in the basket, I’ve also placed inside modeling pastes, a palette knife, paint brushes and a few gift cards I sometimes use for spreading pastes.

Stencils-4-Extras

Be sure to visit the MFT Blog for links to more stencil storage, and don’t forget to leave a comment for your chance to win one of two prize packages:

5Ways_Prize2aThanks for visiting!


An Organized Crafty Stash, Day 1of 5 – Stamps

5Days_BlogHeaderToday My Favorite Things kicks off Five Days to an Organized Crafty StashEach day we will highlight a different area of the craft room and share ideas for putting everything in its place. To make it even more fun, two prizes will be given on Days 1 through 4 with one Grand Prize on Day 5.  (And believe me, it is g-r-a-n-d!) For your chance to win one of these AMAZING prize packages, be sure to leave a comment on each day’s Organization post on the MFT Blog.

Necessary statement:  I attribute 90% of my stamp room organization to Jennifer McGuire and her incredibly creative and brilliant ideas.  I cannot thank her enough. (You can find her info on stamp organization here.)

I file most of my stamps in this bin from Bed, Bath & Beyond.

Michele Boyer - Stamp Organization

Each stamp set is placed into one of these clear pockets and filed under the appropriate category.

Michele Boyer- Stamp Set in pocket

If the set has coordinating Die-namics dies, I adhere a magnetic sheet to the back of the white insert so all pieces are kept neatly together.

Michele Boyer/dies stored behind stamp set in pocket

I use these vent covers (magnetic sheets) available from Home Depot for about $4 per pack.

Org-Mag-sheets

Pure Innocence sets are filed in a basket on one of my shelves, sorted by holiday, birthday,  miscellaneous, etc.

Stamps-3-PIsBackground stamps are stored in a basket as well.

Stamps-4-Backgrounds

Head on over to the MFT Blog for direct links to more stamp storage solutions! And don’t forget to comment there for your chance to win one of two prize packages:

5Ways_Prize1a

Thanks for stopping by!