Category Archives: Altered Items/3D

Altered Candlestick Holders (Brass No More)

Hi everyone.  🙂  Today I wanted to share a couple of candlestick holders I altered to better fit my decor.

Candles-1

I’ve had these for years and never used them. I’m sure they were a gift of some sort.

Candles-2

I’ve never been a fan of brass so finally, after all these years, I decided to change them.

Candles-3

I first painted two coats of Tommy Art Milk chalk-based mineral paint.  Tommy Art chalk paints provide excellent coverage, dry very quickly, work with most surfaces with no preparation and are available in more than 35 colors.

Candles-4

Once the paint was dry, I used a paper towel to apply a thin coat of Antiquing Wax, concentrating a heavier application in the crevices. Tommy Art waxes are a creamy, solvent-based beeswax that can be used to add color or to create a seasoned look. Ideal for use with wood, plaster, and metal, each producing its own decorative effects. They are easy to apply and buff and are an excellent way to protect surfaces.

Candles-5

After just a few minutes, I buffed off the wax with another paper towel.

Candles-6

Lastly, I applied a thin coat of Neutral WaxNow, I will use the candlestick holders.  🙂

Before this project, I had never altered anything with paint and/or wax. This was so easy and fun. Now I want to paint all things.

Thanks so much for visiting today!

1amichele siggy

One of My Favorite Peeps (a taylored expressions Easter treat)

Hi everyone! We’ve had an early spring in this part of the country and so it seems only natural (not really, it’s kind of weird) to be thinking about Easter treats. Taylored Expressions has an adorable Sack It Chick die set which fits perfectly onto their Sack It treat box.

Favorite-Peep-Treat-500

I used the largest Egg Stacklet shape as the base for the chick’s body and a bow from All Wrapped Up atop the chick’s head.

The box is incredibly easy to assemble.

box-asssembly

1 – Die-cut two box pieces and fold along the score lines. Apply double-sided tape to flaps on both pieces and bottom of one piece.

2 – Remove release tape; carefully align box bottoms and adhere, pressing firmly along tape areas. I use a bone folder to apply added pressure.

3 – Carefully aligning box sides, adhere flaps to inside of box.

4 – Finished!

X-Press It High Tack Double Sided Tape

I always reach for X-Press It High Tack Double-sided tape for projects like this. It’s great for all weights of paper, especially heavier types such as mat board, cardboard and heavyweight card stock. It’s also great on wood, metal, plastic and fabric! It comes in 1/2″, 1/4″ and 1/8″ widths, features high grip and easy tearing by hand. It’s also heat resistant so if you heat emboss or iron over it , the tape will not be damaged. Also, the release paper is very easily removed and doesn’t stick to your fingers. (That makes me crazy.)

Favorite-Peep-Treat-CU

The cute sentiment is from new Peek a Boo Easter stamp set. You can find additional Sack It die sets HERE. (I also especially like the fox!)

Thanks for visiting today!

1amichele siggy

Taylored Expressions November Release Preview – Monogrammed Notepads

Hi everyone! Welcome back to another day of November release previews with Taylored Expressions! All new products will be available for sale tomorrow, Thursday, November 3rd.  🙂

Today we’re sharing projects using TE’s new Initially monogram dies. Each initial die set includes one large uppercase initial measuring just over 3 1/2″ tall, a smaller uppercase initial measuring 1″ and one lowercase initial measuring 3/4″. (Height of lowercase initials varies within m, h, j, etc.)

Michele-Monogram-Note-PadsCU500

I created several monogramed notepads using Initially M, A, K and L with new Garden Party background. (See info below on how you can receive the Garden Party background for FREE.)

Monogram-Tablet

I purchased four 4″ x 6″ mini notepads from Target for $1.99 each. (Beware of the “ruled” notation. The pads are not in fact ruled. They are plain paper.)

Michele-Monogram-Note-Pads2-500

I stamped the Garden Party background in new Blue Corn ink, as well as Peapod, Plum Punch and Toffee onto Sugar Cube card stock. I cut the panels to 4″ x 5 1/4″, added a strip of Oreo card stock to the bottom and adhered to the paper pad. (I ♥ how these turned out!)

Michele-Monogram-Note-Pads500

Inside each circle, I stamped “handmade for you” from new Noteworthy stamp set. To add a bit of dimension to the monomgram, I die-cut each letter four times, glued the layers together and adhered within the circle.

Initially monogram dies promo

Taylored Expressions is celebrating Release Week with some fabulous giveaways! Visit the TE Blog to answer Taylor’s Question of the Day for a chance to win a prize from the latest release!

question of the day

On the TE Blog you will also find a complete list of today’s participating designers, as well as new product information.

Thanks so much for visiting!  🙂

1amichele siggy

Taylored Expressions November Release Preview – 2017 Calendar 3×4

Hi everyone! Welcome to the first day of Taylored Expressions‘ November release previews!  All new products will be available for purchase on Thursday, November 3rd, 7 a.m. PDT.

Today the team is sharing  a variety of 2017 calendars in a 3″x 4″ format (already available for purchase here) as well as new 5″x 7″.

Michele Boyer - Taylored Expression 3x4 calendar display

My samples for January, February, March, October, November and December are in the 3″x 4″ format. I will share the remaining six months soon!

Michele Boyer - Taylored Expressions 3x4 calendar January, February, March

I used Calendar Critters with coordinating dies, elements from new Build A Scene Calendar 2 and Build a Scene Calendar 5×7 with some Build a Scene Calendar pieces sprinkled in as well. The hearts on the February page were die-cut using Skinny Mini Valentine Borders.

Michele Boyer - Taylored Expressions 3x4 calendar October, November, December

I also used Little Bits Spider & Web for October and All Wrapped Up for December.

You can see each month individually (and larger) by clicking on the thumbnails below.

Michele Boyer - Taylored Expressions 3x4 calendar January Michele Boyer - Taylored Expressions 3x4 calendar February Michele Boyer - Taylored Expressions 3x4 calendar March

Michele Boyer - Taylored Expressions 3x4 calendar October Michele Boyer - Taylored Expressions 3x4 calendar November Michele Boyer - Taylored Expressions 3x4 calendar December

To display individual pages of my calendar, I purchased THIS mini easel from the TE shop. The 3″x 4″ pages fit perfectly.

Michele Boyer - Taylored Expressions 3x4 calendar display easel

Taylored Expressions is celebrating Release Week with some fabulous giveaways! Visit the TE Blog to answer Taylor’s Question of the Day for a chance to win a prize from the latest release!

question of the day

On the TE Blog you will also find a complete list of today’s participating designers, as well as new product information.

Thanks so much for visiting!  🙂

1amichele siggy

Copic Marker Storage: Art Case with DIY Inserts

Hi everyone! Today I’m sharing Copic‘s new Art Carrying Case and how my handy husband created removable inserts for the markers. This sturdy, lightweight case holds all 358 Sketch markers with extra room for accessories and comes in four colors. You can read a bit more about it here.

Black Case

Plastic marker cases, available here, fit inside, holding the markers upright, in place and nicely organized with room to spare.

Case filled with cases

I, however, don’t have any of those cases. After chatting with friends and doing a bit of Pinterest research, I found that many folks use fluorescent lighting ceiling panels as the markers, both Sketch and Caio, fit perfectly within the squares.

Case-open

From one panel (<$20), my husband used a Sawzall with a fine blade to cut two pieces, (each is 26 x 19 squares) to fit the inside of the case. He also cut two pieces of foam core board to 17 1/8″ x 3 1/2″.

Case-supplies

One grid is placed on the bottom, the core board is placed along each long side with the second grid placed on top. A marker inserted at each corner holds the core boards and grids perfectly in place. My husband is so clever. ♥

Case-corners2

With 26 x 19 squares, I can hold 494 markers (haha).  I don’t have all 358 markers, but if I did, I’d have plenty of room to spare. With the extra space, I find it helpful to leave a bit of room between the color groups.

Case-top-view

I like that the panels are easily removable so the case is great for other items as well. When not in use, I store the panels, strap and keys inside.

Case-inserts-storage

Thanks so much for visiting! Have a great day!

1amichele siggy

Fun with Hot Ribbon

Today I am deviating from my standard paper crafting posts to share a bit about Hot Ribbon, a fun new product now available from Copic. Here’s a bit of info from the website:

Add a unique design or color accent to any article of clothing, fabric, or fiber art with Hot Ribbon! Hot Ribbon is a laser cut strip of polyester that irons on to any porous surface without sewing or the mess of glue. It comes in 22 colors, plus gold and silver metallic; you can even color the white Hot Ribbon with your Copic markers and expand your palette even further!

hotribbonFeatures

  • Each package contains two yards of Hot Ribbon (183 cm)
  • Product comes in four 18” x ⅛” strips (46 cm x 3 mm)
  • Hot Ribbon can be cut into thinner strips without fraying
  • Irons on with no sewing or gluing required
  • Works on any porous surface

Hot Ribbon is so easy to adhere with a Clover Mini Iron (which I talked about yesterday, here).

Finished

I’ve used this sewing design in the past to create a mini iPad sleeve. This one, a little bigger, will hold a super-secret iPad Air. Shhhh….

Supplies

There are two methods for adhering Hot Ribbon – Direct and Tempered Glass Transfer. For my pattern, which was printed from a computer, I felt Tempered Glass was the way to go. (I adhered washi tape around the edges of my glass to eliminate any risk of cutting myself.)

Step-1-Cut-and-adhere-to-glass

I first placed my pattern beneath the glass. I cut small pieces of black Hot Ribbon to fit the cacti and laid them on the glass over the pattern. I found it helpful to use the pointy end of my scissors for precise placement. The pieces were then “tacked” together and to the glass with a Clover Mini Iron set to low heat. Once the cacti were in place, I adhered the black ribbon, little by little, tacking to the glass following the pattern.  I then followed with the blue-green ribbon.

Step-2-finished-on-glass

Once complete, I used a kraft knife to gently lift the assembled design from the glass.

Step-3-adhere-to-fabric

I trimmed the ends, positioned each strip on the felt and covered with a non-stick pressing sheet. (I used Parchment Paper.)  To permanently bond the ribbon, I set my iron to medium-high heat then pressed across each area of the design for about 30 seconds.

Step-4-ironed-onto-fabric

Isn’t the blue-green pretty? So shimmery!

You can find more tips and information on Hot Ribbon HERE. It’s really cool, super easy and lots of fun!  🙂

1amichele siggy

celebrate EVERYTHING

Hi everyone!

This week’s Bellarific Friday theme was  “anything but a card.”   I used a frame from my stash, placing new Tiny Townies Tiny Dancers inside. I can’t begin to say how much I love the new Tiny Townies, and this one just might be my favorite from the lot of them. Sooooo cute.

Celebrate-Everything-500

I stamped onto X-Press It Blending Card and colored with Copic markers, then used a Copic to alter clear rhinestones. This is super easy to do. Just be careful not to touch the marker to the adhesive strip connecting the rhinestones.

Celebrate-Everything-CU

I adore these girls.   ♥

You can check out more “anything but a card” projects by the DT on the Stamping Bella blog (a little later this morning).

Next week’s challenge is a sketch:

sketch-12-June-19 copy (3)

If you’d like to play along, use a current Stamping Bella image, email your card to Emily by next Thursday and you’ll be entered to win some Bella Bucks!  (All challenge details can be found HERE.)

Thanks for stopping by! Have a great day!

1amichele siggy 

Additional supplies/info:  Frame 7″ x 5 1/2″ with opening 4 1/2″ x 3″, Copic markers (E00, E11, BV000, R01, E21, E23, E27, E29, E13, 15, E18, V15, V17, V22, YG00, Y02, Y38, G20, G43, YG11, YG13, G17, R81, RV32, R83, R85, C00, C1, C3,), clear rhinestones altered with RV19 Copic.

MFT Feb. Creative Challenge – Hop into Action

Hi everyone! Welcome to this month’s Creative Challenge with My Favorite Things! Today we’re focusing on Easter cards and crafts.

I created a card using Somebunny stamp set and dies along with a coordinating Treat Tote.

Happy-Easter-Feb-CC-500

The Happy Easter sentiment is stamped in Sweet Tooth pigment ink and white embossed using Lisa Johnson’s Easter Bunny stamp set.

Happy-Easter-Feb-CC-Card-500R

The little Somebunny was die-cut from X-Press It Blending Card, stamped in Black Licorice hybrid ink and colored with Copic markers.  The hill was created using Stitched Snow Drifts Die-namics.

Happy-Easter-Feb-CC-CU500

Inside, I created another hill and white embossed a partial sentiment from Somebunny stamp set.

Happy-Easter-Feb-CC-In-500

The Treat Tote has a hill as well, with small white brads holding the handle in place.

Happy-Easter-Feb-CC-box500

Be sure to check out the MFT blog for direct links to more Easter crafts.  🙂

Print

Thanks for stopping by!

Additional supplies/info: Copic markers (RV00, R30, R32, BG11, BG13, E40, E42), white embossing powder, white brads.  Finished card size 4 1/2″ x 4 1/2″.

October Creative Challenge – Count Down to Christmas

Hi everyone!  It’s time for this month’s Creative Challenge with My Favorite Things!  The MFT Design Team Creative Challenge is a monthly feature where we are challenged to explore our creative side using a specific theme, product, or technique.  This month we will inspire you with an assortment of ideas to help Count Down to Christmas.

I will actually not use this project until MUCH closer to Christmas, but in case you didn’t realize it, Christmas IS only 63 days away.  EEK!

I used quite a few Die-namics dies as well as the Brick Wall stencil to create an 8″ x 10″ count down frame.

I began by mixing a bit of acrylic paint into Gesso then wiped it over the Brick Wall stencil which was laid atop Primitive Cream card stock.  Once dried, I mixed a few drops of Hot Fudge ink (refill) into water and brushed (somewhat sloppily) over the bricks, being careful not to brush between the bricks.

The numbers were die-cut from Paver Red card stock, cardboard and then magnetic photo paper.  Behind the bricks I adhered more magnets to hold the numbers.  I used Chalkboard Frame Die-namics (cut down to size) to create the frame around the count down phrase.  “Days until” was stamped in Timber Green ink using Typewriter Alphabet and “Christmas” was stamped in Paver Red ink using Holiday Subway Art.

The mantle (created using a piece of Chalkboard Frame and Western Backgrounds) is raised on foam tape with pieces of Winter Wreath cut from Timber Green card stock tucked in and glued atop to create garland.

The stockings were stamped and die-cut using Stitched Stockings and Stocking Trio Die-namics, and raised on foam tape.  I stitched tiny Paver Red and Timber Green buttons to each.

Finally, the “mat” around the assembled piece was created using the woodgrain stamp from Western Backgrounds, stamped onto Kraft card stock using Hot Fudge ink.  After stamping, I lightly sponged over the “wood” with more Hot Fudge ink.

While I had all of the supplies out, I decided to create a matching card.

Instead of using the Gesso to create the brick, here I mixed a bit of Kraft ink (refill) with water into a mini Mister and sprayed over the Brick Wall Stencil.

The sentiment, from Cheerful Christmas Greetings (free to you this month with any $60 purchase), was stamped in Timber Green ink and raised on foam tape.

Inside, I stamped a second sentiment from Cheerful Christmas Greetings and added a Paver Red border strip from Stitched Stockings.

Be sure to check out the MFT blog for direct links to more Christmas Count Down inspiration!

Thanks for visiting today!  🙂


Frame:  Stamps: MFT LLD Holiday Subway Art, LJD Stitched Stockings, Typewriter Alphabet, Western Backgrounds  Ink: MFT Paver Red, Timber Green, Hot Fudge (plus refill), Kraft (plus refill)  Paper: MFT Primitive Cream, Timber Green, Paver Red, Kraft  Accessories: MFT LJD Stocking Trio, High-Rise Numbers, Chalkboard Frame, Winter Wreath Die-namics; MFT Brick Wall stencil; MFT Brick Red and Timber Green buttons; X-Press It foam and double-sided tapes; Michaels 8×10 frame; ProMag Magnetick Sheets; Recollections mini brads and rhinestones; Claudine Hellmuth Gesso; Martha Stewart Putty and Rootbeer Float acrylic paints; string; sponge; mini Mister.
Card:  Stamps: MFT LJD Stitched Stockings, Cheerful Christmas Greetings  Ink: MFT Paver Red, Timber Green, Hot Fudge, Kraft (refill)  Paper: MFT Primitive Cream, Timber Green, Kraft   Accessories: MFT LJD Stocking Trio, Chalkboard Frame, Winter Wreath Die-namics; MFT Brick Wall stencil; X-Press It foam tape; Recollections rhinestones; sponge; mini Mister.

Holiday Subway Art, Western Style (and a notebook)

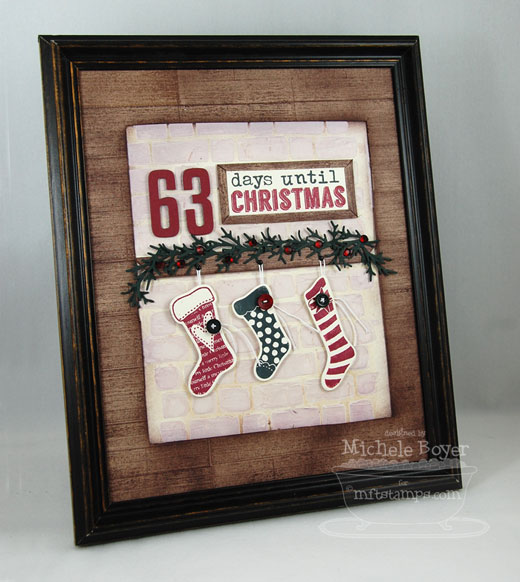
Hi everyone!  It’s time to revisit products from My Favorite Things’ recent release (available HERE).  For my projects today I focused on Laina’s new Holiday Subway Art, creating a frame and card gift set along with a small holiday gift notebook.

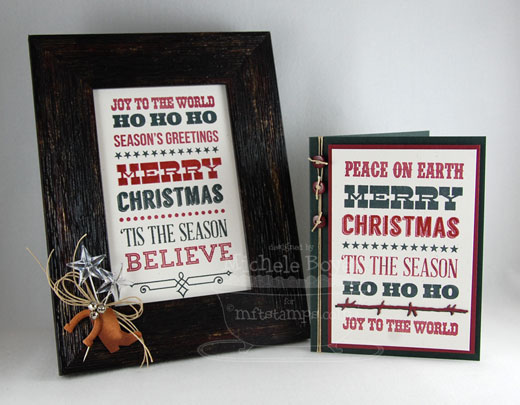
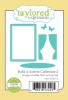
While browsing through Michaels’ clearance aisle a couple weeks ago, I found these rustic frames for $4 each and couldn’t pass them up.  I didn’t know what I’d be doing with any of them at the time (I bought three) but thought I’d eventually put them to some kind of use.  Combined with Holiday Subway Art and Country Charms Die-namics, I create a gift for my in-laws.

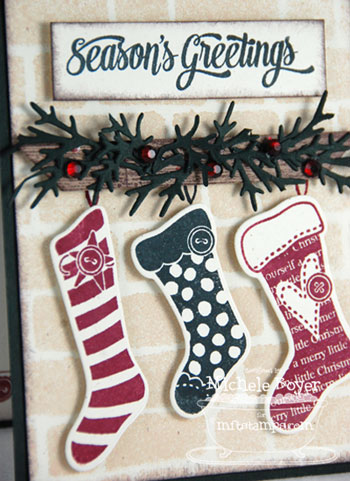
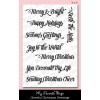
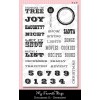
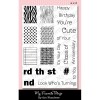
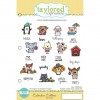
The sentiments were each stamped using new Timber Green and Paver Red inks onto Primitive White card stock.

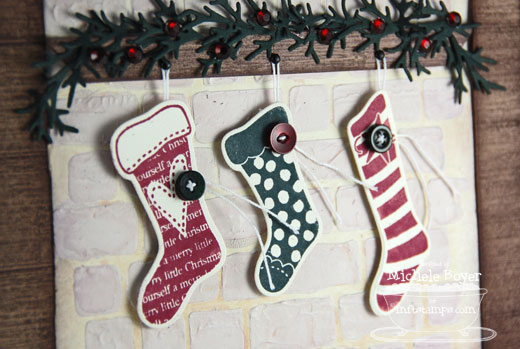
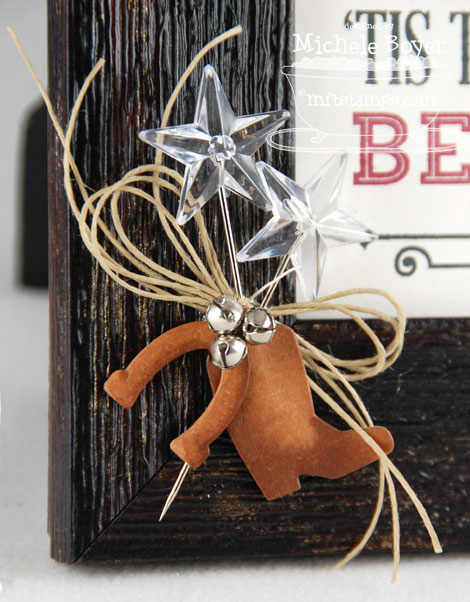
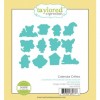
In the corner, I layered some hemp cord with jingle bells and star pins.  The charms were die-cut from Primitive White card stock and colored with Copic markers.

I created a coordinating card, this time adding in a double layer of Barbed Wire Fence.  For additional detail along the side, I tied three Paver Red buttons with hemp cord.

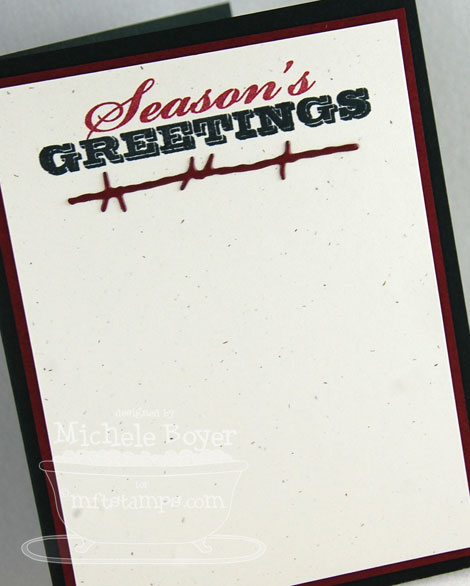
Inside, I stamped a sentiment from Seasonal Sentiments and used a leftover piece of Barbed Wire Fence.

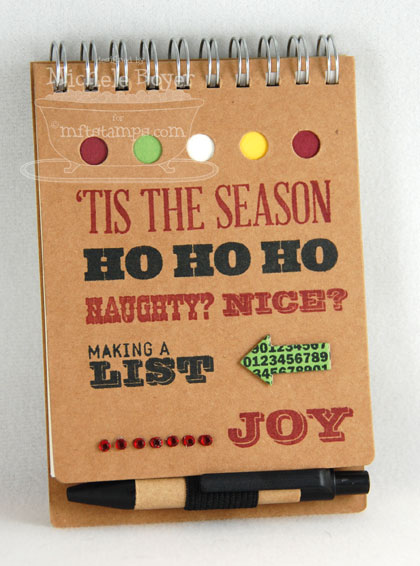
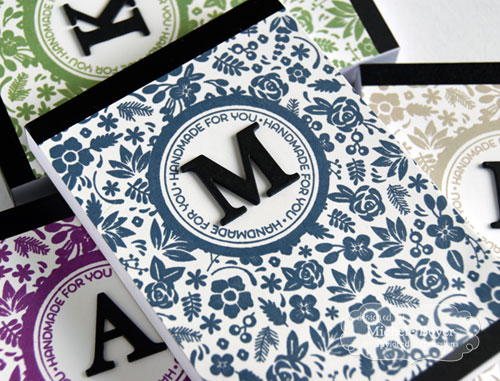
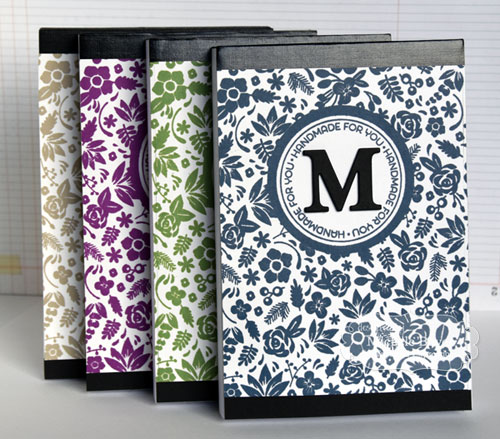
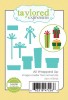
Next, I decided to use Holiday Subway Art to create a little notebook to help with my holiday shopping. (If you know me, you know that I pretty much do not like any type of shopping so the word “JOY” at the bottom is 100% sarcastic. ha!)

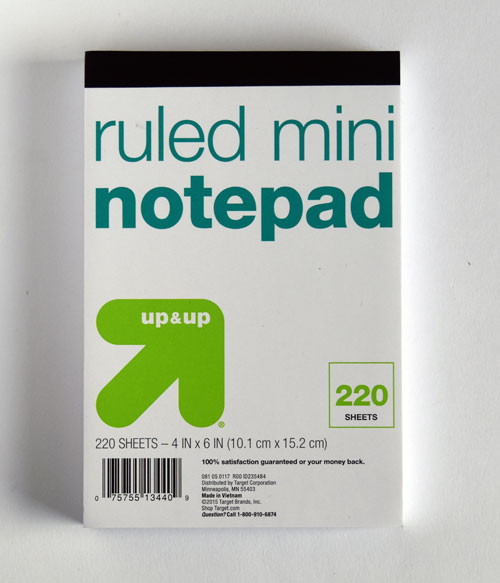
The notebook was something I picked up from a Pick Your Plum sale.  If you haven’t heard of Pick Your Plum, you should google it.  Good deals to be had (thank you, Lori Craig.  Hee, hee.)  Sometimes the deals are crafty, sometimes not, but it’s worth signing up for the emails.  You never know.  🙂

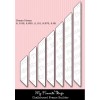
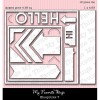
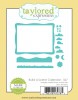
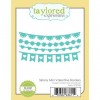
Again, I used Timber Green and Paver Red inks to stamp sentiments from Holiday Subway Art with a little Document It December thrown in (naughty/nice, list and joy).  I used a scrap of Sour Apple card stock along with the arrow from Blueprints 7 to cut the little arrow, which is also stamped with the numbers pattern from By the Numbers.

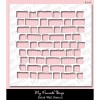
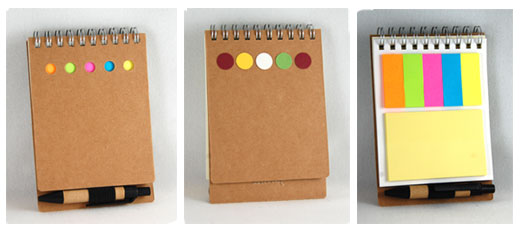
Since the little circles across the top were open to reveal the various colors of sticky note tabs inside, I punched/adhered small circles from scraps of coordinating card stock-Paver Red, Sour Apple, Primitive White and Lemon Drop.

Here’s a little peek at before, my circles covering the holes inside the front cover, and a look at the sticky notes/note paper inside.

Be sure to check out the MFT Blog for direct links to more October Release Rewinds.

Thanks for stopping by!

Frame/card Stamps: MFT LLD Holiday Subway Art, Seasonal Sentiments  Ink: MFT Paver Red, Timber Green   Paper: MFT Primitive White, Paver Red, Timber Green  Accessories:  MFT Country Charms and Barbed Wire Die-namics, Copic markers (E33, E35), hemp cord, Maya Road Star Pins, 6mm jingle bells, Paver Red buttons, X-Press It Foam Tape, Michael’s Frame.  Frame 6 1/2″ x 8 1/2″ with approx. 4″ x 6″ opening, card 4 1/4″ x 5 1/2″.
Notebook Stamps:  MFT LLD Holiday Subway Art, By the Numbers, LLD Document It-December  Ink: MFT Timber Green, Paver Red  Paper: MFT Paver Red, Sour Apple, Primitive White, Lemon Drop  Accessories: MFT Blueprints 7, MME rhinestones, Pick Your Plum notebook.  Finished size approx. 3 1/2″ x 5″.