Category Archives: This and That

Copic Coloring Guide Level 4 Blog Hop and Give-away

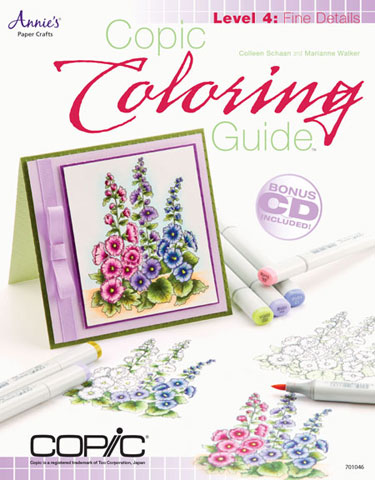
Good morning and welcome to a very special blog hop!  I’m certain you’ve heard about the release of the new Copic Coloring Guide, Level 4: Fine Details authored by Colleen Schaan and Marianne Walker.  Would you like to win a copy?  Of COURSE, you would!   :)

To help kick off the celebration, each designer on the hop is giving away a copy of the book. Please comment on this post* for your chance to win mine! Commenting will close at 9 a.m. EST, Monday, July 1st.  Winners will be announced on the individual designer’s blog.

*Contest (on this blog) limited to US and Canadian residences only.

The 64-page book is the latest in the Coloring Guide series, offering information and educational material for crafters of all skill levels.  From light source to shading and shadows, to mixing mediums and tackling detailed images, this book shows how to take your coloring up one notch further by focusing on the fine details.

An included CD contains all of the hand-drawn images used in the tutorial section of the book, along with the assembly instructions for all of the projects.  All information is presented in an easy-to-follow format.

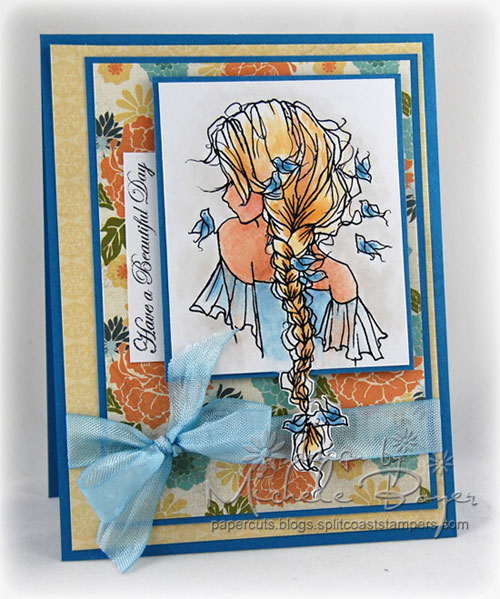
Here’s a peek at one of my favorite projects from the book using Braid in My Hair from A Day for Daisies.

Be sure to visit each and every designer listed below to better your chances of winning!  GOOD LUCK!  🙂

Copic Coloring Guide Level 4: Fine Details is now available at many stamping and scrapbooking stores. Visit your local store today and ask about availability.  It is also sold through the Annie’s catalog, accessible online at Annie’s.


Exciting News!

Details coming soon!  (If you can’t wait, here‘s a peek.)

If you’ve been visiting my blog for a while, you know what this means for you!  🙂

The Copic T-shirt Winner is…

SHARI GREEN!

🙂   Congratulations, Shari!!   🙂

Copic Book 3 Winner…and another Copic Give-away


Hi everyone!  I’m sure you’re eager to hear who has won the “Copic Coloring Guide, Level 3: People” book!

I’m excited to announce ALYSSA S as the winner! Congratulations, Alyssa! 🙂 I’ll be emailing you today.

How about another fun Copic give-away?

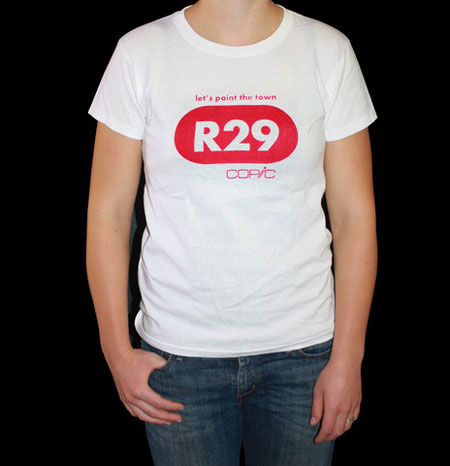
Check out this cool new t-shirt! “Let’s paint the town R29.”  I love it!  🙂

If you would like to win your very own (in your chosen size of course), simply leave a comment on this post.   I will randomly select a winner next Thursday, November 1st. (Oh my gosh… November already!)  Please note that this contest is open to US and Canadian residents only.

Be sure to visit the following blogs to increase your chances of winning!

Can’t wait to win?  You can purchase your own “Paint the town R29” shirt HERE. While there, check out our growing selection of limited edition t-shirts (all exclusive to the Copic site).

Good luck and happy hopping!  🙂


“Hope You Can Cling To” Challenge — Cards for Kids

Hi everyone!  Happy Monday!   In case you haven’t hear, there’s a lot of excitement going on over at Splitcoaststampers this month!

In combination with WCMD, SCS is proud to partner with UT MD Anderson Cancer Center for the third annual month-long card drive to benefit those affected by breast cancer.

With special challenges all month long (posted in the SCS Hope You Can Cling To Fourm), papercrafters are encouraged to put their talents to work creating beautiful handmade cards to send to patients and their families at the MD Anderson Cancer Center.   You can find all the details HERE.

When my friend, Lori, asked me to create a sample for her challenge (HERE), I couldn’t say no.  (Plus she said “pretty please.” 🙂  )  She has challenged us to create a card or two for kids.  You can use your own stamps of course or, if you’d like, Lori has attached in her challenge thread two digi files (including sentiments), one for boys, one for girls, illustrated by Marianne Walker.

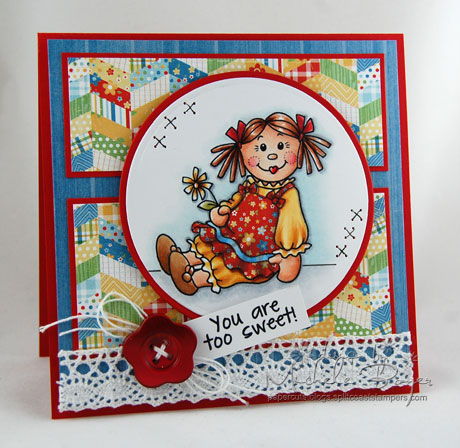
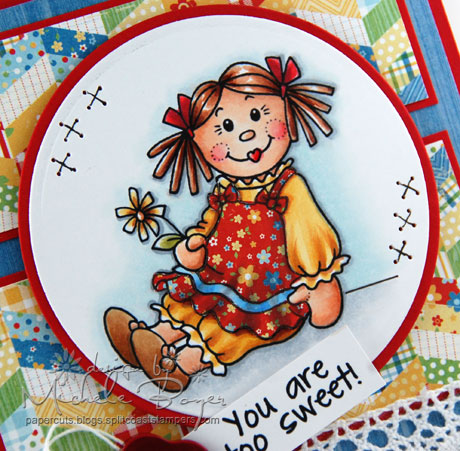
I chose to use Marianne’s *adorable* ragdoll.  As a child, I cherished my little Raggedy Ann.  (I still have her!)  So I couldn’t resist.

After coloring my image with Copics, I pieced the jumper, die-cut the image using My Favorite Things Circle STAX Die-namics, added gloss to the doll’s lips with a clear glaze pen and added the little faux cross-stitches using a piercing template, piercer and 0.25 black Copic Multiliner.

When uploading your creations to SCS, don’t forget to use keyword HYCCT1201B.

Thanks for playing along, and thanks for visiting!  Have a great day!

m.

Digi-stamp:  Stay Strong (compliments of Marianne Walker)   Paper: My Favorite Things Red Hot heavyweight cardstock, X-Press It Blending Card, My Mind’s Eye Six by Six “Playdate”   Accessories: Copic markers (E00, E11, E13, R20, E15, E18, E31, E33, E35, B21, B23, Y21, YR23, R22, R27, R39, C00, C1, C3, BG70, 0.25 black multiliner), clear Sakura 3-d glaze pen, My Favorite Things Circle STAX Die-namics, Melissa Frances trim, button, string, X-Press It foam tape.  Finished size 5″ x 5″.

An Exciting Contest with Taylored Expressions

Taylored Expressions is proud to announce the premiere of a new and exciting stamping talent competition, Last Card Standing. Based in part on very popular reality competitions such as Last Comic StandingProject Runway, and Chopped, TE is looking for the very best and creative card-makers to stamp their way to the top. Each week, finalists will be challenged to create a themed card for a panel of celebrity judges in hope of avoiding elimination. Finally, the Top 5 Finalists will be voted on by the public, with the stamper receiving the most votes to win the title of Last Card Standing!

What’s at stake? An amazing prize package that includes:

  • A 3- month subscription to the Key Ingredients kit club
  • Two full size stamp sets of the winner’s choice AND
  • A coveted Guest Designer spot for the November/December Release!

How do I fit into this fun venture? I’m one of your three guest judges!

The competition begins today with the Open Casting Round. To enter, simply upload your best cards to your Splitcoaststampers gallery using keyword: TELASTCARD.

For this round, ANYTHING GOES — Birthday, Thank You, Holidays, Get Well, Congratulations…the sky’s the limit! The only requirement is that you use at least one stamped image from Taylored Expressions.

Do you have a card that you think could get you a callback to the next round? Go for it — Submissions do NOT have to be a new creation for the Open Casting Round and you may enter as many cards as you want! Both new and old projects will be considered.

Deadline for submission to Open Casting Round: Thursday, September 20, 2012 by 11:59 pm PST.

For contest details, visit the Taylored Expressions Member Company Forum at Splitcoaststampers.

Good luck!  🙂


New MFT Feature – Creative Chat

Hi everyone.  🙂  There’s a new monthly feature at MFT, the My Favorite Things Design Team Creative Chat.   We’ll be challenged to explore our creative spaces and share valuable organizational methods, tools and shopping strategies with you. You’ll be able to peek into our creative spaces, ask questions and share your own ideas in the MFT forum.   Fun?  🙂

This month we were asked the following questions:

  •  How do you store and organize your Die-namics?
  • Any fun or helpful Die-namics purchasing strategies you’d like to share?
  • How do you store extra Die-namics die-cuts?

Visit Kim’s Blog for a full list of designers that have taken up the challenge and get ready to delve into the minds of our creative team!

Until this challenge came about, I had no organization for my Die-namics.  The border dies were standing in a jelly jar, rather tightly packed, and the other dies were just tossed into a plastic container in one big messy pile.  I have so many dies now that it was becoming a nuisance to “hunt” for the one piece I wanted.  This challenge was the perfect “boot-in-the-pants” to get organized.

Everything here is quite frugal.  Totally not fancy or exciting.  I didn’t purchase anything new but simply made use of what I already had around the house.
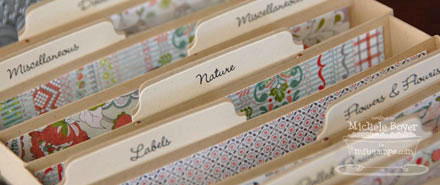
I created eight box-bottom “files” for my Die-namics.  (Directions below on creating the files.)  I die-cut labels for each using MFT’s File Tab Die-namics.  I attached the labels with brads rather than a strong adhesive so that I can rearrange or re-label as needed. 
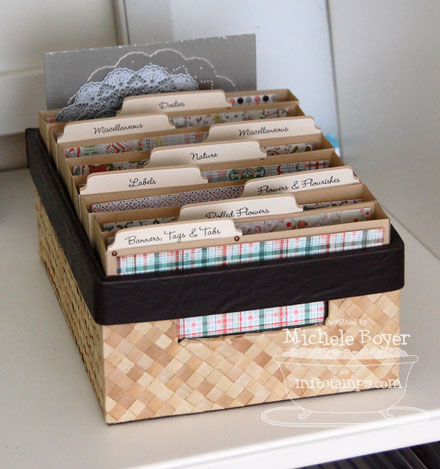
For now, I have “Banners, Tags & Tabs,” “Rolled Flowers,” “Flowers & Flourishes,” “Labels,” “Nature,” two “Miscellaneous” files, and one for “Doilies.”   I would suggest, however, that you attach the tabs before you assemble the files.  I would hate for you to accidentally push a needle under your pinky fingernail while punching holes for the brads.  Just sayin’….

For die sets with multiple or smaller pieces, I’ve placed each set in a small ziploc bag and filed accordingly.  (I found several sizes of small baggies at Walmart in their craft section.)
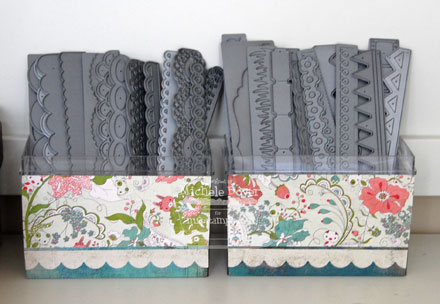
My border dies are now kept in two base containers that once held my Copics.  I was going to toss the containers, but then thought they would be perfect (for now) for holding my border dies.  I placed scallops and lacy-ish dies in one and miscellaneous in the other.  I covered the fronts with patterned paper, using Simply Scallops Die-namics to spruce up a bit.  I may add a flower or two later.
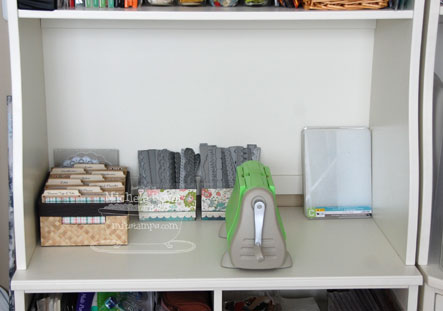
Here is my little die-cutting area (while it’s clean…which isn’t often).  Someday I hope to get a Vagabond but for now, I’ll crank away with my little Cuttlebug. 
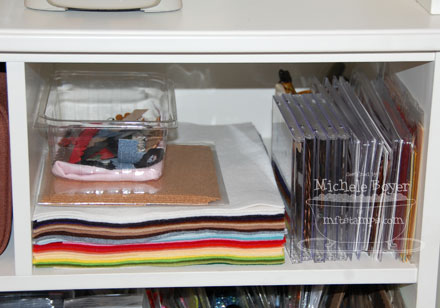
Below my die-cutting shelf, I have another little area that houses my felt, cork, Nestabilities and a little plastic container of extra die cuts.  (That’s the container that used to hold all of my Die-namics.  Eek!)   I try not to keep too many unused die-cuts, but sometimes they come in handy.

As for buying tips, I don’t have any.  I buy what I want, when I can afford it, and I think you should too.  🙂

How did I make the files?   In an effort to keep this post from being TOOOO long (which it probably already is, lol), my photos below are thumbnails. If you click on each you can see it in a larger format.
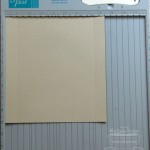
My basket is a little less than 6 3/4″ wide, 9″ long and 3″ deep so I wanted my folders to be 6 1/2″ wide, 1″ deep and 4″ tall.  I cut my Fossil cardstock to 8 1/2″ x 9″.  With the 8 1/2″ side horizontal to the top of the Scor-Pal, score at 1″ and 7 1/2″. 

.
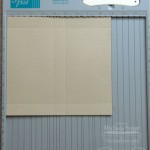
Turn your cardstock and score at 4″ and 5″.  This will form your box bottom.

.

.
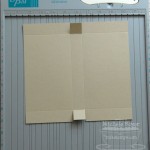
Clip the 4″ and 5″ score lines up to the 1″ horizontal score lines.

.

.
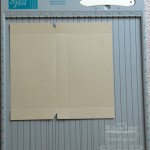
Clip one corner from inside edge on both sides of one flap.  This will help the folds come together without bulking.

.

.
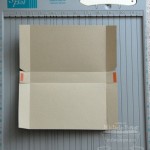
Using a bone folder or scoring tool, firmly crease all score lines; unfold.

Apply adhesive to small tabs.

.
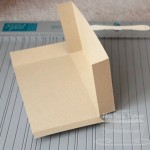
Remove red film from adhesive and adhere small tabs to outside edge of “corner-cut” tab.  (The small tab will be “sandwiched” between the two longer tabs and invisible from the inside and outside.)

.
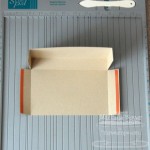
Apply adhesive to remaining long tabs.

.

.

.
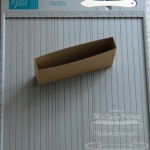
Remove red film and adhere tabs to form box.

Decorate as desired.  I applied patterned paper to the front and (back) inside of the first box, and just the (back) inside of the remaining boxes as that is all that is visible while boxes are in the basket.)

If you read this far, thank you!  lol.  If you have any questions, please feel free to ask.  🙂

Thanks for visiting!  Have a great day!  🙂

Copic Coloring Guide Winner & Pure Sunshine

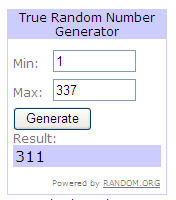
Congrats to #311, GABBE!  You’ve won an autographed copy of the Copic Coloring Guide from my blog!  I’ll send an email shortly requesting your address.  Thank you to everyone who played along!

🙂

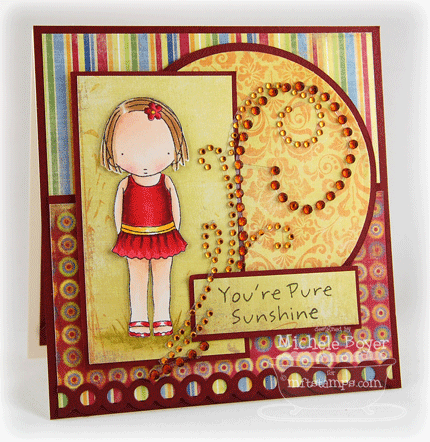
Today I have a card to share using one of My Favorite Things‘ recent releases, Make a Splash.

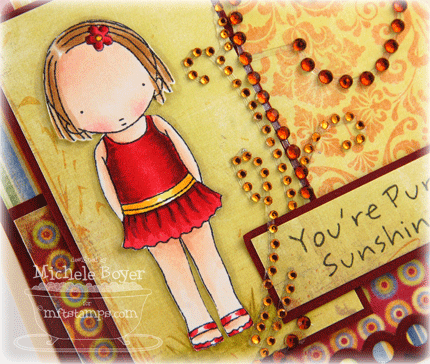
You’re Pure Sunshine

I stamped my girl onto Copic’s X-Press It Blending Paper, colored her, then cut her out to adhere over the patterned paper. 

I’ve just started using the X-Press paper and I have to say, it is FABULOUS.  My new favorite to color on, for sure.  (I bought mine from the MFT Boutique but it’s currently out of stock.)  I forgot to jot down the Copic colors I used on her little dress (bathing suit), but I used E000, E00, E11 and R20 for her skin with E31 and E33 on her hair.

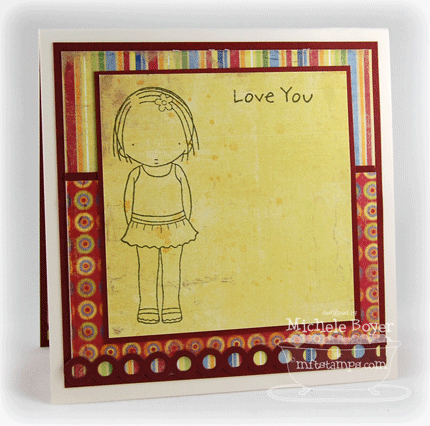
On the inside, I stamped the girl again, along with a sentiment from Heart Stripes, another Pure Innocence set.  Along the bottom (front and inside), I placed a die-cut strip of Dainty Dots Die-namics.

Thanks so much for stopping by!  Have a great day!

Stamps:  My Favorite Things “Make a Splash” and “Heart Stripes” (Pure Innocence)    Ink: Memento Tuxedo    Paper:  Papertrey Ink Vintage Cream (base), Prism Crabapple Dark, Copic X-Press It Blending Paper, Fancy Pants Beach Bum (6×6)     Accessories:   Copic markers, Prismacolor pencils, Spellbinders Nestabilities, Zva Creative crystal flourish, My Favorite Things Dainty Dots Die-namics, foam boosters.  Finished size 4 3/4″ x 4 3/4″.

Kraftin Kimmie Boxing Day Sale

Hi everyone!  Just popping in to let you know there is a HUGE Boxing Day Sale going on at the Kraftin Kimmie store!    Now through December 31st MOST of Kimmie’s inventory is 20% – 50% off!  

The store will be closed through December 27th and again from December 30 – January 4.  You are free to place orders during these times and they will be shipped out as soon as the office reopens.

I’ll be back soon!  🙂

m.

Krafty Khristmas Sale!

Just popping in to say that through December 5th EVERYTHING in the Kraftin Kimmie Store is 20% off!    Simply use the coupon code KK20 at checkout to save!

I’m off to drag myself to the store for several boxes of tissues.  I’m fighting a terrible cold.

Happy shopping!