Monthly Archives: July 2017

Using Copic’s New Sketch Fine Nib

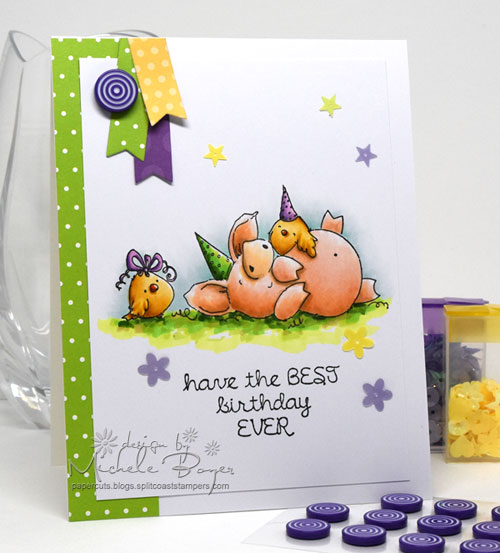
Hi everyone.  Today I am dreaming of vacation (and being thin enough for a bikini). 🙂  My card features Stamping Bella‘s Beachabella from the Bella 2.0 Collection.  I also used a new Fine nib for Sketch markers, now available from Copic.

Stamping Bella Beachabella (Bella 2.0 Collection)

A bit about Fine nibs from the Copic website:

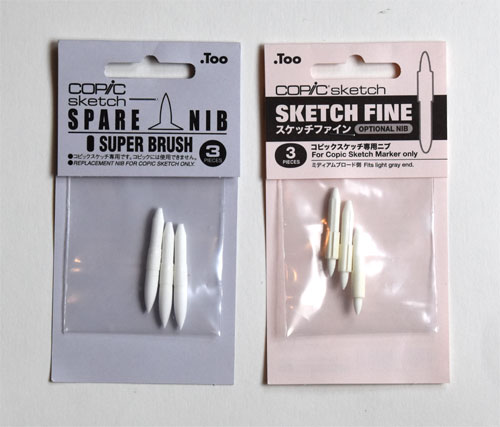
Fans of the popular Sketch marker now have a new, more precise nib to choose from. The Fine Nib is thin yet firm and leaves clean, consistent lines. The Fine Nib easily fits into the Medium Broad end of the Sketch marker and can be replaced as needed.

Relax-New-Sketch-Nib

While the nib fits easily into the Broad end of the Sketch marker,  I tried it in the Super Brush end and it fit perfectly there as well.  I now have two E35 markers, one with the Super Brush and one with the Fine nib. (I chose to have two separate markers because I refill from the Broad end and didn’t want to risk damaging either a Super Brush or Fine nib in the removal/replacement process. And I chose to place the Fine nib in an E35 marker as I very often use E35 for hair and furr.)

Stamping Bella Beachabella (Bella 2.0 Collection) with Copic Sketch Fine Nib

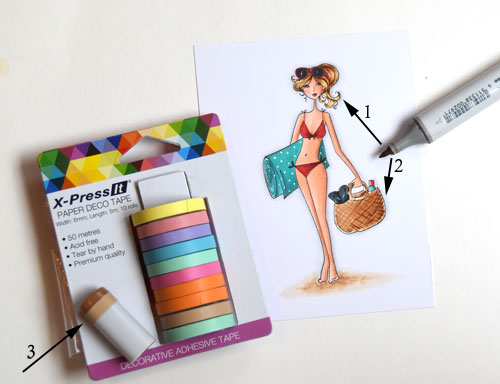
In the photo above, I marked where I used the Fine nib for (1) hair and (2) basket detail. To distinguish between my two E35 markers, I wrapped the Fine nib marker cap with deco tape (3).

Replacing with Sketch Fine nib; refilling marker

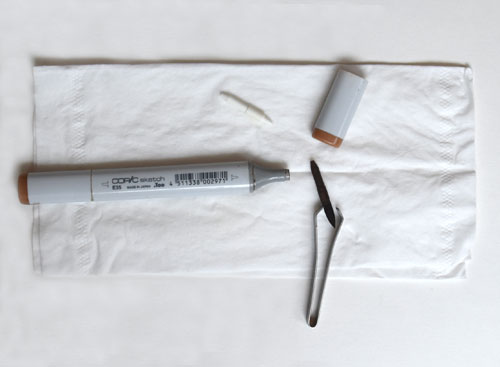
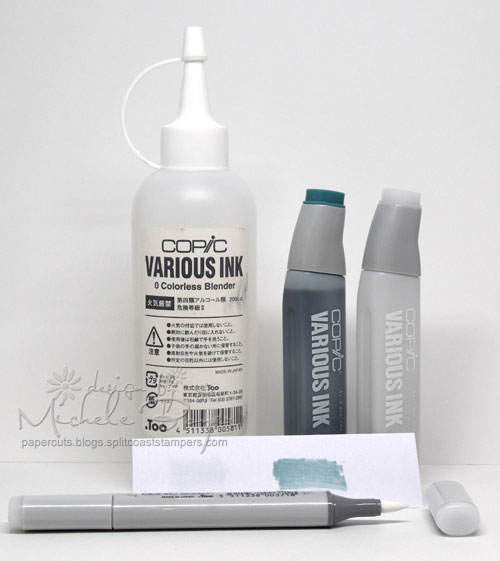
I used a nib tweezer to remove the existing Super Brush nib then simply inserted the new Fine nib.

Relax-Replace-Nib-Fill

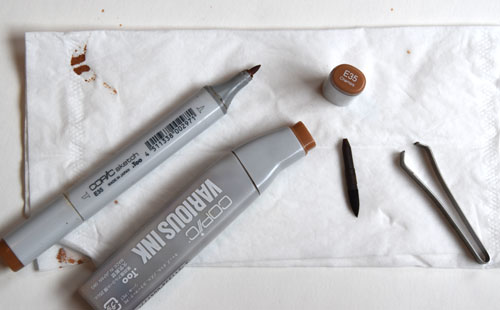
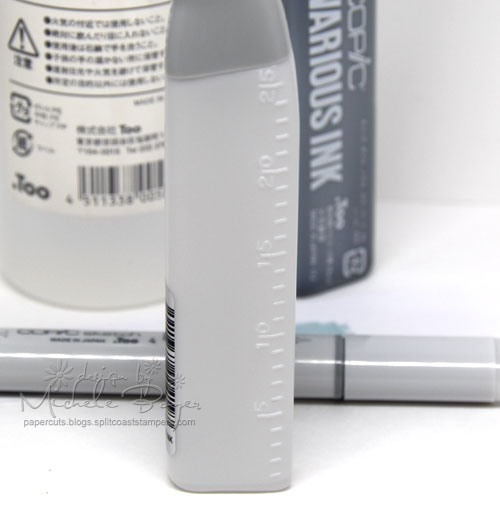
Once the nib was in place, I removed the Broad nib from the opposite end, refilled as usual with E35 Various Ink then placed the Broad nib back in the barrel. So easy.

Stamping Bella Beachabella (Bella 2.0 Collection)

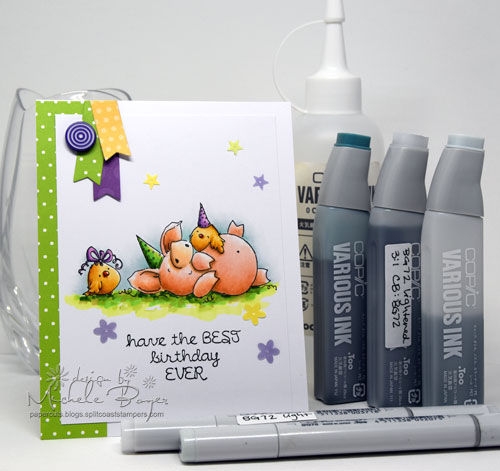
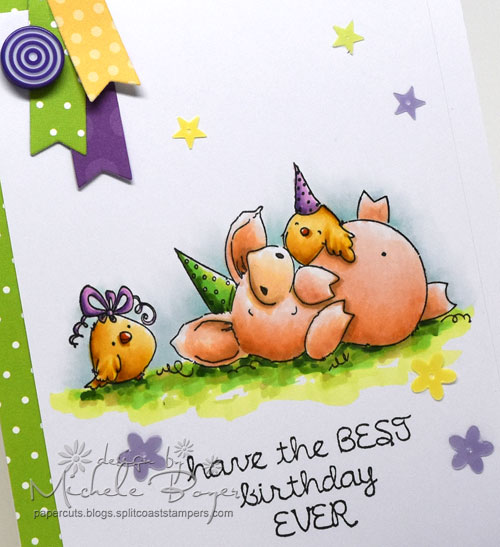
Copic markers – BG13, BG15, BG18, BG70, custom BG72, C00, C1, C3, C6, C7, C9, E01, E11, E30, E31, E33, E35, R20, R27, R56, R59, Y21; Copic Opaque White

I’m considering Fine nibs for my usual “go-to” skin marker choices as well. In which of your markers would you find a Fine nib helpful?

1amichele siggy

Watercolored Prayers (paper smooches)

Hi everyone! Today I have a card to share using two new dies now available from Paper Smooches.

Paper Smooches - 3d Cross and Prayers dies

3D Cross is a lovely set which includes the crosses as well as flowers, leaves, a heart, a feather and butterfly. The set would work great for Easter cards, Christmas or, in my example, a sympathy card paired with new Prayers die.

Paper Smooches - 3d Cross and Prayers dies (close-up)

To create the background, I scribbled Zig Clean Color Brush Markers onto an acrylic block then watercolored onto watercolor paper. The flower centers were colored with an R000 Copic marker. Very quick and easy (other than waiting for the watercolor paper to dry).  🙂

Thanks for visiting today! I’ll be back soon!

1amichele siggy

Creating Custom Copic Color for Petunia (stamping bella)

Welcome to another Bellarific Friday with Stamping Bella! This week the team is featuring July’s Stamp of the Month, Petunia has a Party which is 20% off through July 31.  I’m also sharing how to create your own custom color Copic marker using Various Ink and Colorless Blender.

Stamping Bella "Petunia Has a Party"

Sometimes I like to add a bit of blue or blue-gray around my images. BG70 is a very light blue-gray (or technically “blue-green“). It’s very nice for adding soft shading or bits of sky.

Stamping Bella "Petunia Has a Party"

Copic markers – BG70, custom BG72, E31, E50, E51, E53, G28, R00, R01, R02, V12, V15, V17, Y23, YG01, YG03, YG06, YG17, YR18, YR21, YR23

I wanted a slightly darker blue-gray for the areas right up against my image. BG72 is far too dark so I created my own custom blend of a lighter BG72, perfect for blending with BG70.

Comparison of BG70 to BG72

You can see on the swatch above just how much darker BG72 is than BG70. To create a nice “in between” color, I used Colorless Blender, an empty Colorless Blender Various Ink container and an empty Copic Sketch marker. Note that there is no number on the cap. (Empty Various Ink bottles are also available if an empty Colorless Blender refill bottle is not available.)

Close-up of measurements on empty Various Ink bottle

After removing the dropper from the refill bottle, I used the numbered measurements on the side of the container to add a ratio of 3:1 with three parts Colorless Blender, one part BG72.  Once mixed, I used a cotton swab to test my blend on paper. When experimenting on your own, the ratio may change depending on how light or dark you want your custom color to be. By filling only a portion of the bottle, room remains for any adjustments. Once you know the exact ratio needed to create your custom color, the whole bottle can be filled.

Custom color using Colorless Blender and BG72 to create lighter shade of BG72 to blend with BG70

Once I was happy with my custom color (indicated above as BG72L, L is for “light”), I replaced the dropper in the refill bottle then filled my empty marker and labelled it appropriately on the barrel as well as the cap. I also labelled the refill with the color as well as the formula so I can easily recreate it later.

Stamping Bella "Petunia Has a Party"

Once my card was assembled, I added a purple Lollies and sequins from Queen & Company. (Patterned papers are also from Queen & Company – Delightful Dots and Flirty Florals.)

Next week’s challenge includes this sketch:

July 14

Use any current Stamping Bella image then email your card to [email protected] by next Thursday to be featured on the SB blog and to be entered to win some Bella Bucks! (All challenge details can be found HERE.)

Thanks so much for stopping by! 🙂

1amichele siggy

Taylored Expression Retirement Sale

Taylored Expressions is bidding a fond farewell to over 120 products as we retire some of our favorite items with an amazing SALE. Choose from a variety of stamps and dies at prices up to 85% off — but hurry, once they’re gone, they’re gone forever! Visit the SALE HERE to start shopping!

thumbnail2

Plus, for a limited time, you can receive additional savings on these soon-to-be collector’s items. Additional discounts expire 11:59 pm CST on July 16, 2017.

Below are a couple cards I created a while back using two of the retiring sets.

Taylored Expressions Love Make the World Go Round Stamps and Die Set

Love Make the World Go Round Stamps and Die Set

Taylored Expressions, Hello Spring Stamp Set and Spring is in the Air dies

Hello Spring Stamp Set and Spring is in the Air dies

What’s on YOUR wishlist? (Really, I’d like to know!)

Happy shopping (HERE)!

1amichele siggy

Queen & Company Candles and Butterflies

Hi everyone! Today I have two shaker cards to share, each using some of my favorite items from Queen & Company.

Celebrate-500

On my first card I used Candles Shaker Card kit which includes (two each) card bases, acetate, card fronts and pre-cut foam. This card literally came together in minutes. I added in the patterned mat (from Heart Throb paper pad), toppings and flowers.

Celebrate-CU-500

Queen & Co. Candles Shaker Kit; sentiment by Paper Smooches

In the openings I used Fimo Fun, Posies, Pops and Diamonds. It would be so easy to turn this into a masculine card by simply changing the fillings, eliminating the Pom Poms and flower sequins and changing the sentiment font.

Hello-Butterflies-500

Another of my favorites from Queen & Company are the Shaped Shaker Butterflies. This set includes nine self-adhesive foam butterflies with precut acetate covers and three coordinating dies. My fave is the rounded wing butterfly I’ve used here.

Hello-Butterflies-CU-500

Queen & Co. Shaped Shaker Butterflies; hello die by Taylored Expressions

I adhered the foam shape and die-cut butterflies over Heart Throb patterned papers, filled the foam shape with Donuts and Pastel Diamonds then adhered a few pink Rivets once the card was assembled.

If you haven’t tried any of Queen & Company‘s shaker kits, I highly recommend them! They are so easy to assemble and SO much fun (otherwise known as “addictive”).  🙂

Thanks so much for visiting today!

1amichele siggy