Category Archives: Queen & Co.

More from Queen & Company’s new Garden Party Shaker Kit

Hi everyone! Today I’m sharing three more cards using Queen & Company‘s adorable new Garden Party Shaker Kit. You can find the first three cards I posted here.

On my first card, I decided to create a little bird house using the foam pieces without creating a shaker.  I like the dimension.  And the little bird.  🙂

I used Foundations Dies #4 (back in stock!) to die-cut the sentiment piece and added Polka Dot enamel dots to the flower centers.

Next I created a shaker wheel barrow, adding die-cut tools and seed packets.

Inside the shaker I used only toppings included in the kit.

And lastly, a boot with flowers.

Again, I used only toppings from the kit.

You can find all things Garden Party (kit, refills, etc.) in the Queen & Company shop HERE.  Also available is Garden Party Solids, a paper pad of 24 double-sided sheets of solid paper, perfectly coordinating with Garden Party patterned paper. Also, I highly recommend Sheer Glue for adhering paper and embellishments over acetate. It’s my favorite to use with the shakers.

Thanks so much for visiting today!

1amichele siggy

Queen & Company’s NEW Garden Party Shaker Kit

Hello everyone! I have a super fun and very “Springy” post to share today. Queen & Company has a new shaker kit, and it is perfect for creating cheery cards to wash away all the drabiness of winter.

Queen & Company Garden Party Shaker Kit

The new Garden Party Shaker Kit includes 36 steel dies, a lovely 6×6 patterned paper pad, a coordinating 4×6 clear stamp set, 21 foam/acetate shakers and 12 shaker toppings. It’s sooo cute and so much fun!

Queen & Company Garden Party Shaker Kit - Wagon

How cute is that wagon??? I used the coordinating Garden Party Outline Die to die-cut the base outline shape of the wagon. The outline dies are not required; they just make it easier to cut the base for the inside of the shaker. Sometimes I simply trace the base die shape and then trim to fit. (Clear as mud?)

Queen & Company Garden Party Shaker Kit - Wagon (close-up)

Behind the wheels and a couple of the flowers, I used foam squares cut from the negative leftover foam pieces. I also placed a gold Petite Posie in the center of each flower.

Queen & Company Garden Party Shaker Kit - Watering Can w/Flowers

Next, I created a watering can and flowers, layering atop a scalloped die from Foundations Dies #2.

Queen & Company Garden Party Shaker Kit - Watering Can w/Flowers (close-up)

Inside each flower center and scattered around the sentiment I placed some black Polka Dot Epoxy Dots. I love them. (The Polka Dot bundle is on sale if you love them too!)

Queen & Company Garden Party Shaker Kit - Window Box w/tulips

I also created a cute window box full of tulips. Check out the dirt shaker toppings. *Love*

Queen & Company Garden Party Shaker Kit - Window Box w/tulips (close-up)

I again placed some foam pieces behind a few of the tulips and stitched a heart button onto the die-cut hand trowel.

You can find all things Garden Party (kit, refills, etc.) in the Queen & Company shop HERE.  Note that also available is Garden Party Solids, a paper pad of 24 double-sided sheets of solid paper, perfectly coordinating with Garden Party patterned paper. As an additional note, I highly recommend Sheer Glue for adhering paper and embellishments over acetate. Of my handful of adhesives, I find that it works best. Just my opinion.  🙂

I’ll be back soon with three more fun cards using this kit!

Thanks so much for stopping by!

1amichele siggy

Fruity Fun

Hello everyone! I’ve been going through some things, lots of things, in my stamp room and in doing so, I decided it was time to revisit Queen & Company‘s Fruit Stand kit. Included are foam and acetate pieces for 18 shaker elements, a fruit themed paper pad, dies, toppings and a themed stamp set. All you need is base card stock and adhesive!

I adore the cute pineapple! I think it’s my favorite from the kit. Inside, I placed pineapple slices and a sprinkling of yellow Jelly Gems. Super sparkly Diamonds would like nice too!

In each of the flower centers I adhered a tiny pineapple slice.  The die used to cut the sentiment strip is from Foundations 4.

Next I created a quick and easy peachy thanks card.

Inside, I placed Pearls, Pops and Diamonds. As a finishing touch I added some white dots to the patterned papers.

You can find the Fruit Stand kit, refills, and a handful of other fruit themed items HERE.  So much fun!!

Thanks for stopping by today!

1amichele siggy

More from Queen & Company’s new Winter Wonderland Shaker Kit

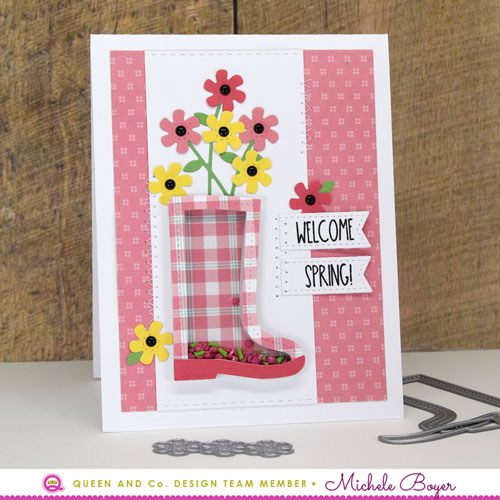
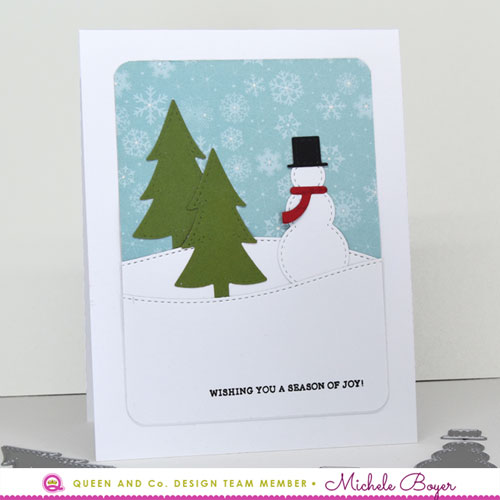
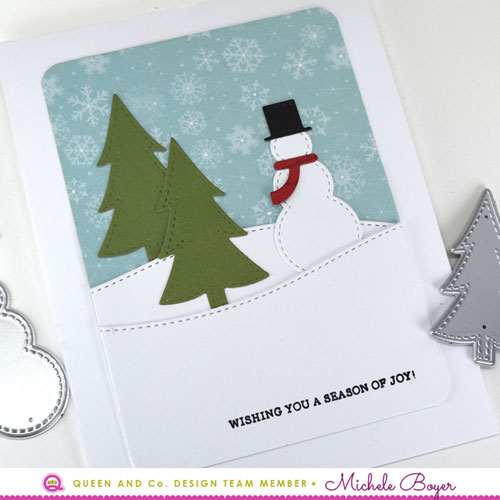
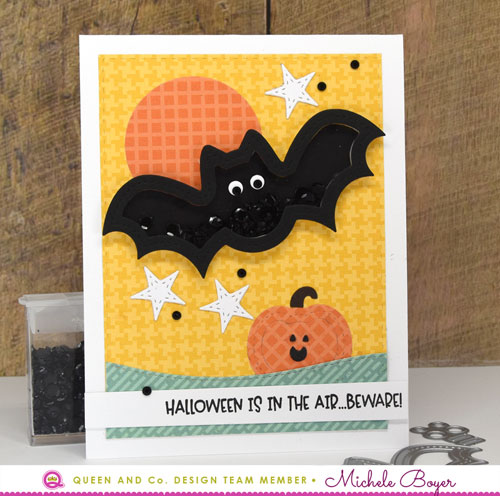
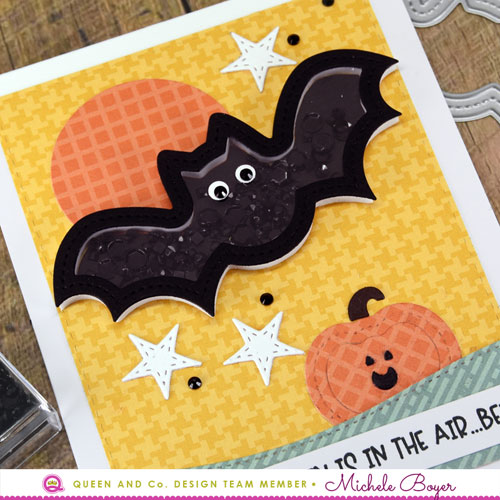
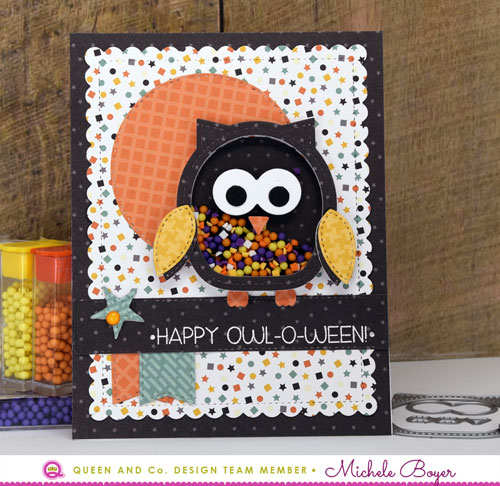
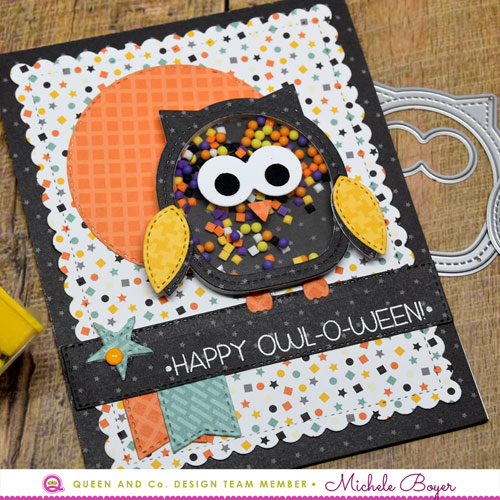
Hello everyone.  I’m back to share more of Queen & Company‘s new Winter Wonderland Shaker kit.  🙂 You can see my previous post/samples here. I had a lot of fun with this kit. There are just so many variations!  All of my samples are cards but the shakers would be so cute on scrapbook pages and gift tags as well!

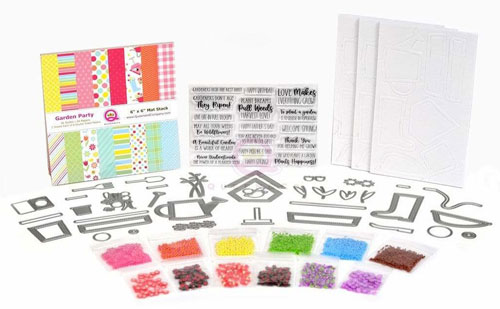
As mentioned previously: The kit includes 30 steel dies, 6×6 patterned paper pad, 3×4 clear stamps, eight exclusive shaker toppings and nine foam/acetate shakers.  As a holiday bonus, outline dies are included in this kit as well ($8.95 value).

Also available:  A coordinating Winter Wonderland Solid paper padtopping refills, and soon to be available foam and acetate refills. There are also Holiday Sprinkles 1 and Holiday Sprinkles 2 on sale.

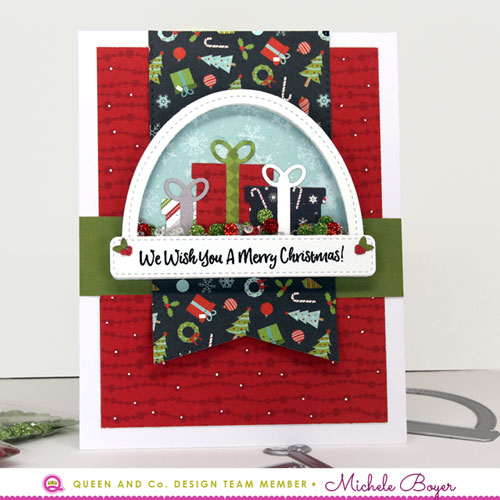
On this card I die-cut packages from the patterned paper.  Using the same “gift box” die, I varied the height creating the appearance of different sizes.

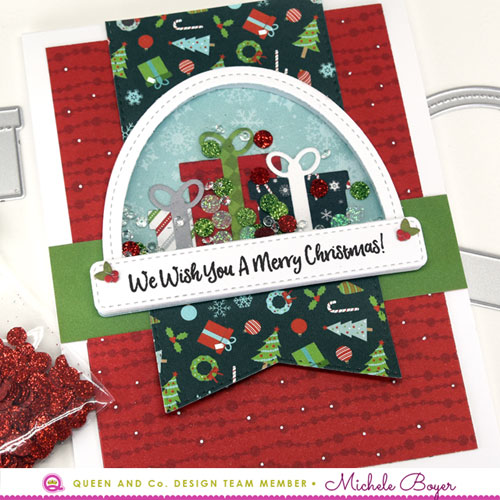
Inside, I placed shiny toppings from the kit as well as a sprinkling of clear diamonds. Once assembed, I adhered over a flag shape from Foundations 2, then layered atop the other pieces. As a finishing touch, I added white accent dots to the red patterned paper using a Kirarina Wink White Pearl pen.

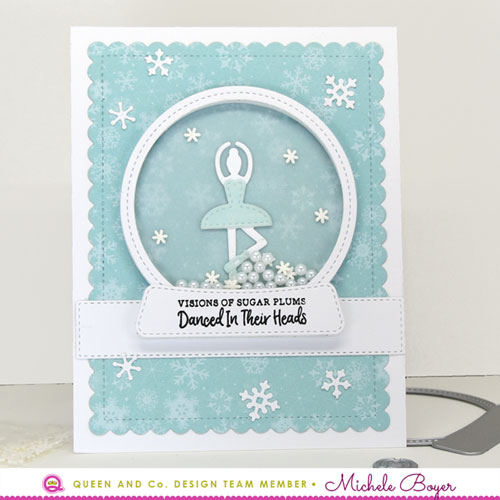
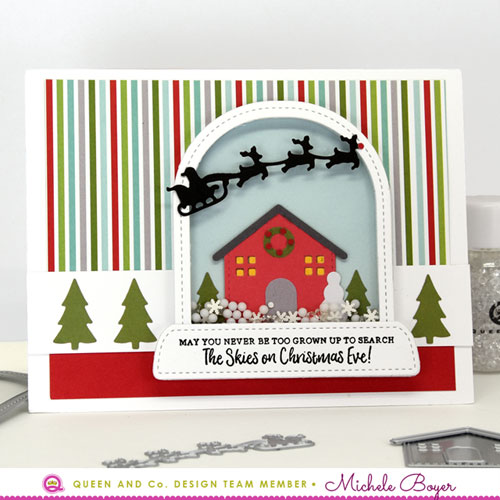
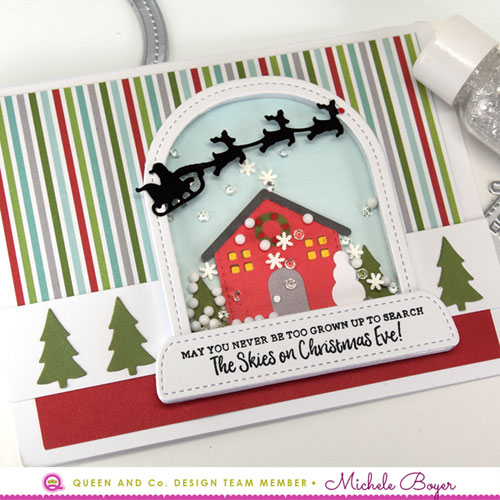
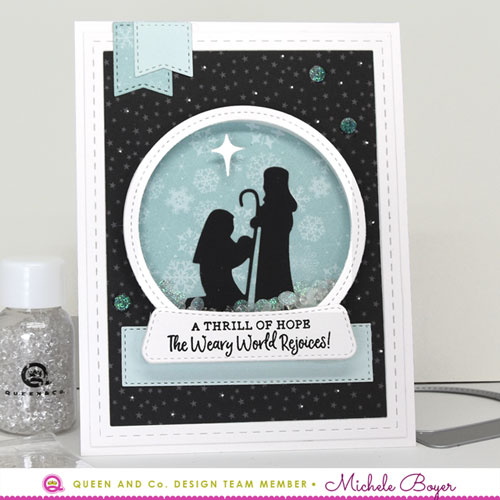
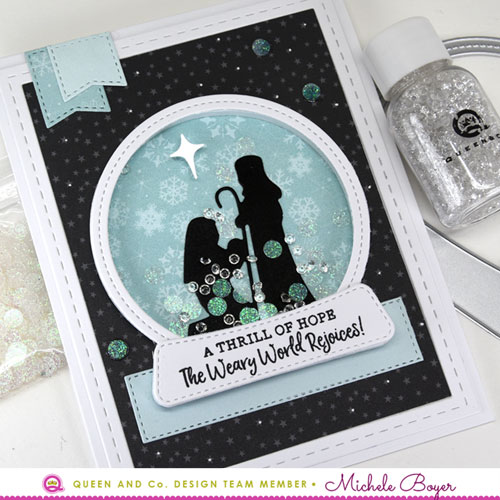
Here I used the super sweet ballerina in the round globe/shaker. I love that there’s a die for her tiny dress and teensy slippers. I die-cut a piece of vellum as the back of the shaker. The snowflakes still show through, they’re just a little more subtle.

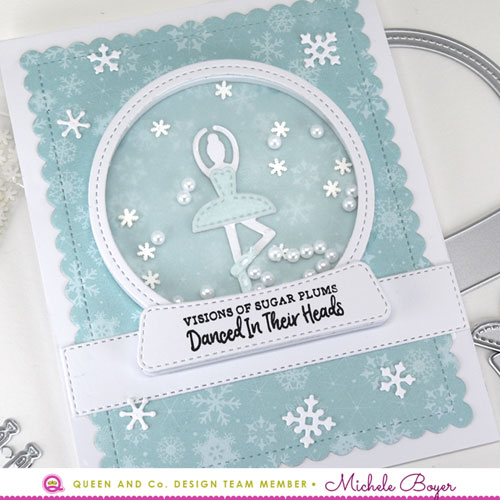
Inside, I used pearls and tiny snowflakes from the kit. Before securing the acetate over the shaker, I used Sheer Glue to adhere several of the tiny snowflakes within the globe so that when the card is standing, the snowflakes are still “suspended.”  The assembled globe was then adhered over a scalloped panel and stitched strip die-cut using Foundations 4.

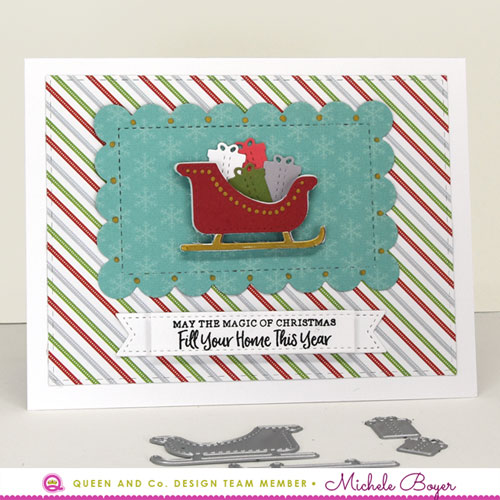
Lastly, I created a non-shaker card using the sleigh dies.  I first die-cut the sleigh from the leftover foam from the center of one of the globes. I then adhered a red die-cut sleigh over the foam, adding gold dots along the edge using a gold Zig paint marker. (A gold Sharpie would work just as well.) After die-cutting the rails, I colored over that piece with the gold marker as well, then adhered.

I placed the sleigh atop a scalloped rectangle from Foundations 2, tucking in a scattering of small die-cut gifts. The sentiment was stamped onto a flag strip, then cropped, placing the sentiment portion over foam tape.

You can find all of Queen & Company‘s current Black Friday options HERE.  (Warning…shaker cards are very addictive!)

Thanks so much for visiting today.  🙂

1amichele siggy

Queen & Company’s NEW Winter Wonderland Shaker Kit

Hello everyone! Queen & Company is beginning Black Friday early! You can check out the current offerings HERE. And just in time is brand new Winter Wonderland Shaker Kit. The kit includes 30 steel dies, 6×6 patterned paper pad, 3×4 clear stamps, eight exclusive shaker toppings and nine foam/acetate shakers.  Holiday Bonus: Outline dies are included in this kit ($8.95 value).

Also available is a coordinating Winter Wonderland Solid paper pad, topping refills, and soon to be available foam and acetate refills. There are also Holiday Sprinkles 1 and Holiday Sprinkles 2 on sale.  Whew! So much fun! I also highly recommend Sheer Glue.  It’s my favorite for attaching the card stock outline and attachments over acetate. 

Queen & Company Winter Wonderland Shaker kit

Here, I used the house, trees, snowman and reindeer/sleigh with patterned papers from the kit as well as extra solids. Berries on the wreath and Rudolph’s nose are just random tiny circles leftover from another die.

Queen & Company Winter Wonderland Shaker kit (close-up)

Inside I placed snowflake toppings from the kit along with white Pops and clear Diamonds.

Queen & Company Winter Wonderland Shaker kit

On this card I used the Mary and Joseph silhouette with dies from Foundations 4.

Queen & Company Winter Wonderland Shaker kit (close-up)

Inside I added irridescent sprinkles from the kit along with clear diamonds. (They’re my favorite and I use a lot of them!)

Queen & Company Winter Wonderland Shaker kit

It’s easy to create non-shaker cards with the kit too! Here I built a snowman, added a couple trees and snow drifts using Curvy Borders.

Queen & Company Winter Wonderland Shaker kit (close-up)

Once assembled, I added bright white dots in the centers of the snowflakes using a Kirarina Wink White Pearl pen, rounded the corners and adhered to my card base.

You can check out the Black Friday sale as well as Winter Wonderland kit and all extras HERE.

Thanks so much for visiting!

1amichele siggy

My Favorite Apple

Hello again! You may recall that Stamping Bella‘s Oddball Girl Mummy is 50% off through 10/31. Today the team is sharing creations using other images from the Oddball category. 

Stamping Bella Apple Cider Oddball

I just love Apple Cider Oddball, and the sentiment….so sweet. She was stamped onto X-Press It Blending Card and colored with Copic markers. I paired her with Queen & Company‘s Apple Shaker kit. Perfect!

Stamping Bella Apple Cider Oddball (close-up)

Copic markers – BG11, E000, E00, E04, E11, E21, E23, E25, E27, E29, E30, E31, E33, E34, E35, E40, E43, G21, G94, G99, R24, R29, R89, W2, Y21, YR23; Kirarina Wink White Pearl pen

After die-cutting the apple shapes from Happy Harvest patterned paper, I placed Pops, Sequins and Fruit Toppings inside.

Stamping Bella Curvy Girl Loves Halloween

Copic markers – BG13, E000, E00, E04, E11, E21, E31, E35, E37, G28, R24, R29, V09, V99, W1, Y17, Y21, Y38, YG06, YG09, YR14, YR18

Also this week, I posted on Instagram Curvy Girl Loves Halloween from the latest release. With her, I used Fright Fest patterned paper and Taylored Expressions’ Starry Night cutting plate.

NEXT WEEK’S CHALLENGE

Create using the photo below and any current Stamping Bella image.

All challenge details can be found HERE.

Thanks so much for visiting today!

1amichele siggy

Queen & Company’s Fruit Stand Shaker Kit

Hello everyone! Last week I shared several cards using Queen & Company‘s super fun Frankie & Friends Halloween shaker kit. You can see my post here. Today, I have two cards using the Fruit Stand kit.

The kit includes 14 dies to create six different fruits, all foam and acetate pieces to create three of each fruit (or 18 shakers), eight exclusive fruit-shaped toppings (shaker pieces), a Fruit Stand patterned paper pad and a coordinating stamp (sentiment) set.  Refills are available as well:  foam and acetate pieces, Fruit Stand toppings, and Fruit Stand patterned paper pad. Also available separately is Fruit Stand Solids which is a pad of perfectly coordinated solid papers. For a bit more variety, the Fruit Basket paper pad is still available also.

Isn’t the Fruit Stand paper pretty? I love it. Inside the raspberry and peach, I used my Kirarina Wink White Pearl pen to add accent dots to the pattern. And inside the pineapple I placed super cute tiny pineapple toppings, which are included in the kit, as well yellow Diamonds (currently sold out but available in the Happy Harvest Topping refill).

Next I used the cherry dies to create a sweet thank you card.  The stitched circle and outer scalloped circle were die-cut using Foundations 1 dies.  I used the scalloped die as a “template” with my MISTI to create the perfect bend of the sentiment.

Inside the cherries I placed pink and white Pops toppings.

I’ll be back soon with three more cards to share using the Fruit Stand kit. It’s sooo cute. Thanks for visiting today!

1amichele siggy

Queen & Company’s NEW Frankie and Friends Halloween Shaker Kit

Hi everyone! Earlier this week I shared on Instagram some samples using Queen & Company‘s new Frankie & Friends Halloween Shaker kit and thought I’d share here as well. Queen & Company’s kits are sooo much fun to use! And they’re easy too!

The kit includes dies to create seven characters, all foam and acetate pieces to create three of each character (or 21 shakers), seven colors of square toppings, a Frankie & Friends patterned paper pad and a coordinating stamp (sentiment) set.  Refills are available as well:  foam and acetate piecessquare toppings, Frankie & Friends patterned paper pad. Also available separately is Frankie & Friends Solids, a pad of perfectly coordinated solid papers.

On the card above, I used square toppings as well as Pops inside the shaker and stitched a few orange star buttons scattered about.

Frankie is my favorite of the characters. I also love the sentiments that coordinate with him. 🙂

Here I used the square toppings inside the shaker and extra dies from Foundations 2.

Next I created a scene using the bat and top portion of the pumpkin die as well as Curvy Borders and stars from Foundations 2.

Inside the bat I placed black square toppings as well as some black Confetti Sequins. As a finishing touch I also adhered a few black Jelly Gems.

Lastly, I used the cute owl dies with Foundations 1 (circle), 4 (tab and scalloped rectangle) and 2 (star).

Inside the shaker I used the square toppings as well as Pops. There’s also an orange epoxy dot adhered to the star.

I highly recommend Sheer Glue for adhering the die-cut outlines over the acetate. It’s great for adhering any embellishments but I especially like it for adhering over the acetate.

I’ll be back soon to share samples using Q&C’s pretty new Fruit Stand kit! Have a great day! Thanks so much for checking out Frankie & Friends! 

1amichele siggy

Queen & Company’s Leaf Shaped Card Kit

Hello everyone! With a bit of crispness in the air, I thought I’d share a card I created using Queen & Company‘s Leaf Shaped Card kit.

If you’re unfamiliar with Q& C’s shaped card kits, let me tell you they are so much fun and so easy to use. Each kit includes shaker dies, an outline die, a coordinating 2×3 stamp set, four foam/acetate shakers, four shaped cardstock bases and four envelopes. The leaf die measures about 5″ x 5″ so I think it’s great that appropriately sized envelopes are included in the kit.

With my shaker I used Happy Harvest patterned paper, green, yellow and orange buttons, Sequin toppings and sentiment tag attached with yellow trim. Also, I highly recommend Sheer Glue for attaching the acetate or any embellishments.

Queen & Company has quite a few Shaped Card kits. ALL so much fun! I hope you’ll check them out.

Thanks so much for stopping by today!

1amichele siggy

Queen & Company’s Pumpkin Shaker Kit

Hello everyone.  🙂  Today I thought I’d share three cards I created using Queen & Company‘s Pumpkin Shaker Kit. How is it even possible that fall is right around the corner? In some respects this year has dragged and in others, it seems to be flying by.

The Pumpkin Shaker Kit includes the pumpin shaker die, pumpkin outline die, a 2″ x 3″ stamp set, four foam/acetate shakers, four shaped cardstock bases and four envelopes. The finished size is approximately 4 3/4″ x 4″.  The kit is very easy and so much fun! I also recommend Sheer Glue as the perfect adhesive for embellishments and especially acetate.

Queen & Company Pumpkin Shaker Kit

On my first card, I paired the shaker with Happy Harvest patterned paper.  The paper pad has the perfect mix of lively patterns for the inside and solid patterns for the outline and stem.

Queen & Company Pumpkin Shaker Kit (close-up)

Inside I placed a mix of orange and green buttons, Sequin Confetti and Pastel Diamonds. The buttons are also available in a collection of all  seven colors HERE.

Queen & Company Pumpkin Shaker Kit

Next I used the Pumpkin Shaker kit and Hocus Pocus patterned paper to create a Halloween shaker.

Queen & Company Pumpkin Shaker Kit (close-up)

Inside I used Bitty Buttons in black, orange and yellow, Pops, Sequin Confetti and Gems. On the stem, I used black string and an Orange Flower button. A collection of all eight packages of pretty Flower Buttons can be found here and nine packages of Bitty Buttons here.

Queen & Company Pumpkin Shaker Kit

Lastly, I created a more traditionally colored shaker pumpkin using Special Delivery paper pad.

Queen & Company Pumpkin Shaker Kit (close-up)

Inside I placed orange and yellow Bitty Buttons with orange and white Pops.  I die-cut two flagged strips, stamped the sentiment and adhered to the pumpkin outline using hemp cord.

You can find a large assortment of shaker kits HERE. Refills too!

Thanks so much for visiting today!

1amichele siggy