Monthly Archives: August 2017

(air)Brushed and Blended Butterflies

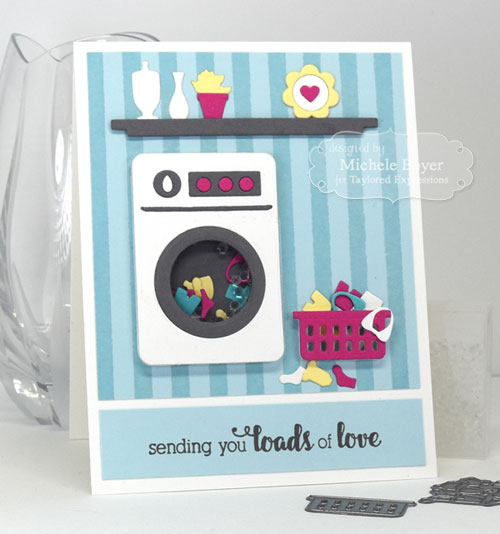
Hi everyone! I’m popping in today with a card I created using my Copic airbrush/compressor, Sketch markers and Colorless Blender. Using a combination of the three, I created and background and image, using ink to only stamp the butterfly bodies and sentiment.

Airbrush-thanks-CU

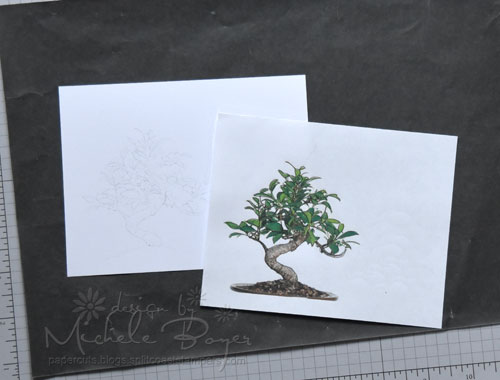
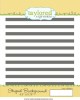
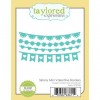
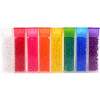
I first airbrushed Y17, Y13 and YR04 onto a block of glossy card stock. I let that dry while I ran several errands. Once the ink was dry, I placed a rubber butterfly stamp (from Taylored Expressions’ Simply Stamped Butterflies) onto an acrylic block. I spritzed the stamp with Colorless Blender then carefully stamped the butterflies onto the airbrushed card stock.

Airbrush-thanks-500

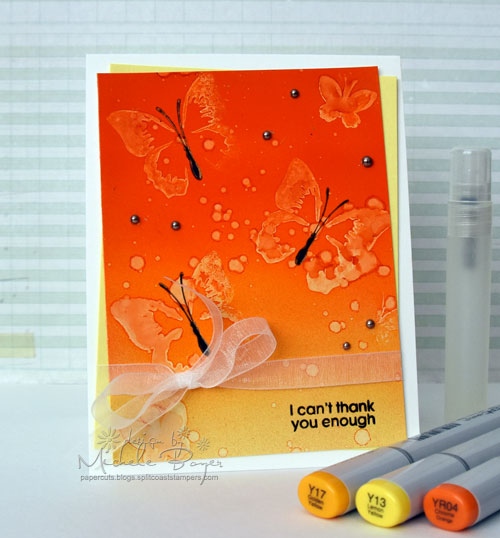
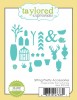
Upon contact, the Colorless Blender pushes away the ink, leaving the impression of the butterfly. Pretty cool! Once the butterflies were dry, I removed the sprayer/straw from my mini spritzer containing the Colorless Blender and flicked some drops of Colorless Blender over the butterflies. Then once that was dry, I stamped the butterfly bodies and sentiment (from Paper Smooches Many Thanks).

Airbrush-post

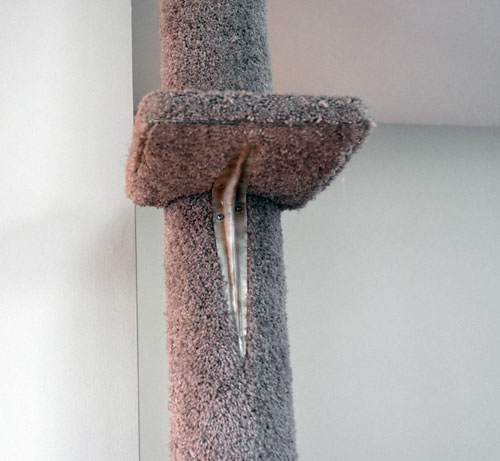
On a totally different creative note…my husband built a very tall cat post with three shelves using on empty (heavy-duty) carpet roll, carpet and wood blocks for shelves. Beneath the shelves he had used bright white brackets. They stood out like a sore thumb but I used my airbrush to spray the brackets so they’d blend in a bit more with the surrounding carpet. The post isn’t the prettiest item in my house but it’s in an inconspicuous spot. I love my two cats and they like the post and shelves. (If they only loved each other…)  Anyway, the airbrush came in quite handy.

Have you used an airbrush for anything other than artwork? If so, I’d love to hear about it.  🙂

At only 9.9 pounds, the air compressor is lightweight, runs quietly and is very portable. It’s perfect for airbrushing with Sketch or Classic Copic markers and takes up very little space.

On the Copic website are several airbrush options as well as airbrush supplies and more detailed information.

Thanks so much for visiting today!

1amichele siggy

Stamping Bella Preview – Garden Girl Marigold

Hello everyone! It’s time for another preview from Stamping Bella‘s September 4 release! I’m curious, what is your favorite so far? I’m not sure I could choose just one.

Today I’ve used new Tiny Townie Garden Girl Marigold with another sentiment from new Fall Sentiments.

Stamping Bella Garden Girl Marigold

I just adore the Garden Girls. They are SO cute and such fun to color. 🙂

Stamping Bella Garden Girl Marigold (close-up)

Copic markers – BG70, BG72 (custom), E09, E31, E35, G46, W00, W1, Y21, Y19, YG63, YG67, YR07, YR09, YR18

After coloring with markers, I adhered a few perfectly matching Orange Sunflowers from Queen & Company. (You can see all colors here.) The Delightful Dots patterned paper is from Queen & Company as well.

Be sure to stop by the Stamping Bella blog to see all of today’s preview images and samples!  And don’t forget to leave a comment while there for the chance to win a $25 gift certificate to the Stamping Bella shop. Good luck!

1amichele siggy

Stamps: Stamping Bella Tiny Townie Garden Girl Marigold, Fall Sentiments Ink: Taylored Expressions Oreo  Paper:  X-Press It Blending Card, Taylored Expressions Sugar Cube, Queen & Company Delightful Dots patterned paper  Other: Copic markersQueen & Company Orange Sunflowers.

Stamping Bella Preview – Pumpkin Kisses

Hi everyone! Welcome back to another preview from Stamping Bella‘s September 4 release! Today I’ve used Littles Playing in the Leaves. I adore the new Littles line. It’s so much fun to create scenes with all of the “little” pieces.  🙂

Stamping Bella Littles Playing in the Leaves

After stamping onto X-Press It Blending Card, I colored with markers and drew in the little flying trails coming from the leaves. The sentiment, from new Fall Sentiments, was stamped onto and layered over fishtail flags then stitched to the card front with a wood heart button.

Stamping Bella Littles Playing in the Leaves (close-up)

Copic markers – BG70, BG72 (custom), E00, E01, E11, E07, E09, E31, E35, E37, Y21, Y32, YG93, YG95, YG97, YG99, YR16; 0.25 black Multiliner

Be sure to stop by the Stamping Bella blog to see all of today’s preview images and samples!  And don’t forget to leave a comment while there for the chance to win a $25 gift certificate to the Stamping Bella shop. Good luck!

1amichele siggy

Stamps: Stamping Bella Littles Playing in the Leaves, Fall Sentiments   Ink: Taylored Expressions Oreo  Paper:  X-Press It Blending Card, Taylored Expressions Sugar Cube, Playful Patterns Haunted patterned paper  Other: Copic markers, 0.25 black Multiliner, button, linen thread.

Stamping Bella September Release, Preview Day 1

Hi everyone! It’s Preview Week with Stamping Bella!  On September 4, all kinds of cuteness comes to the Stamping Bella shop. I literally did not know where to begin!  Fall, Halloween, flowers, and so much more.  🙂

Stamping Bella Tiny Townie Hattie Loves Halloween

My sample today uses new Tiny Townie Hattie Loves Halloween along with Fall Sentiments. Isn’t she adorable? I love her big hat. Fall Sentiments is a lovely combination of fall and Halloween sentiments, some of which can be used year round.

Stamping Bella Tiny Townie Hattie Loves Halloween

Copic markers – BG70, BG72 (custom), C7, E00, E01, E11, E31, E35, E37, G94, V09, V15, V17, YR23

I colored Hattie with markers then adhered around her a variety of tiny die-cut stars.

Be sure to stop by the Stamping Bella blog to see all of today’s preview images and samples!  And don’t forget to leave a comment while there for the chance to win a $25 gift certificate to the Stamping Bella shop. Good luck!

1amichele siggy

Stamps: Stamping Bella Tiny Townie Hattie Loves Halloween, Fall Sentiments Dies: Taylored Expressions Starry Night Cutting Plate, Stitched Rectangle Stacklets  Ink: Taylored Expressions Oreo   Paper: Taylored Expressions Oreo, X-Press It Blending Card  Other: Copic markers

Queen & Company’s Fruit Basket Shaker Kit

Hi everyone! Today I’m sharing two cards I created using Queen & Company’s latest shaker kit, Fruit Basket. This kit is incredibly fun with nine dies, the cutest toppings ever, a large punny sentiment set, coordinating paper pad, twine and, of course, the precut foam and acetate shapes. Oh yes, there are also epoxy dot stickers as well as droplet stickers that look just like watermelon seeds.

Fruit Basket Shaker Kit - Lemons

On my first card, I used bright stripes from the Fruit Basket paper pad along with the lemon shape die and foam shapes. I die-cut the lemon from yellow card stock then inked the edges with yellow ink to create a bit of definition.

Fruit Basket Shaker Kit - Lemons (close-up)

Inside the lemons, I adhered lemon print then added two colors of lemon toppings. I used my favorite lemony sentiment and finished the card with a tie of yellow twine.


Fruit Basket Shaker Kit - Apples

Next, I used the apple dies with coordinating paper. I first made the shaker then added the second apple, nipping out the extra portion of apple outline. For a bit of variation, I used two different shades of green card stock for the leaves.

Fruit Basket Shaker Kit - Apples (close-up)

Inside, I placed some tiny apple toppings. (They are the cutest ever!!)

In addition to the Fruit Basket kit, you can also find extra fruit toppings, fruit paper pad, acrylic fruit shapes and refill fruit foam and acetate. (Because you know once you start, you’re going to run out of certain pieces…)  🙂

Thanks so much for visiting today!

1amichele siggy

Supplies:  Fruit Basket Shaker Kit

It’s the Sweet, Simple Things of Life (stamping bella)

Hi everyone. Welcome to another Bellarific Friday with Stamping Bella. Today I have a card to share using Macaron Bouquet.

While on vacation, I recently tried my very first macaron. I must say it was absolutely *nothing* like I had expected. I always thought the top and bottom were cake-like. Nope, not at all. Unfortunately, I was only able to try one but it was magnificient and you can be sure that the next time I happen upon macarons, I will be walking away with a bag of them, not just one. ♥ ♥ ♥

Stamping Bella - Macaron Bouquet

So last week’s challenge was to use this photo as inspiration:

Aug 25

*sigh* I want to eat those macarons!  Haha. (I could do without the milk though. Yuck.)

Stamping Bella - Macaron Bouquet (close-up)

Copic markers – BG11, BG13, BV02, BV13, R22, R24, YG03, YG07, YG17

Next week’s challenge is to create anything you’d like.  Use any current Stamping Bella image then email your card to [email protected] by next Thursday to be featured on the SB blog and to be entered to win some Bella Bucks! (All challenge details can be found HERE.)

Thanks so much for stopping by!

1amichele siggy

Stamps: Stamping Bella Macaron Bouquet  Dies: Taylored Expressions Frame in Frame 2  Ink: Taylored Expressions Oreo  Paper:  X-Press It Blending Card, Taylored Expressions Sugar CubeCookie Monster  Other: Copic markers, Taylored Expressions Enamel Shapes.

Paper Smooches September Blog Hop

It’s Pep Rally week and we are here today to share a sampling of the NEW Paper Smooches SEPTEMBER 2017 release!  FOUR new stamp sets and FOUR new dies will be available to purchase at 8:00 p.m. PT on August 31st. You will find our new products HERE once they go live.

To add extra fun to our hop, we are offering a $25 gift code to choose what you like from the PS online store.

Here are the details:

  • FOUR winners will be chosen at RANDOM from any of the design team blogs and the PS Blog to win the $25 prize.
  • Just leave a comment on any of the design team blogs listed below or the PS blog for your chance to win!  (You do not need to comment on all blogs to qualify but it increases your chances.)
  • Deadline: You have until midnight PT on Sunday, Augus 27th to leave a comment.
  • Please check the Paper Smooches blog on Monday, August 28th to see if you are one of the FOUR lucky winners.

To increase your chances of winning:

  • Tell us that you Facebooked about our blog hop.
  • Tell us that you Tweeted about our hop.
  • Tell us that you posted on your blog about our blog hop.

Today I’ve used new Dinky Doodles 2. This stamp set is loaded with tiny images, perfect for cards, tags, planners and more!

Paper Smooches Dinky Doodles 2

I stamped the leaves and chick then colored with markers. The tiny leaf trails were added with a Copic Multiliner.

Paper Smooches Dinky Doodles 2 (close-up)

Copic markers – E35, R37, R39, W00, W1, Y21, Y23, YG95, YG97, YR16, YR31, YR68; 0.25 Black Multiliner

Alice extended her vacation a bit, so we have a wonderful replacement for her for the blog hop but you will see her creations later this month.  Samantha Mann is stepping in for her and I am super excited about that – woohoo!

Be sure to hop along and comment with the rest of the DT to increase your chances of winning one of four $25 gift codes.

 Thanks for visiting!  Good luck, and happy hopping!

1amichele siggy

Stamps: Paper Smooches Dinky Doodles 2, Fall Sampler  Dies: Paper Smooches Leaves 2, MFT Fishtail Flags and Fishtail Flags Layers  Ink: Taylored Expression  Oreo  Paper: Taylored Expressions Watermelon, X-Press It Blending Card, Carta Fall Blessings  Other: Copic markers and Multi-liner, linen thread

Thinking of You – Using Transfer Paper

Hi everyone! Today I’m popping in to share a card I created using Graphite Transfer Paper by X-Press It.

Transfer-Paper-1-500

X-Press It Transfer Paper allows for very easy transferring of designs onto a variety of surfaces to include paper, wood, metal, glass, fabric, canvas, etc. The transfer paper is available in graphite which is what I used, as well as white for use on darker surfaces.

Graphite-Paper-1024x768

Transfer Paper is ink-jet compatible, non-smudging, easily erases like pencil and washes out of fabric.

Transfer-Paper-1b-500

In an earlier post, I printed an image directly onto the transfer paper for easy transferring onto card stock.

Transfer-Paper-1a-500

Today however, I printed the bonsai tree onto regular printer paper. I placed the transfer paper, graphite side down, onto my card stock then layered the printed image atop and traced. There was no smudging whatsoever of the graphite onto my card stock. Only the traced lines appeared on the paper.

I prefer to print the image directly onto the white side of the transfer paper, but my printer and I have not been getting along very well lately. The transfer paper is excellent no matter which method is used.

Transfer-Paper-1c-500

Once traced, I colored with markers then completed my card.  It’s a fun technique. I hope you’ll give it a try! If you do, please link your work below in a comment so I can see.  🙂

Thanks for visiting today!

1amichele siggy

Together is My Favorite Place to Be (stamping bella)

Hi everyone! It’s another Bellarific Friday with Stamping Bella! Last week’s challenge was to create a thank you or thinking of you card. I used Squidgy & Teddy.

Stamping Bella - Squidgy and Teddy

After stamping onto my favorite white card stock, I colored with markers then added a few enamel shapes.

Stamping Bella - Squidgy and Teddy

Copic markers – BG70, custom BG72, E00, E01, E11, E31, E33, E35, E37, E47, E79, R01, R29, R59, W00, W1, W2, W3, Y21

Across the top, I added a few flags die-cut using Taylored Expressions’ Skinny Mini Valentine Borders.

Next week’s challenge is to create using this inspiration photo:

Aug 25

Use any current Stamping Bella image then email your card to [email protected] by next Thursday to be featured on the SB blog and to be entered to win some Bella Bucks! (All challenge details can be found HERE.)

Thanks so much for stopping by!

1amichele siggy

Stamps: Stamping Bella Squidgy and Teddy  Dies: Taylored Expressions Skinny Mini Valentine Borders  Ink: Taylored Expressions Oreo  Paper:  X-Press It Blending Card, Taylored Expressions Sugar Cube, Cherry Pop, Plum Punch and Rainbow Brights; MFT Limelight  Other: Copic markers, Taylored Expressions Enamel Shapes.

Loads of Love Shaker Card

Hi everyone! I seem to be on a roll with shaker cards lately. They’re just so much fun! 🙂

Today I’ve used Taylored ExpressionsSpin Cycle shaker die with Spin Cycle Sentiments.

Spin Cycle Shaker Card, Taylored Expressions

In the washer I placed some Little Bits Clothing Confetti along with some clear Tiny Bubbles from Queen & Company.

Spin Cycle Shaker Card, Taylored Expressions

The clothing is in (and around) a Little Bits Laundry Basket, and above the washer I added some elements from Sitting Pretty and Sitting Pretty Accessories.

I especially like the Spin Cycle Sentiments. Lots of cute laundry play-on-words phrases.  🙂

Thanks for visiting today!

1amichele siggy