
It’s time for another Dirty Dozen/Dirty Dozen Alumni challenge. This time the focus is to use stamps designed by fellow Dirty Girls or as an alternate choice we could semi-case something by a fellow Dirty Girl . The required element is to use a Spring color combination with a restriction of no diecut/embossing machines (i.e. Cuttlebug). So I decided to use one of Lisa Strahl’s backgrounders from Cornish Heritage Farms and semi-case myself.
If you’re a member of the Splitcoast Fan Club, you may remember this card that I made in November 2005. (You can only see it if you’re a Fan Club member. If you’re not a Fan Club member, you can get details on joining here.) So in this first card, my girl is wearing her little denim skirt, showing off her hip belly button bling. Well, some time went by and she met this great dude, got married and sported this little number…which has, in turn, lead to this:
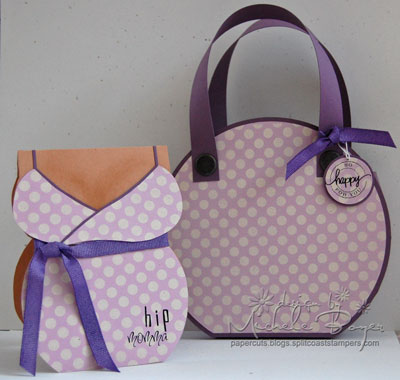
Yes, she’s in the “family way.” She’s still hip, but she’s had to put away the belly button bling…for a while, anyway.
I followed the same premise as the lingerie card but added a lot more curves.
I thought it would be nice to have a matching gift bag to go along with the card so I made my own (nice and round… like her belly). Here’s how I did it:
Cut two 6 1/2″ circles from the dark plum cardstock and two 6 1/4″ circles from the light plum cardstock. I stamped the Large Polka Dot backgrounder using vanilla craft ink on the light plum circles. (Since the circles were wider than the stamp, I used my stamp-a-ma-jig to line up the dots for the remaining part of the circle.) Remove 1/2″ from the bottom of each circle and adhere the lighter pieces to the darker ones.
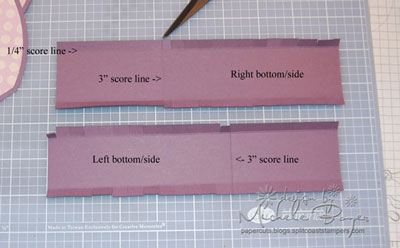
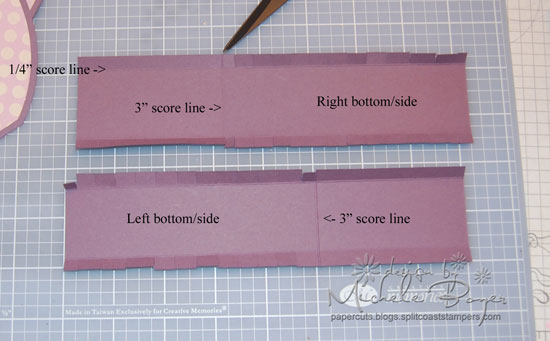
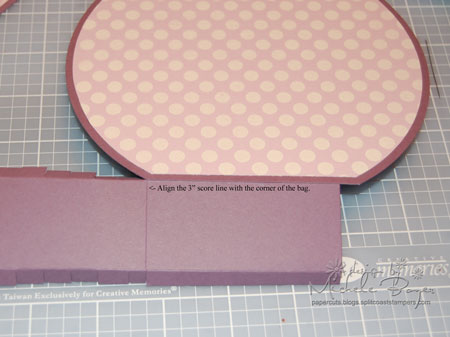
For the sides, cut two 8″ x 2″ strips of dark plum cardstock. Score in 1/4″ along each long side. Score in 3″ from one short side on each piece. From this 3″ score line, snip along the length of the strip, only going in as far as the 1/4″ score line. (Don’t snip past the 3″ score line.)
.
.

Adhere the first side piece, aligning the 3″ score line with the bottom corner of the bag. Continue adhering up the side of the bag, bending the side piece to fit along the curve.
.
.
.
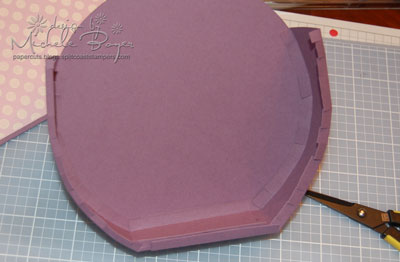
Begin adhering the second side, aligning the 3″ score line of the second strip with the other bottom corner of the bag, overlapping the 3″ lengths of the strips on the bottom.
Apply glue (or your adhesive of choice–I use Tombow Mono Multi) to the exposed tabs and bottom edge and adhere the second side of the bag, aligning the edges with the curve of the side. I poked my scissors down inside the bag to help with alignment.
For the handles, cut two 9 1/2″ x 3/4″ strips of dark plum cardstock. Adhere each end to bag using big brads.
I can’t wait to see what the other DDG’s have created! Click here to see. Thanks so much for looking!!! Have a great day!
Cardstock: SU Creamy Caramel, Perfect Plum, Pale Plum Ink: SU Creamy Caramel and Vanilla craft Stamp: Large Polka Dot backgrounder by Cornish Heritage Farms Rub-ons: Deja Views ‘Congrats,’ One Heart One Mind ‘A Mother is…’ and Lil Davis Designs ‘Black Alphabet’ Accessories: Karen Foster Biggie Brads, ribbon, Creative Memories Circle Cutter, 1 ¼” and 1 3/8” circle punches, pop dots, sponge. Card size 4 ¼” x 5 ½”.


33 responses to “Belly Button Bling, Chapter 3”