Monthly Archives: September 2018

Happy Halloween from a Pile O’ (Oddball) Pumpkins

Hi everyone! It’s time for another Bellarific Friday with Stamping Bella! This week we’re featuring images from the latest release.

Stamping Bella Oddball Pumpkin Pile

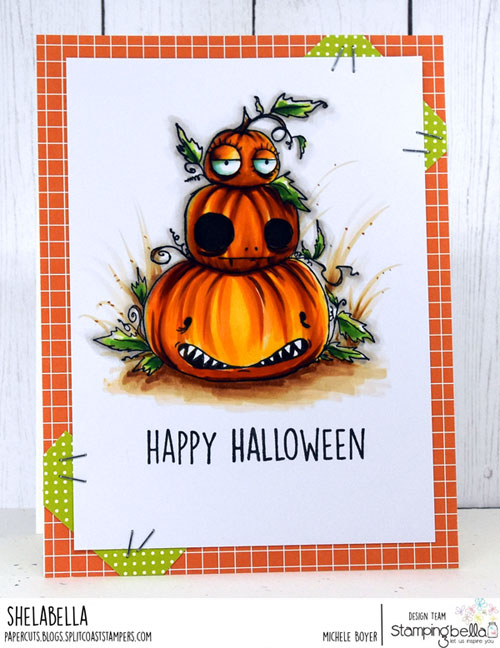
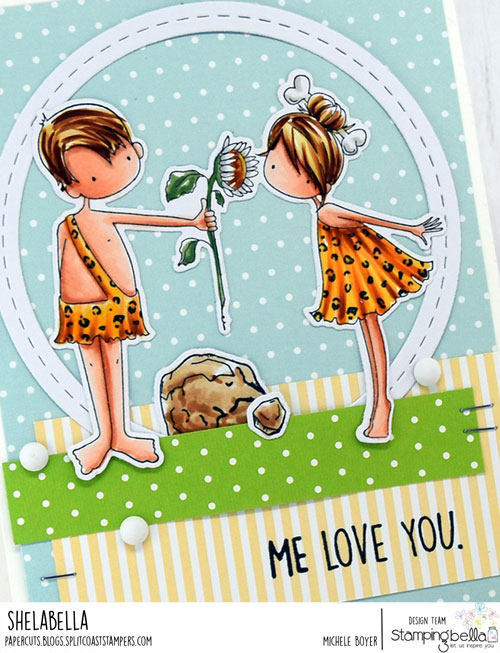
I’ve used Oddball Pumpkin Pile. I love each of their expressions. Haha. (You can find all of the Oddball line HERE.)

Stamping Bella Oddball Pumpkin Pile (close-up)

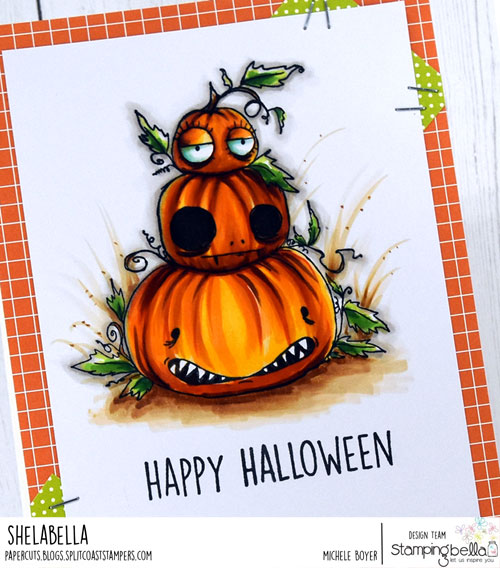
Copic markers – BG11, BG13, E30, E31, E33, E35, E37,G29, W00, W1, W2, W3, Y17, Y23, YG03, YG06, YG17, YR14, YR15, YR18

After coloring with Copic markers, I added a bit of wispy grass in the background.

Stamping Bella Reindeer Family

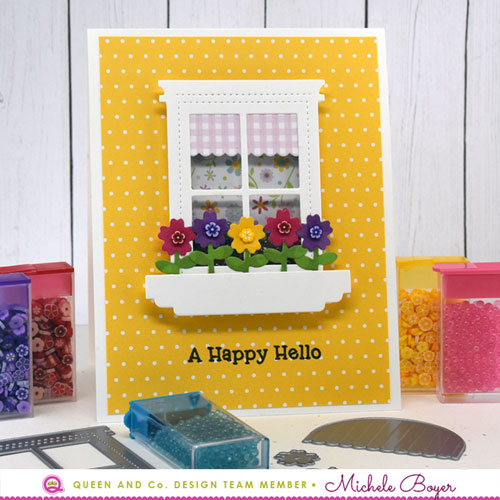
Earlier this week, I posted the card above, using new Reindeer Family, on Instagram.

Stamping Bella Reindeer Family (close-up)

Copic markers – E27, E30, E31, E33, E35, E59, G24, G28, R00, R29, R59, R89

In the background, I first die-cut a circle then embossed with a Holly embossing folder. I framed the circle with gold foil and added the deer.

NEXT WEEK’S CHALLENGE

Use any current Stamping Bella image. (No restrictions.) If you’d like, email your card to [email protected] by next Thursday to be featured on the SB blog. By doing so, you’ll also be entered to win some Bella Bucks! All challenge details can be found HERE.

Thanks so much for visiting today!

1amichele siggy

Leave a Little Sparkle (stamping bella)

Hi everyone. Today I’m sharing a card that features myself as the focal point.  Haha. I *want* to leave a little sparkle, but I’ve been sick with the flu. The same thing happened last year. Flu in September. Why. Isn’t that supposed to be a winter thing? Anyway, I’m feeling better. I just still have a horrible-sounding cough and congestion. Ugh.

Stamping Bella Oddball Sparkle Fairy

Today I’ve used Oddball Sparkle Fairy from Stamping Bella.  She’s sprinkling her own kind of sparkle.  🙂

Stamping Bella Oddball Sparkle Fairy (close-up)

Copic markers – BG10, BG11, BG13, BV02, BV04, BV08, E00, E01, E11, E13, E37, E99, G28, W00, W1, W2, W7, W9, 100, Y23, YG06, YG17, YR23, YR24

Once colored with markers, I added a bit of subtle glitter to her wings and stars/skulls using a clear Wink of Stella Glitter brush.

I’ll be back on Friday with this week’s Stamping Bella challenge.  See you then!

1amichele siggy

i dig you (paper smooches)

Hi everyone. I thought I’d pop in to share a few cards I created recently using Paper Smooches stamps and dies. 🙂

Paper Smooches Woofers & Tweeters

Copic markers – C1, C2, R81, R83, R85

First, I’ve used cute Woofers and Tweeters.  I colored the dog with Copic markers then cut out and adhered over a strip of Queen & Company‘s Simple Stripes patterned paper. Over the stripes, I added a die-cut heart.

Paper Smooches Falling For You

Copic markers – E50, E55, E57, E89, R29, R39, W00, W1, W2, W3, YG06, YG09, YG17

Next, I’ve used Falling for You. After stamping the heart seeds, I added some Glossy Accents to create a bit of dimension. Again, I used Queen & Company‘s Simple Stripes patterned paper.

Paper Smooches Let's Celebrate

Lastly, I created a quick and easy birthday card using Let’s Celebrate and Let’s Celebrate Icons dies. I tied a bit of string around the balloons and then to the openings in the celebrate die-cut.

Thanks for visiting! I’ll be back soon.  🙂

1amichele siggy

Stamping Bella’s Cave Kids

Hello everyone. Welcome to another Bellarific Friday with Stamping Bella! This week  we’re using images from the same category as the September Stamp(s) of the Month, which includes Bella’s Exclusive Images.  Additional exclusive images can be found here and here.  As a reminder, through September 30 Set of UnicornsUnicorn Add-ons and Unicorn Sentiments are all available at 25% off. This includes the coordinating dies as well.

Stamping Bella Cave Kids

I chose to use Cave Couple with a bit of Cave Kids Add Ons (rocks).

Stamping Bella Cave Kids (close-up)

Copic markers – E00, E01, E11, E31, E33, E35, E37, R01, W2, Y17, Y21, YG63, YG67, YR14, YR15

I stamped onto X-Press It Blending Card, colored with Copic markers then die-cut the image which is layered on Queen & Company‘s Simple Stripes and Delightful Dots patterned papers.  I also added some white Rubber Bubbles.

Stamping Bella Lulu's Morning Fix

Earlier this week on Instagram I posted the above card using Lulu’s Morning Fix.  I love Lulus.

Stamping Bella Lulu's Morning Fix (close-up)

Copic markers – BG11, BG15, BG18, BG75, E00, E01, E11, E33, E35, R85, RV32, W00, W1, W2, W3, Y21, YG63, YR23, YR27

Copic markers used are listed above.

NEXT WEEK’S CHALLENGE

Use an image from the latest release.  If you’d like, email your card to [email protected] by next Thursday to be featured on the SB blog. By doing so, you’ll also be entered to win some Bella Bucks! All challenge details can be found HERE.

Thanks so much for visiting today!

1amichele siggy

Queen & Company’s Window Shaped Shaker Kit

Hi everyone! Today I’m sharing two cards using Queen & Company‘s new Windows Shaped Shaker kit. With three basic window shapes and accessories, many different looks are possible! The kit also includes foam and acetate shapes as well as a coordinating stamp set.

Queen & Company Windows Shaped Shaker Kit

To create my first window scene, I die-cut the window and flower box shapes from white card stock.  Behind the window, I used pretty patterns from Flirty Florals paper pad to create wallpaper and a gingham curtain.  Yellow Delightful Dots paper was used as the outside of the home.

Queen & Company Windows Shaped Shaker Kit (close-up)

Within the window shaker, I used several coordinating colors of Iridescent Bubbles.  The flower box was raised on foam tape with the stems tucked inside and die-cut flowers adhered atop. (The flower center toppings I used are no longer available but these Love Jar Flower Toppings are a cute alternative.)

Supplies: Windows Shaped Shaker kit, Flirty Florals paper pad, Delightful Dots paper pad, Iridescent Bubbles, Sheer Glue

Queen & Company Windows Shaped Shaker Kit

Next, I created a window as if the front of the card is actually the inside of the home. I used a square die to cut a square from the Flirty Floral paper then adhered acetate and the white window frame over the opening. The awning die was used to create a curtain which “hangs” from a thin strip of card stock colored with a brown marker to resemble a curtain rod.

Queen & Company Windows Shaped Shaker kit (close-up)

The front panel was raised on foam tape so that flowers could be adhered behind the window as if growing from an outside planter. In the flower centers I adhered clear Iridescent Bubbles.  I created a tag for the sentiment, tying on with baker’s twine.

Supplies: Windows Shaped Shaker kit, Flirty Florals paper pad, Iridescent Bubbles, Sheer Glue

Thanks so much for visiting!

1amichele siggy

you are so sweet (stamping bella)

Happy Friday, everyone. If you’re in the path of Florence, I am thinking of you! Please be safe!

This week the Stamping Bella team is using images not from the latest release.

Stamping Bella Tiny Townie Sammy is Sweet

I’ve used Tiny Townie Sammy is Sweet.  She comes along with the sentiment I used here as well as an accessory stamp of a trio of small hearts.

Stamping Bella Tiny Townie Sammy is Sweet (close-up)

Copic markers – E00, E01, E11, E25, E27, E29, E30, E31, E33, E35, E37, E50, E53, R27, R39, R59, R81, R83, R85, RV32, Y00, Y17, Y21, Y23, YR23, W00, W1, W2

After coloring with markers, I die-cut with a stitched frame, adhered to Queen & Company‘s versatile Simple Stripes patterned paper, then added a few enamel hearts.

Stamping Bella Tiny Townie Layla Loves Leaves/Fall Sentiments

Earlier this week, I posted the above card on Instagram.

Stamping Bella Tiny Townie Layla Loves Leaves/Fall Sentiments (close-up)

Copic markers – BG10, BG11, BG70, E00, E01, E07, E08, E09, E11, E23, E25, E27, E29, E30, E31, E33, E35, G21, G24, G85, G94, R00, R01, W00, W1, W2, W3, Y17; Kirarina Wink White Pearl pen

I used Tiny Townie Layla Loves Leaves with a Fall Sentiment.

NEXT WEEK’S CHALLENGE

Use an image from the same category as the March Stamp(s) of the Month ( Set of UnicornsUnicorn Add-ons and Unicorn Sentiments. ), which means use an image from Stamping Bella’s Exclusive Images.  Additional exclusive images can be found HERE and HERE.  If you’d like, email your card to [email protected] by next Thursday to be featured on the SB blog. By doing so, you’ll also be entered to win some Bella Bucks! All challenge details can be found HERE.

Thanks so much for visiting today!

1amichele siggy

Ribbiting News (paper smooches)

Hi everyone! I’m popping in today with a card I created using Paper SmoochesBear Frog Card dies.

Ribbiting-News-CU

Shaped Card dies are perfect for creating super fun and super FAST cards. I just love the frog.  🙂

Ribbiting-News-500

I used eyelashes from Cat Dog Card die set as well as a sentiment from Critter Card Puns. Along the top and bottom edges of the sentiment strip, I die-cut lines of dots using a Dots & Dashes die.

Thanks for visiting today!

1amichele siggy

Always be Yourself (stamping bella)

Hi everyone! It’s the first Friday of the month which means it’s time to share samples using Stamping Bella‘s Stamp of the Month. Actually, this time there are three, all of which coordinate nicely – Set of Unicorns, Unicorn Add-ons and Unicorn Sentiments. All sets, including their corresponding dies, are on sale for 25% off through September 30.

I used Unicorn Sentiments which includes six sentiments and one unicorn image, as well as an accessory image of stars.

Stamping Bella Unicorn Sentiments

I first used a Rainbow Cutting Plate to die-cut pink Delightful Dots patterned paper from Queen & Company.  Using the outline as a guide, I adhered the stripes and blocks then removed the outline.

Stamping Bella Unicorn Sentiments (close-up)

Copic markers – BG10, BG11, C00, C1, C2, R00, R39, R83, R85, RV32

I colored the unicorn with a handful of Copic markers (noted above) then added a few tiny star sequins near the sentiment.

NEXT WEEK’S CHALLENGE

Use a vintage Stamping Bella image, meaning one NOT from the current/most recent release. (If the image is not listed in the “what’s new” category, then it’s considered “vintage.”) If you’d like, email your card to [email protected] by next Thursday to be featured on the SB blog. By doing so, you’ll also be entered to win some Bella Bucks! All challenge details can be found HERE.

Thanks so much for visiting today!

1amichele siggy

Queen & Company’s New Magical Characters Kit

Hi everyone! As a big Disney fan, I was super excited to see Queen & Companys new Magical Characters kit. The kit contains a themed paper pad, 11 dies, 13 super-cute toppings, 15 foam shaker shapes and a coordinating stamp set.  So much fun!

Im-All-Ears-500

To create my first card, I die-cut one large and two small black circle shapes then glued them in place over pink patterned paper from the Magical Characters paper pad.  I used the bow die to die-cut the outline from white card stock, then used the outline of the die as a template to cut the floral paper. I adhered the floral paper behind the white die-cut outline then attached over the ears using foam tape.

Im-All-Ears-500-CU

I stamped the sentiment onto a white card stock strip then used the larger circle die to cut the ends to the curve of the black circle. The left and right edges of the sentiment strip were adhered with a slight gap left between the two pieces.

Supplies: Magical Characters Kit, Sheer Glue

Quite-a-Character-500

Next, I created a Donald Duck look-a-like card using patterned paper from the Magical Characters paper pad and the bow die.

Quite-a-Character-500-CU

In the shaker, I placed red, yellow and white Confetti toppings, then stamped the sentiment in white ink and white embossed.

Supplies: Magical Characters Kit, Confetti toppings, Sheer Glue

There are so many possibilities with the Magical Characters kit. And it’s perfect for scrapbooking those magical vacation memories!  Magical Character foam/acetate refills, toppings, magical ribbon and paper pad are also available individually.

Thanks so  much for visiting!

1amichele siggy

Stamping Bella September Previews – Holiday Oddballs

Hi everyone! I’m back with one more set of Stamping Bella September 5 release previews! Today the team is sharing new holiday themed Oddballs!  I have three.  All were stamped onto X-Press It Blending Card and colored with Copic markers.

Stamping Bella Oddball Santa & the Missus

First I have Oddball Santa and the Missus.  They look tired…as they probably are. 😉  NOTE: I added the tiny scribbles onto Santa’s list. The stamp image of his paper is actually blank.

Stamping Bella Oddball Santa and the Missus (close-up)

Copic markers -BG10, E00, E01, E11, E33, E35, E37, E50, G05, G07, G29, R29, R39, R89, W00, W1, W2, W4, W5, W7, 100

The images are separate so they can easily be used together or individually. The sentiment I’ve used here is also included.

Stamping Bella Oddball Reindeer

Next I’ve used Oddball Reindeer. The set includes three reindeer and the sentiment I used here.

Stamping Bella Oddball Reindeer (close-up)

Copic markers – BG11, E30, E31, E33, E35, G09, G28, R01, R29, R39, R89, W00, W1, W2, W5, W7, W9

After coloring, I stitched two small jingle bells to the ends of the scarf on the reindeer on the right.  🙂

Stamping Bella Oddball Boy Elf

Lastly, I’ve used Oddball Boy Elf. He comes with the sentiment I used here.

Stamping Bella Oddball Boy Elf (close-up)

Copic markers – BG11, E00, E01, E11, E30, E31, E35, E37, G28, R29, R39, R89, W00, W1, W2, W7, W9, Y19, Y21, YG17, YG23, YG25

Before adhering the completed panel to my card front, I added a few gold cord stitches on the left.

Be sure to stop by the Stamping Bella blog today to see more previews of additional sets. And leave a comment there for your chance to win a prize!

Thanks so much for visiting today! 🙂

1amichele siggy