Category Archives: Lizzie Anne Designs

Trees Teach Us

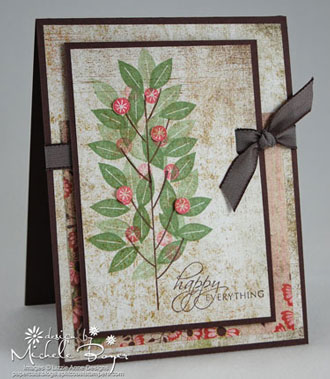
My Lizzie Anne Designs focus set this month is In the Treetop, another of their latest releases, and my first sample fits this week’s WT challenge at SCS–to use patterned paper…for the entire card front…even the focal panel.  I love stamping directly onto patterned paper and many of the packages and paper pads available today have “solid-ish” pieces that match the patterns perfectly.  (I also like to use the solid-ish pieces to cover a white or vanilla card front if I don’t have cardstock to match.)

TTU1

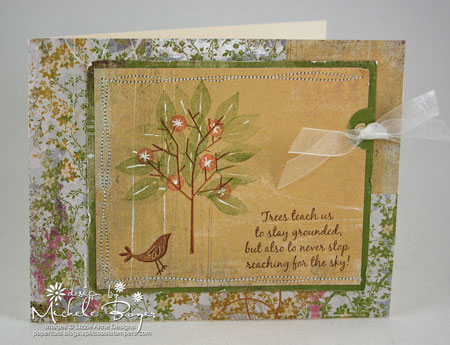
For this card, I used Basic Grey Perhaps.  The closest ink match I could find to the green was Wild Wasabi, but it was too dark (in my opinion) for the leaves, so I stamped off once before stamping onto the patterned paper.  And I stamped some leaves a second time without reinking the stamp. 

Once the tree was stamped, I traced over the leaf and flower lines with a white gel pen to tie into the bits of white on the patterned paper.  I also partially outlined the bird with a Cocoa marker after stamping.  The sentiment is stamped in Chocolate. (I often like to stamp sentiments a bit darker than the other colors on the card or I feel they sometimes get kind of lost.)

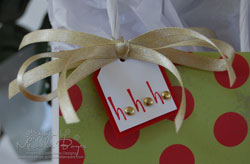
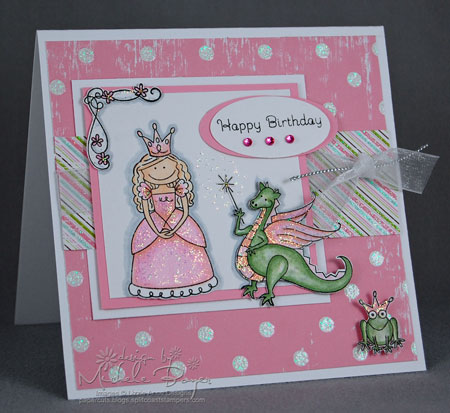
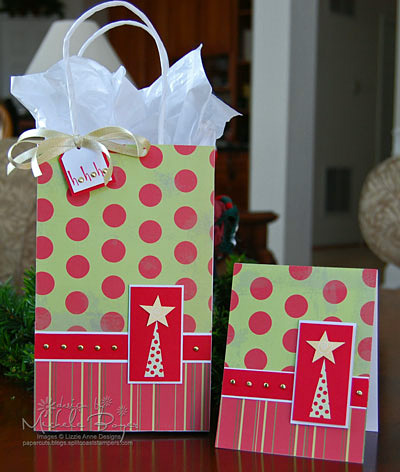
I’ll have more In the Treetop samples soon!  Thanks so much for stopping by, thanks SO much for all the wonderful comments on my daughter’s birthday card…I’m completely overwhelmed…AND don’t forget to check out Jacksonbelle Embellishments–new store!  Use code Opening02 to get 15% off your entire order through March 31st!  I’ll be back tomorrow with some things I’ve been very anxious to share!!! 🙂  Have a great day!

Cardstock:  SU Very Vanilla (base)  Patterned Paper:  Basic Grey Perhaps   Stamps:  Lizzie Anne Designs “In the Treetop”   Ink:  SU Close to Cocoa, Wild Wasabi, Regal Rose, Chocolate Chip   Accessories:  Signo white gel pen, white organdy, Barely Banana eyelet, Crop-a-dile, slit punch, sewing machine/thread.  Card size 5 ½” x 4 ¼”.

Glitter (and issues) Galore

Today is my little girl’s birthday.  I can’t believe it’s been six years since I held my”little” 10 lb. 2 oz. bundle for the first time.   (Nothing like giving birth to a two-month old, lol.)  Since “pink” and “sparkly” are among her favorite things, I wanted to make a card that was just that…really pink and really sparkly.  Little did I know it would take me *forever*.

For the images, I chose “Once Upon a Time” by Lizzie Anne Designs and super-sparkly Making Memories Garden Party paper.

Happy Birthday

HBK3I made one mistake after another…  I began by stamping the crown, then used my Stamp-a-ma-jig to stamp the girl.  Did I mask the crown first?  Noooo.  So I stamped the crown again, masked it and stamped the girl. I waited a few minutes, started coloring her skin with a marker…did I wait long enough for the ink to dry?  Nooooo. The ink bled all over her face.  So I started over.  I finally got the girl all stamped and colored.  I wanted the sentiment to be in the lower right corner of the white panel.  I used my marker to color the sentiment (I was stacking the words instead of leaving them in a straight line), used my Stamp-a-ma-jig so the words would be straight….yep, they were straight…and UPSIDE DOWN.  UGH!  So I cut off the bottom (thus the “out of the box” dress) and I tried again.  I markered the stamp, stamped it straight…there was too much ink on the stamp and it bled all over the place.  At that point, had this card been for anything or anyone other than my daughter, it would have been in the trash, but I was determined to make this card for her.  I wanted to put the dragon at the top, sprinkling glitter down from the wand, but I had to use him to cover up my big mess.  I curled the dragon’s wings a little and did not attach his tail to the card so he looks like he’s popping off the paper a bit.  The little frog is popped up on a dimensional.

So YAY, it’s finally done.  It’s WAY busy for me but I think she’ll really like it.

Thanks so much for looking!  And have a super-sparkly day!

Cardstock:  Papertrey Ink (white), SU Pretty in Pink   Patterned Paper:  Making Memories Garden Party Collection “Glitter Dots Pink” and “Glitter Diagonal Stripe”   Stamps:  Lizzie Anne Designs “Once Upon a Time”   Ink:  Brilliance Graphite Black   Accessories:  Copic markers, Diamond Stickles, Me & My Big Ideas Dahlia Rhinestones, white organdy, silver cord, large oval punch, 3-d black gel pen (frog’s eyes), pop dots.  Card size 5” x 5”.

Soda and a Bug with a Cake

Well, that’s certainly an odd combination, huh? 🙂  Good morning!  I have a couple more samples today using Petite Phrases by Lizzie Anne Designs.

i soda like you

ISLY1For this design, I used Basic Grey’s Two Scoops.  I thought the background paper was perfect for wallpaper.  I used punches to make the “tablecloth” and split the sentiment, one word per line, to make the little sign (which is popped up on a dimensional).

The actual soda image looks like the soda on the right.  For the soda on the left, I omitted the cherry stem and straw, stamped the soda, then used a black marker to draw the straw and the cherry stem turned in toward the center.  The foam/whip is cut out and popped up and the cherries are little Dahlia rhinestones from Me and My Big Ideas.  The tiny brads are Queen & Co. sprinkles.  Card size 4 1/4″ x 4 1/4″.

you take the cake

YTTC1I used a combination of three different images for the focal panel…the bug, the cake and then the flower is from the hat in the set.  The little flower and the bug’s head are both raised on dimensionals (or pieces of dimensionals).  The dotted circles on the yellow/gold background are from another Lizzie Anne set, Funky Floral.

The little black dots were added using a 3-d black gel pen and the papers are all from the Silver Lining line by We R Memory Keepers.  Card size 4 1/4″ x 4 1/4″.

I hate to run, but I have to!  Thanks so much for checking in!  I’ll be back soon!  Have a great day! 

A Special Delivery…and Chocolate

It’s the weekend…and it’s a busy one for us.  Something to do every day, but before I do all I need to do, I want to share a couple things using a new release by Lizzie Anne Designs called Petite Phrases

special delivery 

SDLAD

I don’t know what it is about baby cards, but I just love making them.  Here, I paper-pieced the little sack to match the paper covering the base, but before I adhered it, I added an extra baby.  I used my Stamp-a-ma-jig to place the extra head on the one side, then I drew in some tiny feet above the others.

I used a 1 3/8″ circle punch to cut the rounded end of the blue strip.  I cut the width of the strip to barely fit the width of the circle punch, inserted the strip in the punch as usual, but then I pulled the one end out through the circular hole.  That way I was only punching the rounded end on one side.  It’s easy to do with the word window punch too when you have a phrase or need a tab that’s longer than the punch.  It isn’t a “new” idea, but one I often forget about.  Paper is by Fiskars Cloud 9 Design “Baby Boy” Stripes and Dots.  Card is 4 1/4″ x 4 1/4″.

need chocolate?  (Who doesn’t? 🙂 )

NC1

I don’t know about you all, but I could *always* use some chocolate!

I did some paper-piecing again here.  When it works out, it’s just so much easier than trying to match marker or ink colors to the paper and I like the replication of the print or texture (or maybe I’m just obsessed with the technique).  I used a 3-d black gel pen to add the tiny swirls of dots (which were already on the image…I just highlighted them).  The center chocolate on the 3″ x 3″ card is popped up on a dimensional, as is the focal panel.  The goody box is by Martha Stewart (3″ x 3″ x 2″).  I covered each side and the top with the brown patterned paper, added some brads to the strip of striped paper and adhered the strip to the box.   Paper is Bo Bunny “Paris Blossoms” and “Paris Romance.”

Thanks for stopping by!  Look for a couple more Petite Phrases samples soon!  Have a great day!  🙂

One more from ‘High Hopes’

RFTSI had planned to do today’s sketch challenge and post that, but I have a sick boy at home today and tomorrow.  Strep…again!   Poor kid.  He just had it six weeks ago!!   **sigh** 

So today I will share this last card using High Hopes by Lizzie Anne Designs, heavily influenced by Julia’s stitching and use of those big snaps.  My Crop-a-dile chewed the very last eyelet I set and I just couldn’t bring myself to start all over, so I’m hoping the slightly dented eyelet will “blend” with the scrappy style. 

I just heard the mailman toss a couple packages on my step and I’m impatiently awaiting the arrival of some new stamps.  So I’m off to check.  If there’s a naptime soon, I may be cutting some rubber!

Thanks for stopping by! Have a great day!

Cardstock:  SU True Thyme, Very Vanilla   Patterned Paper:  Cosmo Cricket Little Boys   Stamps:  Lizzie Anne Designs “High Hopes”  Ink:  Brillance Graphite Black   Accessories:  Copic markers, We R Memory Keepers snap, mm eyelets, edge distresser, sewing machine/thread.  Card size 4 ¼” x 5 ½”.

Happy *bright* Birthday

HBHH2

WOOHOO!  It’s the weekend!!  (Don’t the weeks go by fast?)

I don’t usually design with colors as bright as these, but I do particularly like this combo of colors and patterns.  So cheery! 

The stamps are from High Hopes by Lizzie Anne Designs.  I used Copic markers to color the stack of gifts.  The pink/coral-ish ribbon is by Martha Stewart.  (Have you seen her ribbons?  They’re wonderful!)  The tiny white brad in the center of the stack is a Queen & Company “mini-sprinkle brad.”  You can find those here at Jacksonbelle Embellishments.  They, along with EVERYTHING else in the store, are 25% off through Saturday night…lots of goodies there to check out!

One final note…if you have just a couple of minutes, please fill out this survey on SCS.  They want to know what you think, what you want and how they can improve your experience on their site.  Your opinion matters and they want to hear it!  Thanks!!!

Have a fabulous weekend!!  And thanks for looking!! 🙂

Cardstock:  Bazzill Ladybug, Papertrey Ink (white)   Patterned Paper:  My Mind’s Eye “Confetti Surprise”  Stamps:  Lizzie Anne Designs “High Hopes”   Ink: Brilliance Graphite Black   Accessories:  Ribbon (Martha Stewart and May Arts), Copic markers, Queen & Company white mini-sprinkle brad, pop dots.  Card size: 5” x 5”.

(Not) All Rise!

YR5

Good morning (well, it’s morning here)!  I hope you are all well.  I’m great!! 🙂  

Before I forget, I have a little enabling for you.  Everything is 25% off at Jacksonbelle Embellishments… EVERYTHING!!!  Basic Grey, Dew Drops, Glimmer Mist, May Arts, NEW Lizzie Anne Designs, Inkadinkado… get on over there and check it out! The sale runs through Saturday!!

Ok…to the card…I’m still playing with “High Hopes” by Lizzie Anne Designs.  What a fun set!  So many different looks! (Soon I’ll blind you with a *really* bright birthday card using this set.)

I stuck with a simple layout for this card because I knew the focal panel would be rather large.  I stamped the flowers, masking a bit as needed.  I wanted some of the stems in front of some flowers while placing some others behind.  (Once I make a mask for a stamp, usually from a Post-It note, I keep the mask with the set so I won’t have to make another one the next time I need it.  Just a little time-saver tip in case you hadn’t already thought of that.)

To add a bit of interest I cut around a couple of the flowers when trimming the stamped piece, and I popped up the tallest flower with a big pop-dot.  The flowers and brad (which was actually off-white) were colored with Copic markers, and the focal panel is raised on pop dots as well.

Thanks for looking!  I’ll be back soon! 

Cardstock: SU Chocolate Chip, Very Vanilla   Patterned Paper:  My Mind’s Eye Tres Jolie “Birthday Boy Circles”   Stamps:  Lizzie Anne Designs “High Hopes”   Ink:  Brilliance Graphite Black   Accessories:  Copic markers, McGill Retro Words Tag punch, Karen Foster thumbtack brad, MME Tres Jolie Birthday Boy French border sticker, pop dots.  Card size 5” x 5”.

A Neopolitan Birthday

IC Blk LAD

I have been in a total funk lately …I don’t know why.  I was hoping this week’s sketch challenge over at SCS would drag me out of it, but I am just “blah.”  I think this card is cute (cuter in real life), but still kind of plain.

I needed a birthday card for one of my daughter’s friends this weekend so I thought I’d use High Hopes by Lizzie Anne Designs.  The cardstock that looks white here is actually vanilla, and the pink ice cream matches the patterned paper more closely than it appears.  (My monitor died over the weekend so I’m using my daughter’s and all the colors look different on this screen. It’s driving me nuts.)  The center stack of ice cream is cut out and raised on dimensionals.  I used Copic markers to color the ice cream, then I covered all the scoops with Crystal Effects.  I wanted the cherries to be shiny, but still look a little different so I covered them with a clear 3-d gel pen.  The texture is just slightly different.

Thanks for stopping by!  Maybe if I go have some lunch and play on the Wii (lol) I’ll feel better.

Holiday Cheer to You!

Happy Holidays, everyone!  I wanted to post my last two Christmas cards and wish you all a wonderful holiday season!  These two cards use Holiday Cheer by Lizzie Anne Designs

HC400

.

.

For this one, I colored the trees with my markers.  The little “stones” are Gelly Gems by Gel-a-tins and the main panel is raised on dimensionals.

Cardstock:  Always Artichoke, Certainly Celery, Whisper White     Patterned Paper:  Imaginisce Candy Candy Lane “Hello Holly”  Stamps:  Lizzie Anne Designs “
Holiday Cheer”   Ink:  Certainly Celery, Brilliance Gallaxy Gold   Accessories:  Always Artichoke and Certainly Celery markers, Gel-a-tins “Dazzle Me” Gelly Gems, ribbon, dimensionals.  Finished card size 4 ¼” x 5. ½”.

.

.

.

MCLAD2On this card I stamped just the one tree using Versamark directly onto the patterned paper and clear embossed.  Then I punched the circles, cut out the tree and adhered it to the white panel. The star is popped up on a dimensional.  The tiny brads are from a Queen & Co. Halloween set.  You can get them here or here (they’re the sprinkles).  I love those tiny brads!

Cardstock:  Blue Bayou, Whisper White     Patterned Paper:  Basic Grey Dasher “Snowbank” and “Snowfall Polar Blue”   Stamps:  Lizzie Anne Designs “Holiday Cheer”   Ink:  Brilliance Graphite Black, Versamark   Accessories:  Clear embossing powder/heat gun, 1/8” hole punch, word window punch, Queen & Co. Sprinkles, dimensionals.  Finished card size 4 ¼” x 5 ½”.

I hope you all have a wonderful holiday!!  Thanks so much for stopping by!!!  

HH 

Ho Ho Ho!!!

HHH4Hi everyone!  I’ve finally had a moment to start my teachers’ gifts and packaging.  Here is the first of several.  (The color is a bit off in this photo… I couldn’t seem to adjust it properly.  The color looks better in the close-up below.)

I covered a plain white gift bag with the two patterned papers, using Tombow Mono Multi to adhere the paper to the bag.  (I’ve tried other adhesives and Mono Multi works best for me.  Once that stuff dries, you can’t pull it apart without destroying your paper.)

The tree, star and sentiment are from Lizzie Anne Designs’ Holiday Cheer.  Using Celery ink, I stamped the tree onto white cardstock then used a 1/8″ hole punch wherever there was a dot on the tree.  Then I cut it out and adhered it to the red cardstock again using Mono Multi but sparingly so it wouldn’t squish and show through the dots).  The star is stamped in gold, cut out and adhered with a pop dot.

HHHtagFor the tag, I used a red marker to only color the h’s, then added a gold brad for each ‘o’.  The white part of the tag is popped up to accomodate the backs of the brads.   And I added some extra ribbon before tying the knot in an attempt to somewhat duplicate Pam‘s awesome “poofs.”  (That girl can make some incredible bows!!)

I’ve been asked many times, “How do you get your brads so straight?”  I use Stampin’ Up’s mat pack, but there is another little thing I do that helps.  Once I mark the positions with a pencil, I poke the holes with a large needle.  I don’t use a hole punch because then the hole is usually too big and that little bit of extra space allows the brad to move a bit.  If you use a needle, the brad will fit more tightly.  I also make sure the brad (and the prongs) are as flat as I can get them once inserted.  I hope that helps!

Thanks so much for stopping by!! 

Cardstock:  Whisper White, Real Red    Patterned Paper:  The Robin’s Nest “Cindy Lou Stripe” and “Cindy Lou Dots”    Stamps:  Lizzie Anne Designs “Holiday Cheer”    Ink:  Certainly Celery, Real Red; Brilliance Galaxy Gold    Accessories:  Large and small tag punches, 1/8” hole punch, gold brads, mat pack/needle, ribbon (Michael’s), dimensionals.  Finished card size:  4 ¼” x 5 ½”.