Monthly Archives: October 2014

MFT October Previews – Merry Christmas Tree

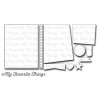
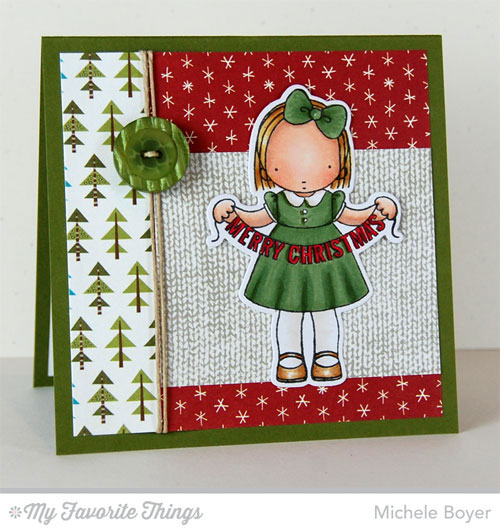
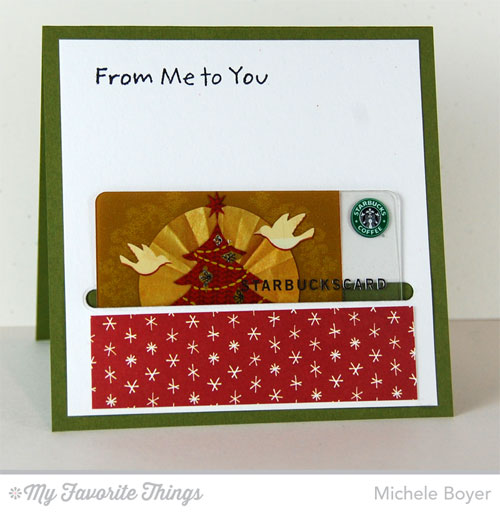
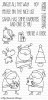
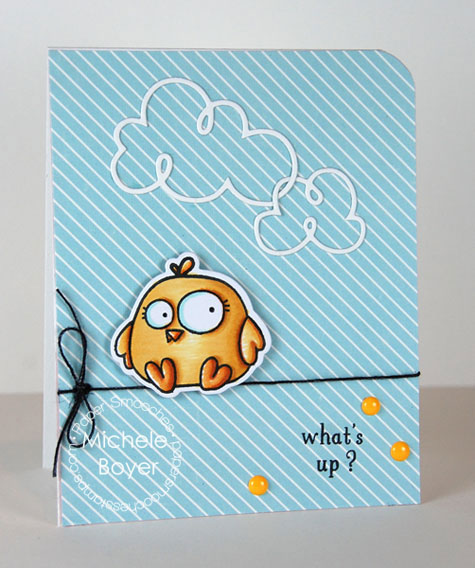
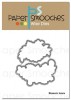
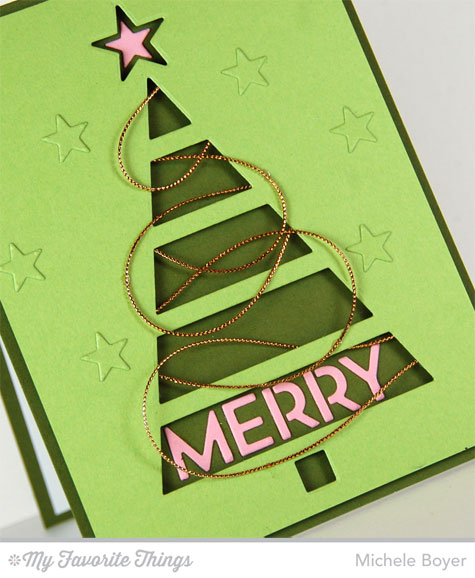
I have one last preview to share before MFT‘s October New Product Launch tonight at 10 p.m. EST.  Today I’ve used Christmas Tree Cutout, which is free to you this month with a $60 purchase.

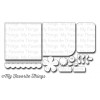
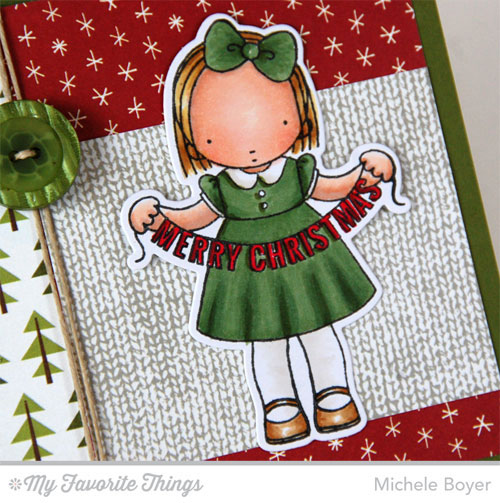
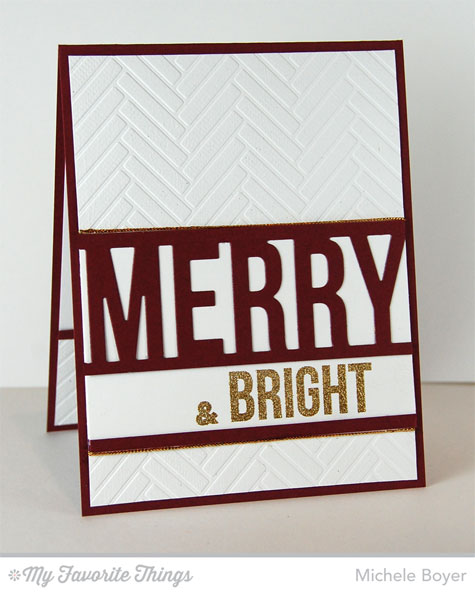
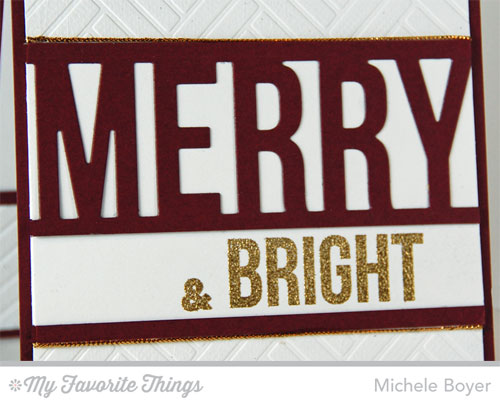
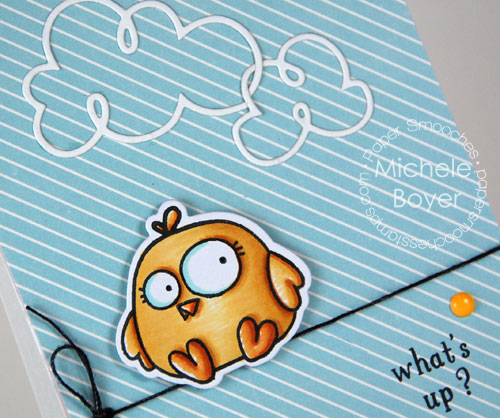
I first die-cut the tree and star from Sour Apple card stock.  Lengths of gold cord were looped on the front and adhered to the back to create trim.

Merry-Tree-475

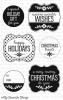
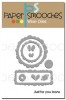
The Sour Apple panel is raised on foam tape with a Bubblegum star and “MERRY” adhered in the openings.  All stars were cut using Sun, Moon & Stars Die-namics.

Merry-Tree-CU

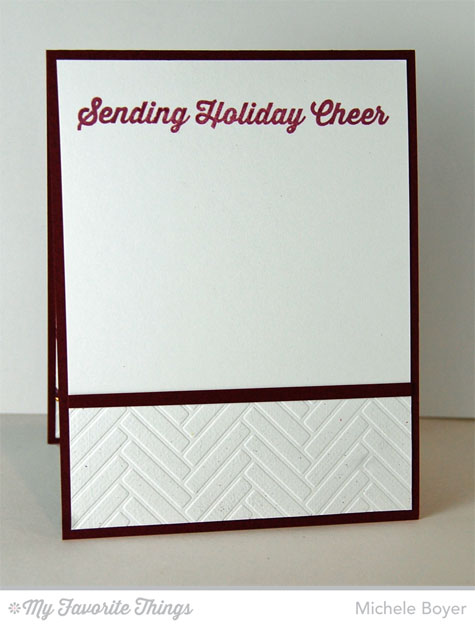
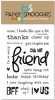
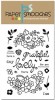
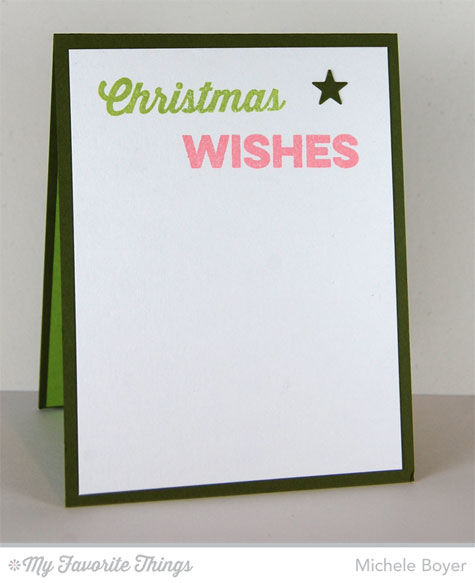
Inside, I used Sour Apple and Bubblegum dye ink to stamp a sentiment from Merry Messages.

Merry-Tree-In

Thanks so much for stopping by!  I’ll be back tonight at 10 p.m. EST for the New Product Launch!

Please note that links to new products will not be in effect until time of release, October 14, 10 p.m. EST.

Additional supplies/info:  Gold cord, X-Press It 1/4″ foam tape.  Finished size 4 1/4″ x 5 1/2″.

MFT October Previews – Words Cannot Espresso

Hi everyone!    I’m back today with two samples of MFT‘s October release.   As a coffee lover, I was super excited to see the new Perk Up stamp set and Coffee Cup Die-namics.  Seriously ♥ them.

My first card used Perk Up and Coffee Cup Die-namics with new Fine Chevron Background.

Words-Cannot-Espresso-475

 I used an inlaid die approach on the cup, cutting first the larger heart shape from the cup cuff, then, with the red heart in place, I die-cut the smaller heart shape.  The little scalloped edge was created by die-cutting the bottom scalloped edge from one of the tags in new Tag Builder Blueprints 2.

Words-Cannot-Espresso-CU

Inside, I added a second sentiment from Perk Up with a second red heart adhered in the lower corner.  (Boxes can be checked later.)  🙂

Words-Cannot-Espresso-In

My next card uses the Herringbone Bricks Stencil to create a background and Hugs & Kisses Cover-Up to add a border.

You-Warm-My-Heart-475

The dotted edge on the cup cuff was die-cut using an element from Blueprints 14. The larger heart was cut using Blueprints 15 and the sentiment was stamped onto a rounded edge Sentiment Strip.

You-Warm-My-Heart-CU

Since I had lots of x’s and o’s left from the one pass through my Vagabond, I included another row inside as well as a second sentiment from Perk Up.

You-Warm-My-Heart-CUCup

Be sure to check out the MFT Blog for direct links to more Countdown samples, info on prizes and all you need to know about our October 14 release!

Thanks so much for stopping by.  Have a great day!

Please note that links to new products will not be in effect until time of release, Tuesday, October 14, 10 p.m. EST.

Words Cannot Espresso card

You Warm My Heart card

MFT October Previews – Merry Christmas

Hi everyone!  Welcome to another day of MFT October previews!  Today I’ve used Pure Innocence Christmas Banner.  She’s so cute holding the greeting!

Merry-Christmas-PI-500r

I used PI Christmas Banner Die-namics to cut the shape from X-Press It Blending Card, then stamped in Black Licorice hybrid ink and colored with Copic markers.  She’s adhered flat in the middle with foam squares attached behind her hands to add just a wee bit of dimension.

Merry-Christmas-PI-CUr

Inside, I used new Gift Card Grooves.  I can’t say how happy I am to see this Die-namics set!  It makes adding/attaching a gift card SO incredibly easy!

Merry-Christmas-PI-InU

Be sure to check out the MFT Blog for direct links to more Countdown samples, info on prizes and all you need to know about our October 14 release!

Thanks so much for stopping by!  

Please note that links to new products will not be in effect until time of release, Tuesday, October 14, 10 p.m. EST.

Additional supplies/info:  Copic markers (E00, E11, R01, R02, BV000, Y21, E31, E33, E35, E40, G94, G85, G99, R29, R89), Fancy Pants Oh Deer! (6×6), Kool Tak Clear Foam Squares.  Finished size 4 1/2″ x 4 1/2″.

MFT October Previews – Christmas Cuteness

Hi everyone!  We’re moving right along with only four more days until MFT‘s October 14 release!  🙂  My card today features new Christmas Cuteness by Miss Tiina along with Fine Chevron Background.

A-Jolly-Hello-475

All images were stamped and masked onto X-Press It Blending Card and colored with Copic markers.  New Fine Chevron Background was stamped onto Kraft card stock using Electric Red ink.

A-Jolly-Hello-CUThe little Stitched Tag was cut using the candy cane from Tag Builder Blueprints 2.

A-Jolly-Hello-CU2

Inside, I stamped a second cute sentiment from the set as well as a second snowman.

A-Jolly-Hello-InBe sure to check out the MFT Blog for direct links to more Countdown samples, info on prizes and all you need to know about our October 14 release!

Thanks so much for stopping by!  I’ll see you tomorrow!

Please note that links to new products will not be in effect until time of release, Tuesday, September 16, 10 p.m. EST.

Additional supplies/info:  Copic markers (E00, E11, E31, E33, E35, E41, E43, R01, R24, R29, R39, E09, W00, W1), hemp.  Finished size 4 1/4″ x 5 1/2″.

MFT October Previews, Merry (Masculine)

Hi everyone!  I’m back today with another preview of My Favorite Things‘ October 14 release!  (Only five more days!)  Today I put a bit of a masculine twist on a holiday card using new Merry Die-namics, Merry Messages and Herringbone Bricks Stencil.

Merry-&-Bright-Masculine-475After die-cutting Merry Die-namics from Paver Red card stock, I stamped “& BRIGHT” in VersaMark ink then gold embossed.  The Herringbone Brick stencil was used to emboss Smooth White card stock.  After adhering the Merry panel, I tucked two strips of gold cord along the top and bottom edges.

Merry-&-Bright-Masculine-CU

The inside was finished very simply by adding a leftover panel of Herringbone Bricks and stamping a second Merry Message in Paver Red ink.

Merry-&-Bright-Masculine-In

Be sure to check out the MFT Blog for direct links to more Countdown samples, info on prizes and all you need to know about our October 14 release!

Thanks for stopping by!  I’ll be back tomorrow!

Please note that links to new products will not be in effect until time of release, Tuesday, October 14, 10 p.m. EST.

MFT October Release – Jingle All the Way

Hi everyone!  Welcome back to a second day of October 14 release previews with My Favorite Things!  Today I’ve used new Birdie Brown Jingle All the Way stamp set and Die-namics with new Snowfall Background and Stitched Snow Drifts Die-namics.

Jingle-All-the-Way-475

After stamping the tree onto an X-Press It Blending Card panel and coloring with Copic markers, I stamped new Snowfall Background with VersaMark ink and embossed with a matte embossing powder.  The snowdrifts were added, reindeer cut, stamped and colored and then the little bell was stitched to his collar.  Lastly, I airbrushed a bit of ink around the tree and background.

Jingle-All-the-Way-CU

I added a few more snow drifts to the inside, along with a second sentiment and tree.

Jingle-All-the-Way-In

You can check out the MFT Blog for direct links to more Countdown samples, info on prizes and all you need to know about our October 14 release!

Thanks so much for stopping by!  I’ll be back tomorrow!

Please note that links to new products will not be in effect until time of release, Tuesday, October 14, 10 p.m. EST.

Additional supplies/info:  Copic markers (E31, E33, E35, E41, Y23, YR12, G14, G16, G28, R27, R29, E09, BG11), Copic airbrush, 6mm jingle bell, VersaMark ink, Wow! Clear Matt Dull Embossing Powder, X-Press It 1/2″ foam tape, ribbon. Finished size 4 1/4″ x 5 1/2″.

MFT October Previews, Christmas Labels

It’s time to begin sharing samples of My Favorite Things‘ October release, and boy oh boy is it a fun one!

Today I’ve used several new products — Christmas Labels (Lisa Johnson Designs) and Jingle All the Way (Birdie Brown) with their coordinating Die-namics, Herringbone Bricks Stencil, Stitched Traditional Tags STAX and Tag Builder Blueprints 2.

Happy-Holidays-Cute-475

New Herringbone Brick Stencil was used to emboss the Wild Cherry Stitched Tag.  I added snowflakes (Let It Snowflake) to the Sweet Tooth background, and the cutie pie little girl was die-cut from X-Press It Blending Card, stamped in Black Licorice hybrid ink and colored with Copic markers.

It doesn’t show in the photo, but I colored over each dot on the label using a clear glaze pen.

Happy-Holidays-Cute-CU

Inside, I stamped a sentiment from new Merry Messages along with a tree from Jingle All the Way.

Happy-Holidays-Cute-In

Be sure to check out the MFT Blog for direct links to more Countdown samples, info on prizes and all you need to know about our October 14 release!

Thanks so much for stopping by!  I’ll be back tomorrow!

Please note that links to new products will not be in effect until time of release, Tuesday, October 14, 10 p.m. EST.

Additional supplies/info:  Copic markers (E00, E11, Y21, E31, E35, R24, R27, E09, E41, E43), Clear Sakura Glaze Pen, Red Baker’s Twine, Kool Tak Clear Foam Squares, 1/4″ X-Press It Foam Tape.  Finished size 4 1/4″ x 5 1/2″.

we wish you a Merry Christmas

Today I have a holiday card to share using A Holy Holiday by Paper Smooches.  I love how this turned out.  I may make several to send this year.

The sky and snowy hills were created using Eclipse Masking Paper and my Copic Airbrush System.   The moon was punched from masking paper using a 1″ circle and adhered before airbrushing.  The hills were created by cutting strips of masking paper using a Borders 1 die and applying one at a time, airbrushing each line, from top to bottom.  

We-Wish-You-a-MC-475

Once the airbrushing was complete, I stamped the reindeer and adhered Twinklets Diamond Dust using Glossy Accents.

We-Wish-You-a-MC-CU

Thanks for stopping by today.  I’ll be back very soon!  🙂

Additional supplies/info:  Copic markers (B93, B95, B97, B99).  Finished size 4 1/4″ x 5 1/2″.

what’s up?

I’m back to clean and simple today with a cute Chubby Chums bird and Curly Clouds from Paper Smooches.

The bird was cut from X-Press It Blending Card using the Chums coordinating die, then stamped and colored with Copic markers.

After die-cutting the clouds, I nipped the edge of the smaller one and linked it inside the bigger one.  The edge of the big cloud hides the cut for a seamless appearance.

What's-Up-475

To create the “wire,” I colored white string with a black Copic, adhering the bird atop using foam tape.  (The sentiment is from Bosom Buddy stamp set.)

What's-Up-CU

Thanks for stopping by today.  🙂

Additional supplies/info:  Copic markers (Y21, YR15, YR23, YR14, YR27, E15, BG10, 100), white string, enamel dots.  Finished size 4 1/4″ x 5 1/2″.

Hello, October Paper Smooches Release!

Today Paper Smooches releases four new dies as well as a new TAM (“thanks a million”) stamp set.  You must check out Uplifters!  It’s a super cute sentiment set and it’s FREE with a retail purchase over $60.

Today I used new Blossoms Icons dies (which coordinates with Blossoming Buds) and Just for You Icons dies.  I love those teeny tiny butterflies.  

Hello-Blossom-Icons-500

 The flower image was die-cut from X-Press It Blending Card, stamped and colored with Copic markers.  Once colored, I added Glossy Accents to the flower centers then adhered the image, only in the center, allowing the ends of the leaves and the flower buds to bend forward off the card just a bit.

The foremost flower was stamped a second time then cut out and adhered over the larger image on a clear foam square.  “Hello” was stamped from Salutations, onto the inside cut of the scalloped rectangle shape from Just for You Icons.

Hello-Blossom-Icons-CU

 Thanks for stopping by!  Have a great day!


Additional supplies/info:  Gold card stock (source unknown), gold sequins, Glossy Accents, Copic markers (R81, R83, R85, Y21, YR23, E35, YG91, YG93, YG95, YG97).  Finished size 4 1/2″ x 4 1/2″.