Category Archives: Tutorials

Ruff Day?

Hello again! As promised, I’m back today coloring cute Kiki digi-image from Tiddly Inks, using tips from Copic’s Coloring Cats & Dogs with Copic Markers.

Ruff-Day-500-Copic-Dog-Book

Isn’t Kiki cute?  (She’s also FREE!)  The sentiment is from Paper SmoochesPaws for a Cause and the Stitched Frame is from Taylored Expressions.

Michele Boyer - Tiddly Inks

Copic markers – E40, E41, E42, E44, W5, W7

Coloring Cats & Dogs with Copic Markers focuses on many different aspects from basic smooth coloring to creating texture, adding shadows, coloring different lengths of fur, breeds and more.

Michele Boyer - Tiddly Inks

To color Kiki, I first printed her onto X-Press It Blending Card. I began with a base of E42 then added the next darker shade of E44, using long feather strokes to apply the color. Next I began building shadow using W5, finishing with W7. The highlighted areas of white were left uncolored.

Michele Boyer - Tiddly Inks

I’ll be back soon with another card featuring the other half of the book – a cat.  🙂

Thanks so much for visiting!

1amichele siggy

Coloring Glass with Copic Markers

Hi everyone!  Today I’m featuring another topic covered in Imagination International‘s Intro to Coloring with Copic Markers.

Michele Boyer - Stamping Bella

As mentioned previously, there are so many helpful tips in this book. I colored wood in this post and vividly beautiful butterflies using only two markers in this post. Today I’m sharing how I colored the mason jar in this oh-so-pretty image by Stamping Bella, Mason Jar of Flowers. (The simple “hi” sentiment is from Tiny Townie Penelope has a Pencil.)

Glass-5-finished

There are two methods of coloring glass in Intro to Coloring with Copic Markers. I used the Colorless Blender method. (Colorless Blender info can be found here and purchased here, although it is currently out of stock.)

Glass-1

I first stamped the flowers onto X-Press It Blending Card and colored with Copics.

Glass-2

Next I colored around the edges of the jar using two grays, C1 and C3. I left a small strip of white along the outside left and right edges of the jar and used short feathering strokes, moving in toward the center of the jar.

Glass-3

I added blue to the water using B41, again using feathering strokes from outside edges in toward the center, leaving the center area white.

Glass-4

Lastly, I applied Colorless Blender in the center, allowing the colorless solution to push the edges of the gray and blue ink away from the center and toward the edges.

Michele Boyer - Stamping Bella

Copic markers – B41, C00, C1, C3, G03, G16, E35, R83, R85, R39, RV32, Y15, Y17, Y38

Once the coloring of the glass was complete, I added more shading around the flowers and ribbon and grounded the jar with a bit of gray.

You can find this description in greater detail, as well as many other coloring tips and tricks in Intro to Coloring with Copic Markers. It is an excellent resource!

Thanks for visiting!

1amichele siggy

Explosive News|Explosion Card (tutorial)

It’s always fun to add something a little unexpected to a card. How about a pop-out insert that opens to be bigger than the card itself? Fun right? And super easy!

Intro-Photo

I started with Paper SmoochesGreat Chemistry stamp set. I paper-pieced the scientist’s glove which made inserting the beaker very easy! (The set with comes with a couple different options of what to place in the hand.)

Michele Boyer - Paper Smooches

Copic markers – BG10, BG70, C00, C1, C2, C3, C6, E00, E11, E35, E41, E42, R01, R02, Y21, YR14, YR23

I created my insert with one-sided patterned paper to add a bit of color to the folds. The white side was stamped lightly with a pattern of beakers and light bulbs with the sentiment stamped in the center.

Michele Boyer - Paper Smooches (explosion card, open)

The insert opens to be completely flat so it’s easy to add a written message once assembled.

You can find complete step-by-step instructions with photos HERE on the Craftsy blog. I hope you’ll check it out.  🙂

1amichele siggy

Create Quick and Easy Tissue Paper Flowers in Minutes (tutorial)

When fresh flowers aren’t seasonally available, why not make your own from tissue paper?  Tissue paper flowers are inexpensive and incredibly easy to create. On the Craftsy blog today, you’ll find step by step tutorials for three different flowers,  all of which can be made in just minutes.

Final-Trio2

You can create very small or very large flowers simply by adjusting the size of your tissue paper sheets.

Small-and-Large

Create different flower styles by combining paper colors. Or create a totally different look with a simple change in the way the paper edges are cut.

Daisy-Step-8-Push-yellow-back

Tissue paper flowers can be used to create a floral arrangement, as party decor, dress up gift wrapping and more! No matter the use, you’ll be amazed at just how easy tissue paper flowers are to create!

Purple-Fringe-Finished

I hope you’ll check out the FREE tutorial (found here).

1amichele siggy

Fun with Hot Ribbon

Today I am deviating from my standard paper crafting posts to share a bit about Hot Ribbon, a fun new product now available from Copic. Here’s a bit of info from the website:

Add a unique design or color accent to any article of clothing, fabric, or fiber art with Hot Ribbon! Hot Ribbon is a laser cut strip of polyester that irons on to any porous surface without sewing or the mess of glue. It comes in 22 colors, plus gold and silver metallic; you can even color the white Hot Ribbon with your Copic markers and expand your palette even further!

hotribbonFeatures

  • Each package contains two yards of Hot Ribbon (183 cm)
  • Product comes in four 18” x ⅛” strips (46 cm x 3 mm)
  • Hot Ribbon can be cut into thinner strips without fraying
  • Irons on with no sewing or gluing required
  • Works on any porous surface

Hot Ribbon is so easy to adhere with a Clover Mini Iron (which I talked about yesterday, here).

Finished

I’ve used this sewing design in the past to create a mini iPad sleeve. This one, a little bigger, will hold a super-secret iPad Air. Shhhh….

Supplies

There are two methods for adhering Hot Ribbon – Direct and Tempered Glass Transfer. For my pattern, which was printed from a computer, I felt Tempered Glass was the way to go. (I adhered washi tape around the edges of my glass to eliminate any risk of cutting myself.)

Step-1-Cut-and-adhere-to-glass

I first placed my pattern beneath the glass. I cut small pieces of black Hot Ribbon to fit the cacti and laid them on the glass over the pattern. I found it helpful to use the pointy end of my scissors for precise placement. The pieces were then “tacked” together and to the glass with a Clover Mini Iron set to low heat. Once the cacti were in place, I adhered the black ribbon, little by little, tacking to the glass following the pattern.  I then followed with the blue-green ribbon.

Step-2-finished-on-glass

Once complete, I used a kraft knife to gently lift the assembled design from the glass.

Step-3-adhere-to-fabric

I trimmed the ends, positioned each strip on the felt and covered with a non-stick pressing sheet. (I used Parchment Paper.)  To permanently bond the ribbon, I set my iron to medium-high heat then pressed across each area of the design for about 30 seconds.

Step-4-ironed-onto-fabric

Isn’t the blue-green pretty? So shimmery!

You can find more tips and information on Hot Ribbon HERE. It’s really cool, super easy and lots of fun!  🙂

1amichele siggy

Peace Love Hope Friendship

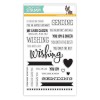
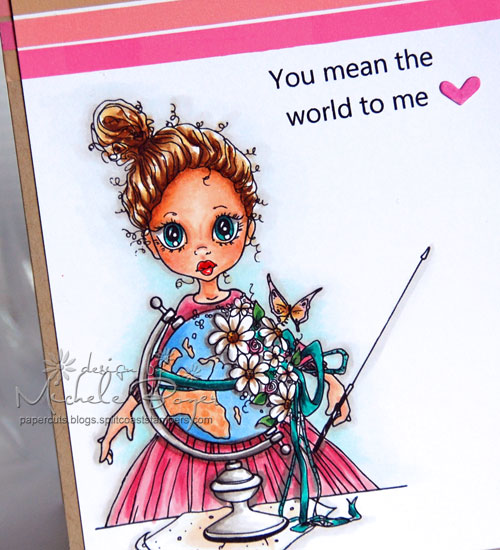
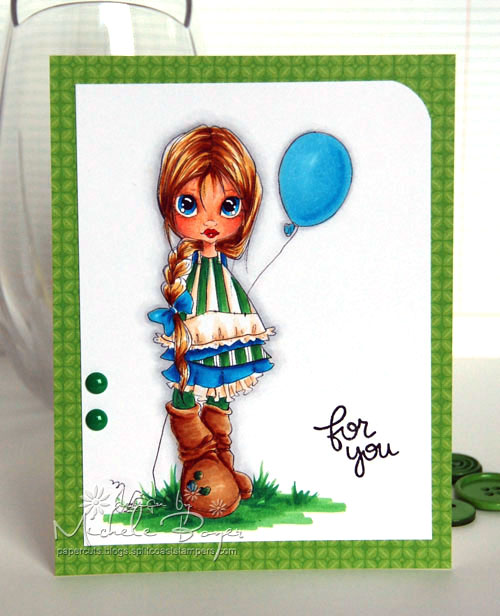
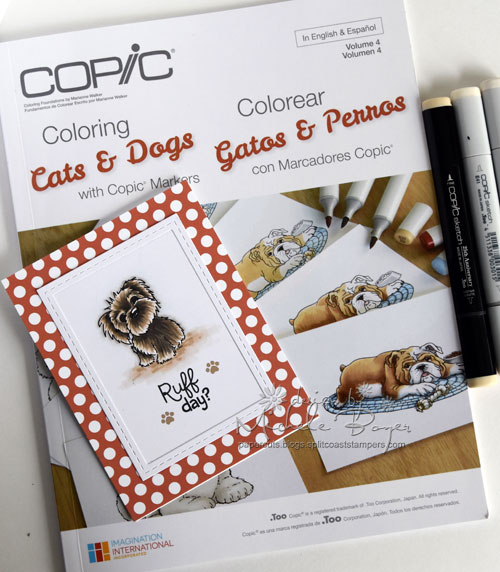
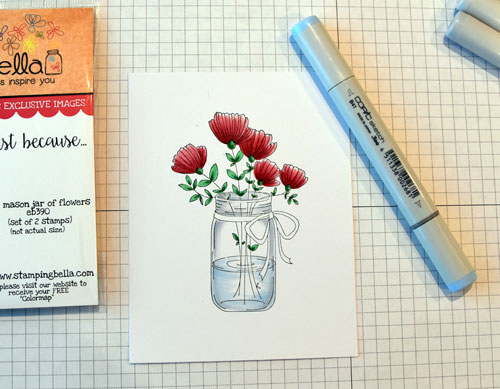
On Black Friday there were so many great deals to be had. I accomplished a bit of Christmas shopping, and splurged a bit on myself, purchasing this sweet C0zy Cupfuls stamp set by Power Poppy.

I know some of my friends will be surprised to see me posting this particular image because I am not a fan of (male) Cardinals.  There’s one in particular that shows up every spring, year after year….after year.  (I’m just assuming it’s the same one. For all I know, the whole lot of them are crazy.)  This one follows me around  the house from window to window, pecking wildly like it’s lost its mind. All. Day. Long. I don’t know what it’s trying to accomplish. It might be secretly entertained by my annoyance, screaming and yes, cursing. It makes me INSANE.

Michele Boyer - Power Poppy

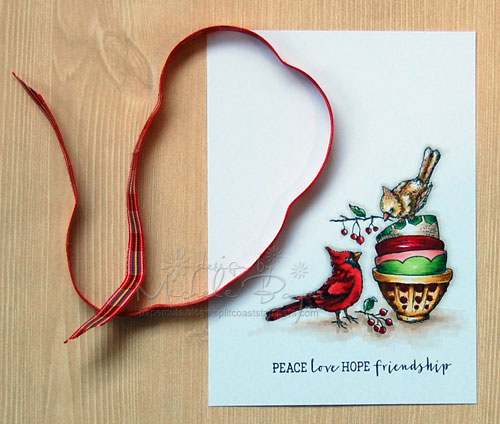
Anyway, I specifically love the (quiet, non-threatening) female bird on top of the cups, sharing her twig (with the wacky one).  😉   I adore the other images in the set, but strangely enough, this one is my favorite.

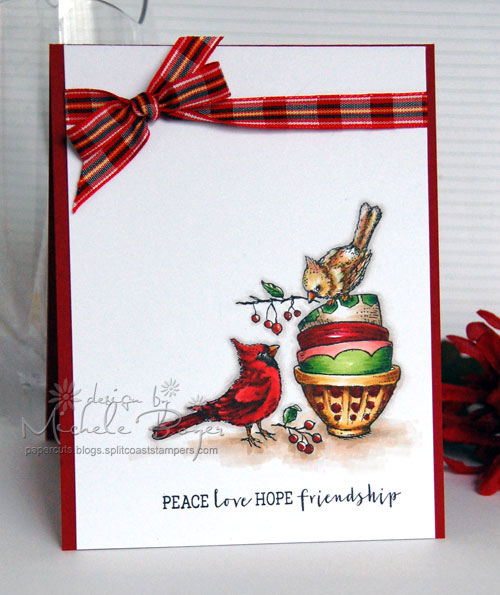
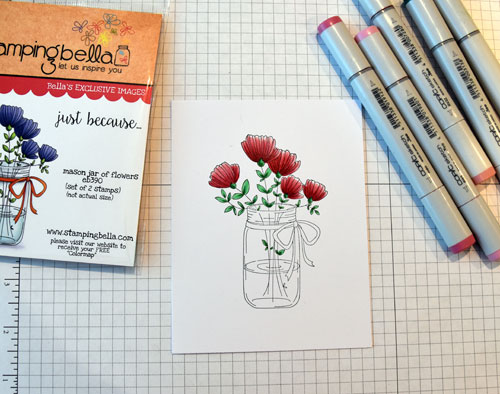
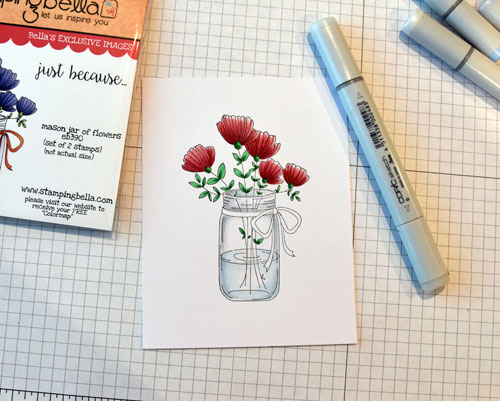
After stamping onto X-Press It Blending Card and coloring with Copic markers, I decided to tie a pretty ribbon around the top. I have loads of ribbon but don’t often use it. It is mostly stored on ribbon cards like this:

Michele Boyer - Power Poppy

When I take it off of the card, it looks like this (or worse):

Michele Boyer - Power Poppy

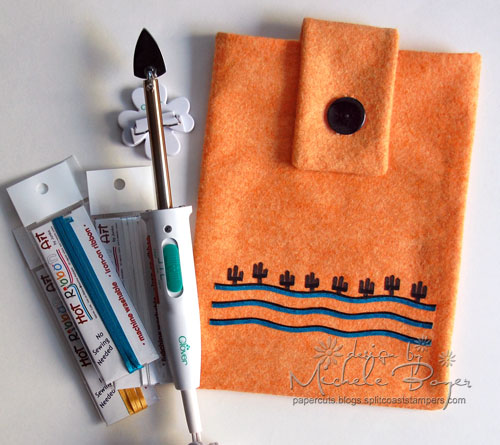
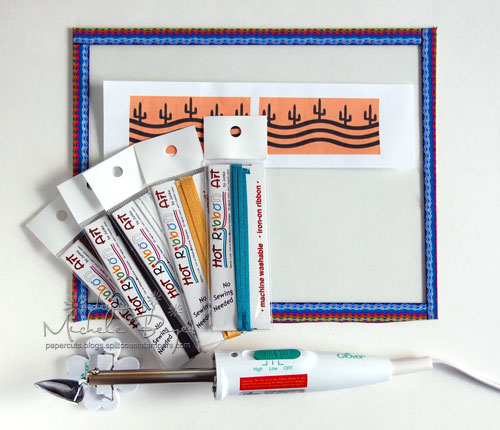
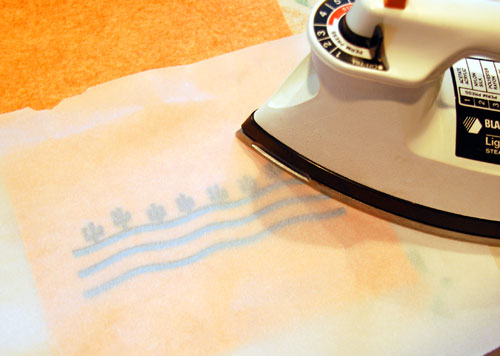
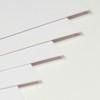
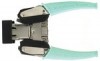
I don’t like the creases, and there always seems to be one or more in the worst locations after tying my bow. Now available from the Copic website is the Clover Mini Iron. It’s thin, has a perfectly small, pointed tip and heats in just a few minutes.

clover-mini-iron

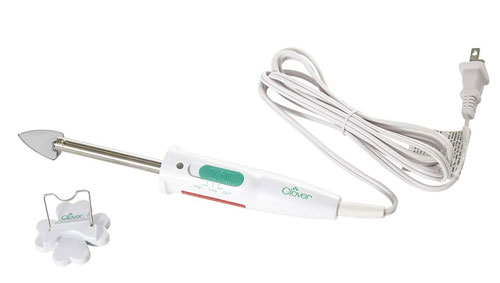
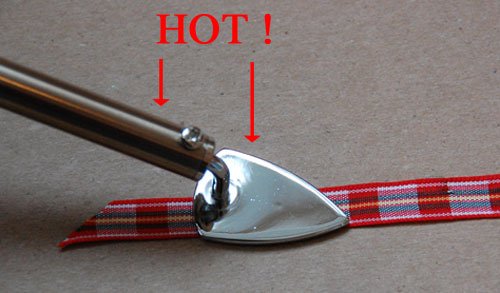
There are two heat settings (low and high), a cute little stand and it’s great for ironing ribbon!  I highly recommend!  I also highly recommend taking care not to accidentally touch the shaft. It gets hot. Very, very hot. It will hurt.  Just sayin…

Clover Mini Iron

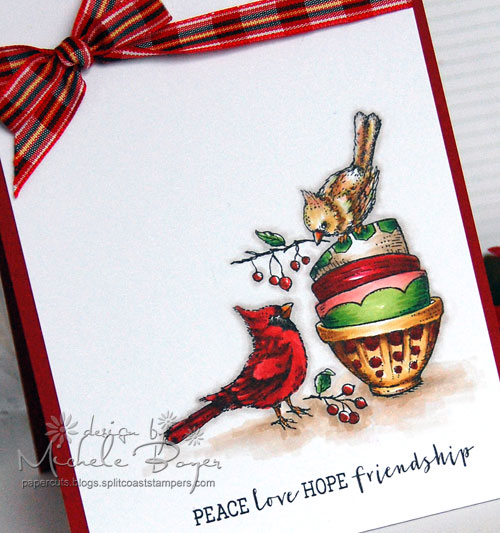
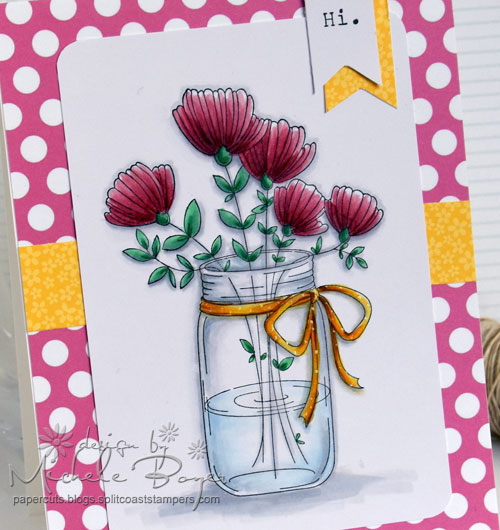
Once pressed, I tied my crease-free ribbon into a pretty bow around the top of my colored panel. *happy sigh*

Michele Boyer - Power Poppy

Copic markers: E35, E37, E40, E41, E42, E43, G17, G29, R01, R20, R22, R24, R29, R59, R89, W00, W1, W2, W5, W7, Y21, YG03, YG17, YR15, YR23

I’ll be back tomorrow to share another new (and very cool) product with which the Clover Mini Iron works perfectly! See you then!

1amichele siggy

Revisiting the One Sheet Wonder

If you’re like me, you probably have a sheet (or twenty) of patterned paper tucked away somewhere, unused. Why not put it (or them) to good use with the One Sheet Wonder, an oldie but goodie technique that provides patterned pieces for use on a set of cards.

Michele Boyer - Simon Says Stamp

To create this entire stack of cards, I used Simon Says Stamp’s Sending & Wishing stamp set and dies with Hero Art’s Stamptember exclusive Prayers stamp set and die and one 12″ x 12″ sheet of Recollections’ Pink Roses patterned paper (from Michael’s). The only extras required are card bases and matting (card stock) for the patterned pieces. I love the results, but even more so I love having a stack of pretty all occasion cards on hand to send at a moment’s notice.

Michele Boyer - One Sheet Wonder

I put pencil to paper and created a template that resulted in 14 QUICK and EASY cards. I really don’t know why I didn’t think to do this sooner. Imagine how quickly you could create a set of holiday cards!

Michele Boyer - One Sheet Wonder Card Sketches

On the Craftsy Paper Crafts blog today, you can find larger photos of my One Sheet Wonder template and corresponding card sketches as well as tips for creating your own One Sheet Wonder and keeping all those pieces organized.  I hope you’ll check it out and give it a whirl! I know I’ll be using my template again soon!

Thanks for visiting!

1amichele-siggy1

Three Quick and Easy DIY Bookmarks

Creating a bookmark to coordinate with a handmade card can be quick and easy as well as a nice surprise for the recipient.  I chose three previously designed  cards and created a matching bookmark for each using three different styles.

1a-Intro-Final-Magnet

The bookmark above includes a hidden magnet to snugly hold the place of the marked page.

3-Elephant-Final

To use this bookmark, the page is inserted between the longer panel and the elephant so the elephant appears to be floating or peeking over the top of the page.

2a-Final-Intro

The quickest and easiest of the three was designed with elements pulled directly from the card.

You can find step by step tutorials for each HERE on the Craftsy blog today.

Thanks for visiting!

1amichele-siggy1

you mean the world to me

Today I decided to do a bit of Copic coloring on a Saturated Canary digital stamp I’ve had for a while. I actually purchased it with the intention of coloring during Kathy‘s recent 30-day color challenge but it turned out I had waaaayyyyy too much going on in October and was only able to play along a few days. (To be honest, I did color pretty much every day but was unable to share pretty much all of it.)

Michele Boyer - Saturated Canary

Along with coloring Beautiful World, I used a new product found in the Copic store, Paper Deco Tape.

X-Press It Paper Deco Tape

Each package contains ten 15 ft. rolls. It’s super easy to tear or cut and is easily repositionable, leaving no tacky residue behind. It’s available in the collection of ten rolls shown above as well as a set of ten glitter paper rolls.

X-Press It Paper Deco Tape - Tape holder

As an extra little bonus, the package”post” pulls out so tape can easily be removed for use then replaced for convenient storage.

Michele Boyer - Saturated Canary

I used three of the colors to create a striped pattern above my colored image. With the colored image secured over grid paper, it was easy to apply the tape in perfectly straight lines.

Next step, printing the sentiment.

Michele Boyer - Saturated Canary

I printed the sentiment onto a piece of printer paper. I held the sentiment up to a window, then placed the colored panel on top. I could easily see the sentiment through the colored panel so I carefully positioned the sentiment where I wanted it to print then used the Deco Tape to hold the colored panel in place while traveling through my printer. For extra stability, I added shorter strips of tape to the left and right sides.

Michele Boyer - Saturated Canary

The tape held my colored panel perfectly in place with no shifting at all. Once printed, I carefully removed the tape and finished my card.

Michele Boyer - Saturated Canary

Copic – B21, B23, BG10, BG13, BG18, BG70, E00, E21, E23, E31, E35, E40, E41, E43, E50, E57, G28, R20, R29, R83, RV32, RV34, W00, W1, W3, W5, Y21, Y35, YG17

I have a few other uses in mind for X-Press It Deco Tape. I’ll share those soon! Thanks so much for stopping by!

1amichele-siggy1

Coloring Faces & Hair with Copic Markers

I love to color all things, but if you’re a regular here on my blog, you know people are my favorite. There’s just something about bringing life to a face or figure. Boy or girl, young or old, it doesn’t matter. I, of course, have my way and style of coloring, but I love to see how others do the same. And I’m always up for learning something new!

for-you-final-with-book

I was so excited to get a copy of Copic’s Coloring Faces & Hair by Marianne Walker (published by Imagination International). As soon as the book was in my hands, I immersed myself in every word. The book is packed with info on coloring simple as well as complex images, different skin tones, styles of hair, no hair (bald heads), eyeglasses (which I found very interesting), and more. This is my favorite of Copic’s books to date.  *I highly recommend.*

for-you-final-500

Follow along below to see how I’ve colored the hair and skin on Saturated Canary‘s Ava. (I’m not sure if the image is still available as I don’t see it listed in the store.) Continue reading