Category Archives: Mo Manning

Joy to the World (Mo’s Digital Pencil) and How I Refill My Copics

Merry Christmas Eve, everyone! It’s my favorite day of the year! There’s just something magical about it. There’s always so much to do…wrap the last few gifts, prepare for meals tomorrow, tidy the house, go to church… It’s always crazy busy, but I just love it. Eeeee!  🙂

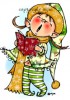
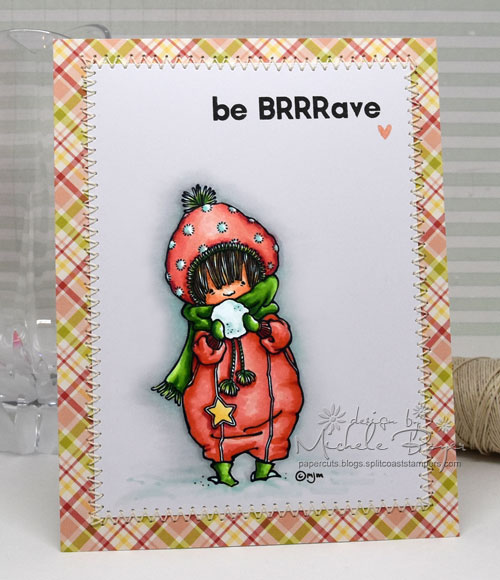
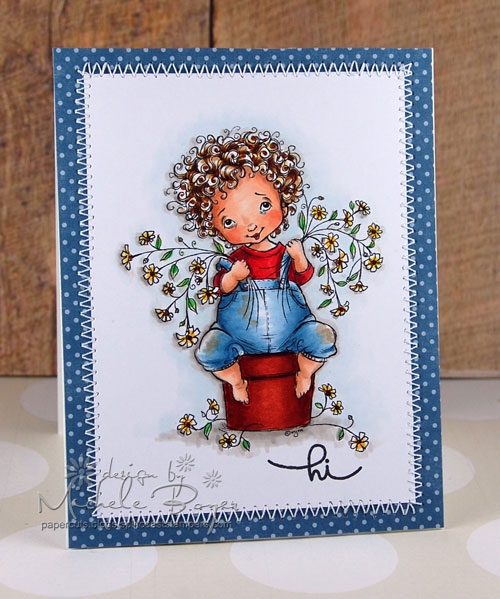
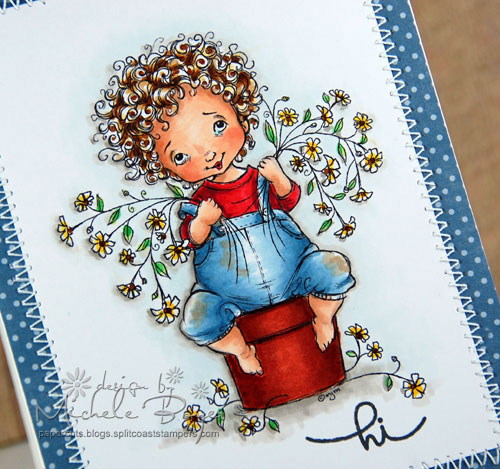
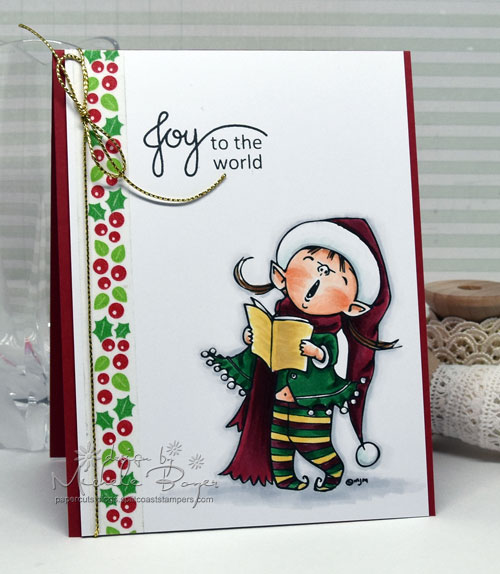
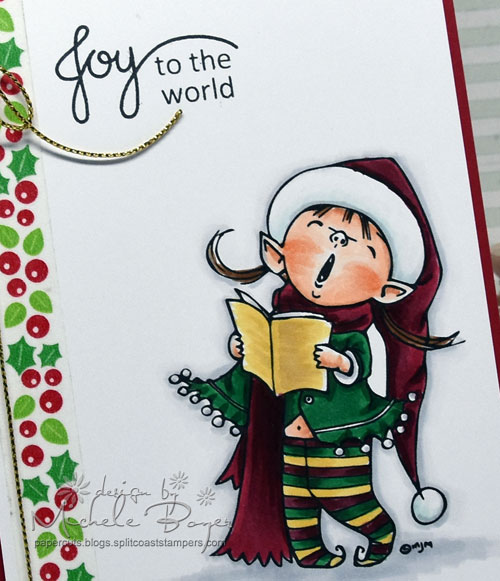
My card today uses another digital stamp, this time from Mo’s Digital Pencil. I had a hard time choosing among these adorable singing elves, finally settling on Singing Elf Wynn. (I probably should have just purchased all three!)

Michele Boyer - Mo's Digital Pencil

While coloring my image, I realized I had several markers to refill so I thought I’d share how I do that. I actually use two different methods depending on my available time and how dry the marker is.

PP1

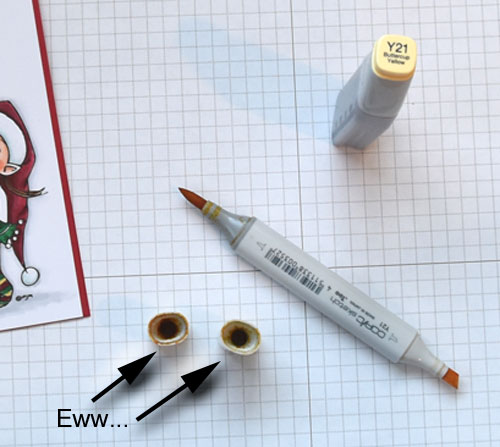
First I remove both caps. If the insides look like those above (yuck), I take the time to clean them.

PP2

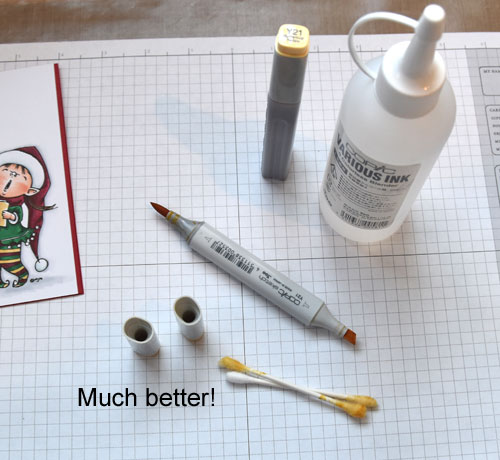
I apply a bit of Colorless Blender to the end of a cotton swab (I use cheap ones, from the dollar store) and swish it around the inside of the cap until it is clean.  I also use a cotton swab with Colorless Blender to carefully clean the ink away from the tip of the marker (if it’s especially inky).

PP3

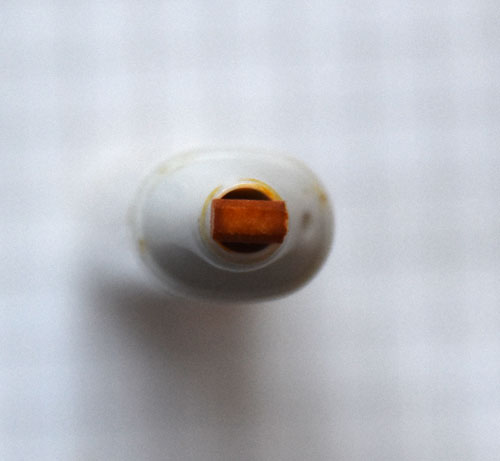
If time is short, I will simply apply drops of Various Ink (refill) to the chisel nib. If you look closely at a top view of the chisel end of the marker, you will see a small gap on each side of the nib. I add drops of the refill to the side of the nib and ink is drawn down into the marker.

PP4

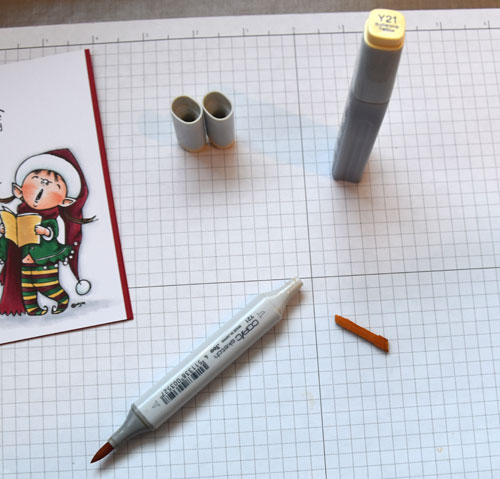
When I’m not in a hurry and want to be certain the marker is completely filled, I remove the chisel nib and carefully drop ink into the barrel.

Always remove the chisel end, never the brush, to refill a marker as brush nibs are easily damaged when removed.

A Copic Nib Tweezer is inexpensive and makes pulling nibs super easy, plus it will keep your fingers clean. I can’t find mine at the moment so I used my fingers to remove the chisel nib. In my experience, the chisel nib always comes out fairly easily with fingers.

If you are replacing the brush end, the nib tweezer makes removal of the brush much easier. I tried using a regular tweezer once and only the outer edges of the nib came out. The Nib Tweezer is the way to go for removing a brush nib.

Once the chisel nib is removed, I usually add about 35-40 drops of Various Ink, holding the marker over a paper towel just in case I overfill and the ink drips out of the brush end. After filling, simply reinsert the chisel nib into the barrel.

Boosters are handy for filling markers cleanly. They’re reusable but must be thoroughly cleaned in between each use. I mostly use one to refill my Colorless Blender marker. Because the Colorless Blender is thin, it’s harder (almost impossible) to fill the marker drop by drop.

Michele Boyer - Mo's Digital Pencil

Copic markers – BG10, BG70, C00, C1, C2, E00, E01, E41, E42, E57, G09, G19, R01, R02, R37, R81, R56, R89, RV34, Y21

Thank you SO much for visiting today, or any day. I hope you have a very merry, healthy and happy Christmas!

1amichele siggy

be BRRRave (mo manning/paper smooches)

Hi everyone! Yesterday I picked up a few digital images from various online sales and actually had time to color one! Yay!  Haha. This is Snow Tot One from Mo’s Digital Pencil.

Michele Boyer - Mo Manning

She’s sooo cute, I think.  She was printed onto X-Press It Blending Card and colored with Copic markers. The super cute sentiment is from Paper SmoochesWinter Sampler which you can get for free for just a few more days (through 11/30) with any $60 retail purchase, or it can be purchased on its own.

Copic markers - BG10, BG11, BG70, C00, C1, C2, E01, E11, E27, E35, G07, R02, R05, R14, R20, R37, Y21, Y32, YG17, YG23, YG25

It’s been a while since I’ve stitched on a card (or anything else for that matter). I blew the dust from my machine and crossed my fingers that it still worked. Luckily, it did.  🙂

Thanks for visiting today!

1amichele siggy

hi, Mo

Hey everyone.  🙂  I seem to be on a bit of a “digital image roll” lately.  This time I’ve checked out Mo’s Digital Pencil.

hi-2

I printed Flowers ForU onto X-Press It Blending Card and colored with Copic markers (listed below). The sentiment is from Paper SmoochesScripty Sayings.

hi-CU2

I liked coloring this little guy.  🙂   I kept it simple, adding no embellishments.

Thanks for stopping by!

Copic markers: E00, E11, R01, R02, Y21, E31, E35, E59, B91, B93, B95, B97, E42, E43, R24,R29, R39, E08, E09, Y19, YG03, YG09, BG10, W00, W1, E3.  Finished size 4 1/4″ x 5 1/2″

More Mo

Hi everyone.  🙂  I have a second design today from Mo’s Digital Pencil.  I’ve seen this image around for a while and finally decided I wanted it.  Maybe it’s the warmer summer days, I don’t know.  🙂

Thoughts of You

   MMTOY

This one is called “End of Summer.”   So carefree.  So sweet.  Kind of reminds me of my daughter.

MMTOYCUShe was fun to color.  As always, I used mostly markers with a bit of pencil on the ground.

Tomorrow begins previews of June My Favorite Things releases!  I hope you’ll check back!  Lots of fun things coming!  🙂

 Thanks for stopping by! Have a great day!

Digital Image:  Mo’s Digital Pencil “End of Summer”  Sentiment:  Cornish Heritage Farms “Silhouette Blooms I”   Ink: Memento Tuxedo Black  Cardstock: Stampin’ Up Always Artichoke, Papertrey Ink Vintage Cream   Patterned Paper: Basic Grey Green at Heart 6×6 paper pad  Accessories: Copic markers (E000, E00, E31, E33, E35, R20, R11, YG91, YG93, YG95, YR04, YR07, V12, V15, V17, C00, C1, Y0000), Spare Parts trim, Flora Doodles foam flowers, brads, clear embossing powder (over sentiment), dimensional boosters.  Finished size 5 ½” x 5 ½”.

There aren’t enough hours in the day

Hello.  🙂

I recently purchased a few digi-images from Mo Manning and finally had a chance to color one today.  I’ve started the other two so hopefully I can share those soon.  (There are just too many cute images out there these days and not enough time to play with them.)

Birthday Wishes Just For You

   MMBWJFY

This little girl with her static-y hair just cracks me up.  Remember how fun(ny) it was to rub balloons on your hair, stick them on the wall and then laugh at your hair standing on end?  🙂

MMBWCUI colored Angelina with Copics then used pencils for the ground.  (I just love those big cheeks!) 

I’ll be back soon!  With what I am not sure.  (I sound like Yoda.) 

Thanks for stopping by!  Have a great day!

Digi-image:  Mo Manning “Angelina’s Balloon”  Sentiment: Cornish Heritage Farms “Classic Essential Expressions”   Ink: Memento Tuxedo Black  Cardstock:  Papertrey Ink Dark Chocolate, Vintage Cream  Patterned Paper: Basic Grey Max & Whiskers 6×6 paper pad  Accessories: Copic markers (E000, E00, E33, E35, E37, E50, YR23, YR24, R05, R20, BG0000, BG01, BG34, BG49, YR31, W1, W3), Prismacolor pencils, ribbon and trim, Bow Easy, eyelet, linen thread, 1 ¼” and 1 3/8” circle punches, dimensional boosters.  Finished size 5 ¼” x 5 ¼”.