Category Archives: Gift Bags/Packaging

Be Merry

Hello.  🙂

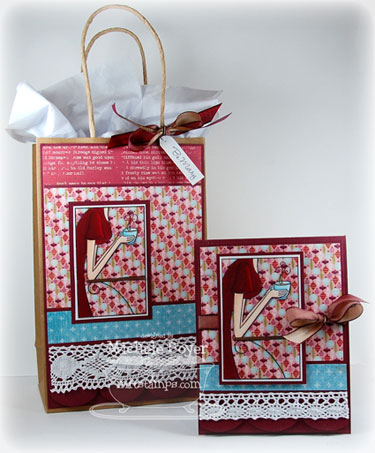
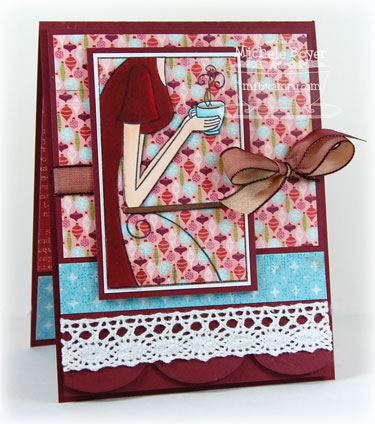
I’m off this morning to meet a friend for coffee and this is what I’ll be toting along.  I used Coffee? Tea? WTG from My Favorite Things.

Be Merry

Inside the gift bag is a little coffee bracelet (like this one) and a gift card…for the coffee shop, of course.  The little tag on the gift bag reads “Be Merry” and is from the Candy Cane Kisses à la modes set.

I used the same basic layout on the card, adding the ribbon to fill a bit of space.

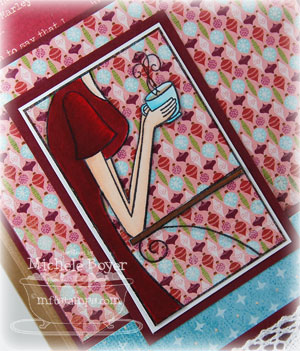
I stamped the image first onto the ornament patterned paper, then again onto white.  I colored the white image with markers, then cut out the girl and tabletop as one piece, adhering that over the patterned imprint.  Matted that onto white, then burgundy.

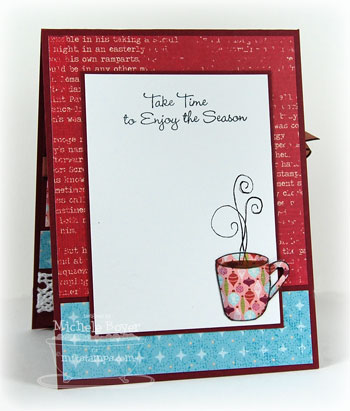
The sentiment I used on the inside is from Winter in the City WTG.    I’m not sure if I like that pattern on the mug, but it’s there.  And it’s done.  🙂

Thanks for stopping by! Have a great day!

Stamps:  My Favorite Things “Coffee? Tea? (WTG),” “Candy Cane Kisses (à la modes), Winter in the City (WTG)   Ink: Memento Tuxedo Black   Paper:  Stampin Up Bravo Burgundy, MFT white Perfect Paper Panel, Basic Grey Eskimo Kisses (6×6)   Accessories:  Copic markers (E000, E00, E11, E57, R29, R59,  B0000, B00, B02, C1), MFT Jumbo Scallop Die-namics die, trim, ribbon, dimensional boosters.    Finished card size 4 1/4″ x 5 1/2″.  Bag size 5 1/4″ x 8 1/2″ x 3″.

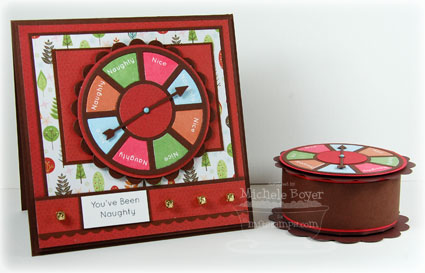
You’ve Been Naughty but Happy Birthday Anyway

I’m just teasing with my post title.  I have a couple things to share today but they are in no way related other than the fact that they both use My Favorite Things’ Die-namics Game Night Spinner and Stamp Set duo and new You Spin Me Additions.  I LOVE this die with the coordinating sets!  So much fun!

You’ve Been Naughty

This first project includes a card and matching “treat” box.  (I really like the little jingle bell brads!  I found them in a Hobby Lobby on my way home from Disney!)

Chalk inks are the best choice for stamping solid images with acrylic stamps.  But I don’t have very many so stamping the inside pieces of the wheel was a bit of a challenge for me.  After some trial and error, I was able to get a decent impression using my Mementos.   But now I’m on a mission to find more chalks.  I found a great new website the other day that lists cost comparison of ink types among different suppliers.  InkPads.net is a great resource.  On their left sidebar, you can choose the different brands to see a list of various suppliers and prices.    I didn’t purchase any yet, but I found distress inks for a great price at a camera store of all places.  Who would have thought?  So check it out!

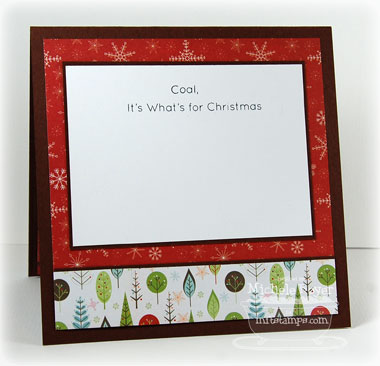
Since the spinner landed on “naughty,” the recipient of this card is getting coal (as stated on the inside of  my card).

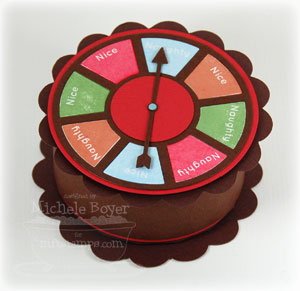
And here’s the perfect little box to hold the coal.  I used Jen’s Full Circle Treat Box template found here.    The actual template cuts a smaller box than I wanted so using my Cricut and Make the Cut software (many thanks to a very generous friend 🙂 and found here on Jody’s left side bar), I simply selected the entire template (all pieces at once) and dragged a little arrow in one of the corners until the top circle was the size of the spinner.  I wasn’t sure it would work, but it did!  YAY!  I love when things are easy.  So I cut my larger treat box, assembled another spinner and WA-LA.  Done.  🙂

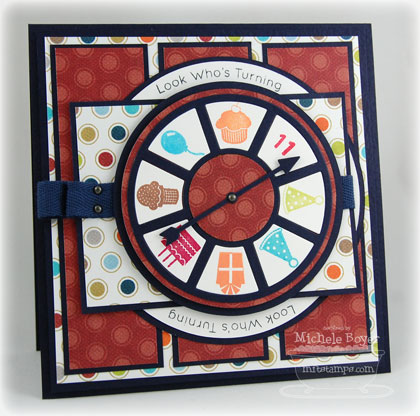
I decided to make another spinner card for my son’s birthday.

Look Who’s Turning 11

I like how this turned out but I didn’t realize until now that I placed two party hats side by side.  GASP! (lol)  I should not have done that.  But my son didn’t notice (and wouldn’t care) so it’s fine.

On the inside I stamped a couple more sentiments while leaving plenty of room for all of us to sign.

I’ll be back tomorrow with MFT’s Greatest Hits.  Thanks so much for stopping by!  Have a great day!

You’ve Been Naughty Set  —  Stamps:  MFT “You Spin Me Additions”   Ink: Memento Tuxedo Black, Summer Sky, Lady Bug, Potter’s Clay, Bamboo Leaves  Paper: Papertrey Ink Dark Chocolate, Vintage Cream, Imaginisce Cottage Christmas Collection (6×6 paper pad)  Accessories: MFT Game Day Spinner and Small Scallop Die-namics dies, Michaels mini brad, Spare Parts by Paper Studio Jingle Bell brads, Spellbinders Nestabilities, dimensional boosters, MFT Full Circle Treat box template, red-line sticky tape (on box).  Finished card size 5 1/4″ x 5 1/4″.

Look Who’s Turning 11 Card —  Stamps:  MFT Game Day Due and You Spin Me Additions  Ink: Memento Tuxedo Black, Colorbox Chalks  Paper: Papertrey Ink white, SU Night of Navy, My Mind’s Eye Lil Robots “Blinking Buttons” and “Sock ’em Stars”  Accessories: MFT Game Day Spinner Die-namics, Creative Memories circle cutter, Michael’s mini brads, navy twill, dimensional boosters.  Finished card size 5 1/4″ x 5 1/4″.

MFT à la modes Previews, Day 2

Hello.  🙂  Today the My Favorite Things design team is featuring the second of the two new à la modes sets, What’s Cooking?, available tonight at 10 p.m. EST along with this month’s WTG VIP.  I had a bit of fun with this set so please bear with me.  Lots of photos and a little tutorial. 

Happiness is Homemade
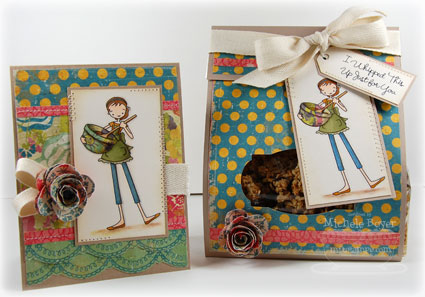
I created a card with a matching goody bag cover.  Inside the bag is some yummy granola.
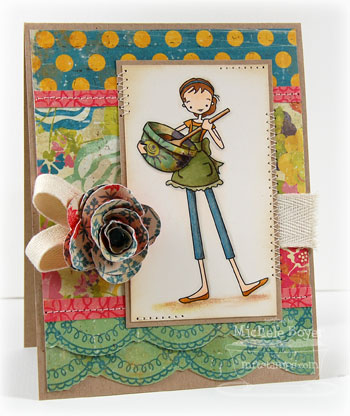
On my card, I colored the girl with markers and pencils, paper-pieced the bowl and added some straight and zig-zag stitches here and there.
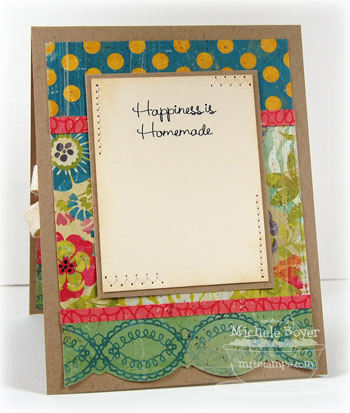
The inside was finished simply, adding bits of stitching to jazz it up just a bit.
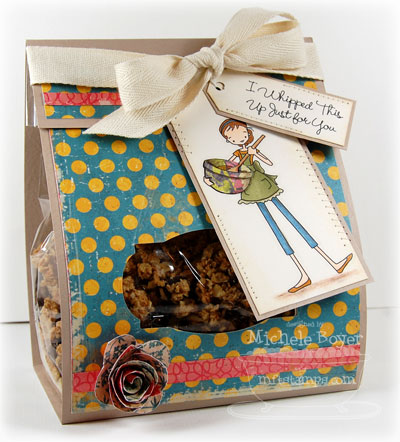
My bag cover was fit to wrap around one of MFT’s large Perfectly Clear flat-bottomed gussetted bags.  (It seems ‘small’ is the only size currently available, but the pattern can easily be altered to fit any size bag.)
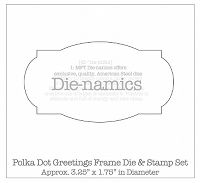
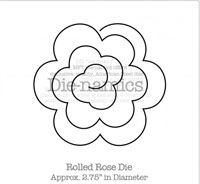
              

On the front of my bag, I used MFT’s Polka Dot Greeting Die-namics die to cut the window, and on the front of the bag and my card I used the Rolled Rose Die-namics die (currently out of stock).
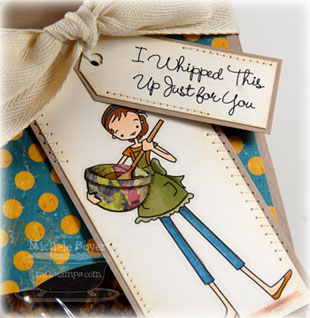
Here’s a close-up of my tag combo.  I added the stitches to the sentiment tag to give it a bit more of a homemade feel (and so it would match the other one).

Here’s how I made my Goody Bag Wrap.  You’ll need two sheets of 8 1/2″ x 11″ cardstock.
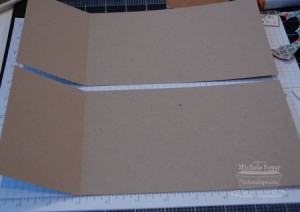
Cut two strips of cardstock to fit the width of your bag.  Mine was 5 1/4″.  Measure the depth of your bag bottom. Mine was 3″ so I scored and folded one end of each piece at the 3″ mark.
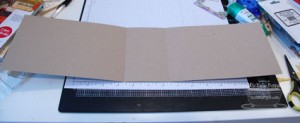
Place two rows of double-sided red-line tape on one of the 3″ ends and adhere the two pieces together, overlapping the 3″ ends. This will become the bag cover bottom.  At this point, you should have one long strip, 5 1/4″ wide, with a scored middle section 3″ wide.
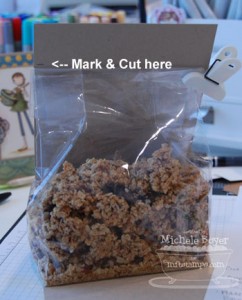
Place your 1/3 filled bag onto the center of the scored strip.  Bring up the front side and, holding the cardstock against the bag, mark the top of the bag.   Cut (remove) the area at that mark.
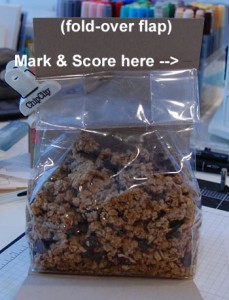
Place your goody bag back into the center of the strip.  Fold up the back and, holding the cardstock against the bag, mark the top of the bag again.  This will be your score line and will create the front fold-over flap.
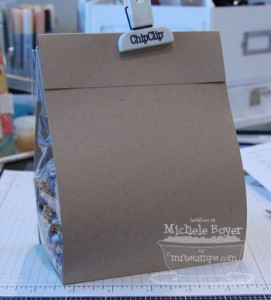
Now your goody bag cover is ready to decorate.    If you’d like to die-cut a window in your bag cover, simply position your die in the desired spot and run it through your die-cut machine.  You can mark the spot using light pencil marks if that helps.  And the Die-namics will easily cut through a sheet of cardstock layered with patterned paper so layer away!  🙂

To see more samples using this fun new set, please check out Kim’s blog HERE after 11 a.m. EST.  Then I hope you’ll come back tonight for our WTG VIP hop at 10 p.m. EST, at which time the two new à la modes sets as well as the WTG VIP package will be available.

Thanks for stopping by!  Have a great day!

Stamps: MFT “What’s Cooking?” (à la modes)  Ink: Memento Tuxedo Black and VersaMagic Wheat  Cardstock: Prism Kraft, MFT cream Perfect Paper Panel  Patterned Paper:  Crate Paper Restoration 6×6 paper pad  Accessories: Copic markers (E000, E00, E31, E33, E35, B95, YR23, YR24, YG93, YG91, W00, W1, W3, YR0000), Prismacolor pencils, MFT Polka Dot Greetings and Rolled Rose Die-namics, twill, sewing machine, sponge.  Finished card size: 4 ¼” x 5 ½”.  Finished Bag size:  5 ¼” x 6 ¼” x 3”.

Let’s Get Digi (in a template kind of way)

Hello!  🙂

Today the My Favorite Things design team is sharing samples using  four new digi-templates and a new digi-paper pack (now available)! 

The template files come in several different formats:

  • PDF: traditional print & cut version
  • SVG: for use with the Cricut Expression and Make The Cut or Sure Cuts a Lot software
  • Ai & DXF: for use with Wishblade, Pazzles, and KNK machines
  • GSD: for use with the Silhouette

How fabulous would it be to have a fancy machine cut all the pieces in a jiffy?  I wouldn’t know.  I used my paper cutter and scissors.  But I’m feeling the pressure….  😉

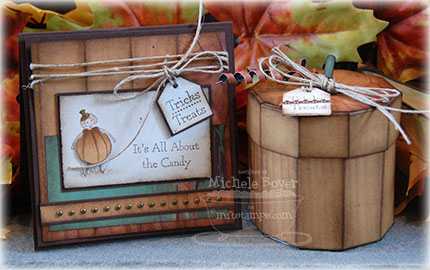
It’s All About the Candy 

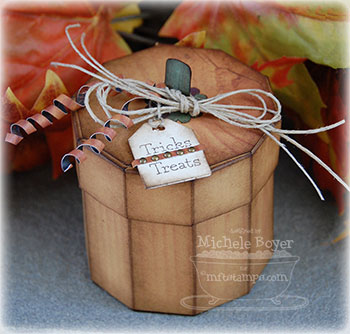
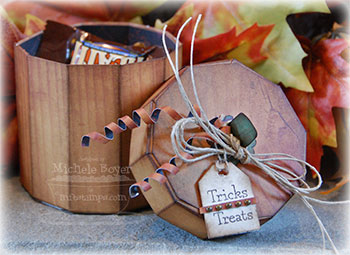
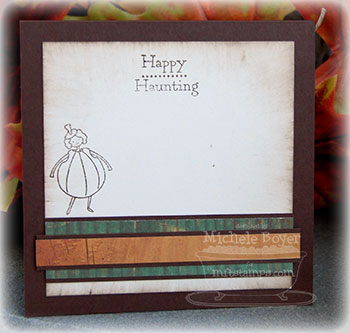
I’ve used MFT’s Tiny Town Halloween along with the Pumpkin Box template.   I ***love*** the pumpkin box.  

I printed the template onto the back side of a woodgrain patterned paper, constructed my pumpkin and sponged all the edges and score lines, quite heavily, with Ranger’s Walnut Stain Distress ink. 

I wrapped one long thin strip of paper around a bamboo skewer to get the curly piece.   After curling, I bent the piece just a bit in the middle(ish) and tucked it beneath my jute string before tying.

I’m really happy with how this turned out.  (Kind of simple, but kind of not.)   🙂  

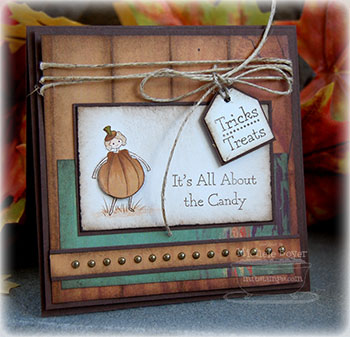
I created a matching card using the same papers, scoring and inking.   A small pop dot beneath the pumpkin costume added just a bit of dimension. 

And a little stamp and sentiment along with some sponging provided a quick finish to the inside.

I hope you’ll check out what the design team has done with these new products!  You can find direct links to the samples HERE after 11 a.m. EST. 

Thanks so much for stopping by!  Have a great day!

Stamps:  My Favorite Things “Tiny Town Halloween”  Ink: Ranger Walnut Stain Distress  Cardstock:  Papertrey Ink Dark Chocolate, Vintage Cream  Patterned Paper: Cosmo Cricket Haunted “Nevermore” and “Them Bones”   Accessories: MFT Pumpkin Box Template, Copic markers (E000, E31, E35, G21), jute string, Michaels mini brads, sponge, dimensional boosters.  Pumpkin box approximately 3 ¼” x 3 ¼”; card 4 ¾” x 4 ¾”.
A Faux Feel

Hi everyone!  I’m filling in, kind of last minute here, for Julia’s WT challenge at SCS.  Today we’re creating “faux feel.”  We can use patterned paper that has a look of texture, create your own texture by embossing or by using one of the SCS resources such as Faux Suede, Linen.  (There is also a new Brick Wall tutorial that looks interesting.)  How can you create a faux texture?
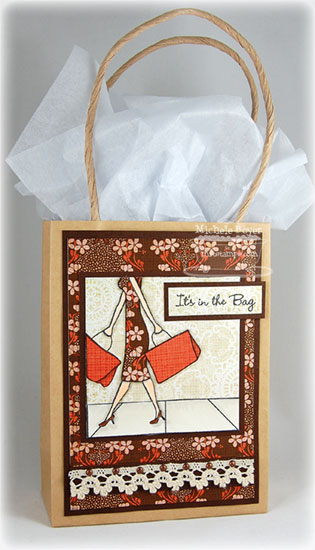
I have a little gift bag using one of MFT’s latest releases, Gifty Girl.  This set is also available in a kit here but can now be purchased on it’s own.

‘It’s in the Bag’ Bag

                MFTIITBB

My girl is all paper-pieced, right along with her pretty shopping bags and background.  At the bottom, I added a strip of crocheted trim with metal baby braddies over a strip of dark brown cardstock.  Here’s a closer pic:

                        MFTIITBCU
.

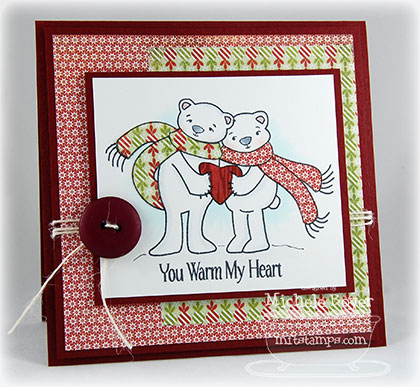
You Warm My Heart

      MFTYWMH3

Here I’ve used a small scrap of red woodgrain paper for the heart.  (Another of MFT’s newer releases, Polar Love.)

If you’d like to play along with the challenge, you can find it HERE.  Thanks so much for stopping by!  Have a great day!

Gift Bag:  Stamps: MFT “Gifty Girl”   Ink: Memento Tuxedo Black   Cardstock: Prism Suede Brown Dark, Natural Smooth   Patterned Paper: Basic Grey Nook & Pantry 6×6 paper pad   Accessories: Copic markers (E00, E37, W1, W3), Spare Parts trim, MFT metal Baby Braddies, gift bag.  Finished size 4” x 5 ¼”. 

You Warm My Heart Card:  Stamps: MFT “Polar Love”   Ink: Memento Tuxedo Black   Cardstock: Prism Crabapple Dark, Super Smooth White   Patterned PaperEskimo Kisses 6×6 paper pad   Accessories:  Copic markers (C00, C1, C3, C5, R20, B0000), button, cream jute string, dimensional boosters.  Finished size 5” x 5”.

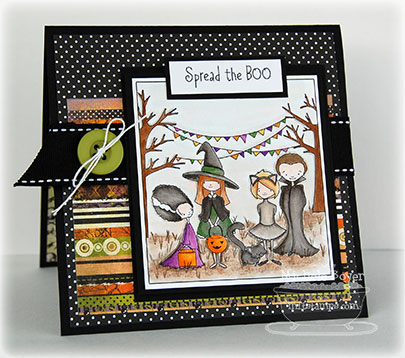
Spread the Boo!

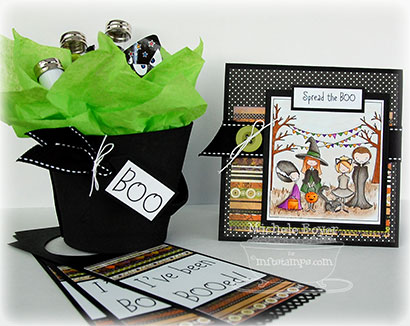
Have you ever been “boo-ed”?  Someone sneaks to your door after dark, rings your doorbell, drops off a bucket or basket of Halloween goodies and then runs away?  My Favorite Things has a super-fun new release today.  It’s a Boo Crew Digi-Stamp Kit containing everything you need to start the boo-ing in your neighborhood or office. 

Spread the Boo

      MFTBBS3

The kit comes with the Boo Crew digi-stamp, Boo Crew sentiments, Boo Bucket notecard download,  instruction sheet download, “I’ve Been Boo’ed” tag sheet download and project idea sheet, all for only $5.95.

The Boo Crew digital stamp is available separately (no sentiments) for $3.95.

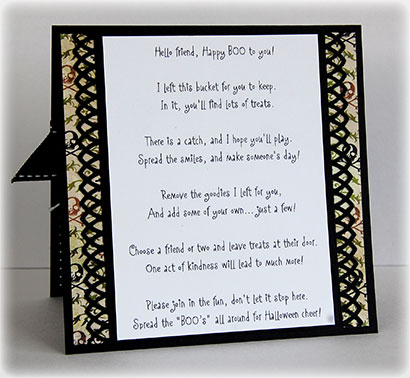
I printed the instruction sheet on plain white paper, rolled it and placed it in one of the tubes in the bucket.

I used one of the “I’ve Been Boo’ed” tags for the bucket (cutting off the portions I did not need), and then  used the whole “tags” to make door hangers which will be delivered with the bucket.  The recipient will keep one hanger to hang on his/her door while the others are passed along to the next recipients.

              MFT BCC3

Inside (notecard download):

              MFTBCCI

Spotlight Savings (9/30 and 10/1 ONLY):

Spend $25 on any MFT products and get a free large Digi-Kit with a value of $15.95.  To take advantage of this special offer, add at least $25 in any MFT products to your cart, then add the large digi-paper pack of your choice ($15.95 value).  At checkout, enter the code DIGIWITHIT to receive your $15.95 discount.

   Choose from these large digi-paper packs:

   Holiday Collection — all colors

   Kiss Collection — all colors

   Simply Spring Collection — all patterns

   Stephanie Fizer Papers — all seasons

Additionally, if you’re among the first 50 to place an order, you will receive a free Memento Dew Drop in New Sprout.

Thanks so much for stopping by!  Have a great day!

Digi-image/kit:  My Favorite Things “Boo Crew”   Cardstock: Prism Black, Super Smooth White  Patterned Paper: Basic Grey Eerie 6×6 paper pad   Accessories:  Copic markers (many), MFT Halloween ribbon, button, white string, circle cutter, Martha Stewart border punch, dimensional boosters, Dollar Store bucket.  Card size 5” x 5”.

I’ll Keep an Eye Out for You…and a SALE!

Hi everyone!  TGIF!

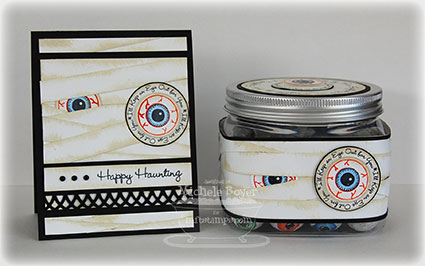
I have a fun little jar to share today.   (It’s kind of creepy but fun too.)

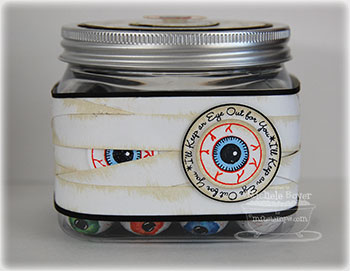
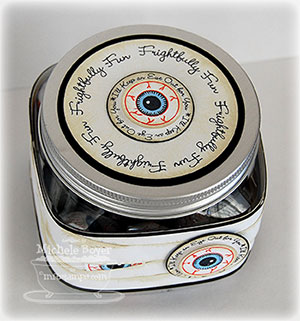
My Eyeball Jar

      MFTEBJ

I used MFT’s new Ghoulish Label set on a 16 oz. square jar.  I cut thin strips of white cardstock, sponged the edges with Ranger’s Old Paper Distress Ink and then adhered them to the jar.  To finish off the top and bottom edges, I adhered thin strips of black cardstock. 

MFTEBJTFor each eye, I stamped the eyeball twice, once in red, once in black.  I punched out the red eye, then colored the black image with a blue marker and punched out that part, adhering it over the red.  The outside eyeball (and lid eyeball) are raised on dimensional boosters.  I also traced over all of the red lines with a clear gel pen so they look wet and icky.

I made a matching card as well.  And please notice….NO PATTERNED PAPER!  I’m so proud of myself.  🙂  (My friend, Lynette, had challenged me to not use patterned paper.  That’s a really hard thing for me.)

   MFTHHJS

SALE:  The sets I used here (along with several others) are 25% off this weekend only!  Check these out:

Too Cute to Spook  –  Trick or Treat w/WTG  –  Who’s that Ghost Flopsey

Party Girl   –   Totally Witchin’   –   GHOULISH LABEL SET

Thanks so much for stopping by!  Have a great day!

Stamps:  My Favorite Things “Ghoulish Label” and “Trick or Treat with Who’s That Girl” (card sentiment)   Ink: Memento Tuxedo Black, Ranger Old Paper Distress, Adirondack Red Pepper   Cardstock: Prism Super Smooth White, Black   Accessories:  1 ¼”, 1 3/8” and 1” circle punches, Sakura clear 3-d glaze pen, Copic marker (B32), Martha Stewart border punch, MFT square jar, circle Nestabilities (for slightly larger black mat around eyeballs), Recollections mini-brads, sponge, dimensional boosters.  Card size 4 ¼” x 4 ¼”.

Saved by my husband…sort of

TGIM!  🙂 

So…curious about that shopping trip?  My husband ended up coming home from work earlier than anticipated so we had lunch together, then shopping.    Well, HE went shopping and left me in the car with the kids!  Oy.  It helped for a bit to have my daughter sit in the third row seat on the opposite side of the car (truck…whatever you want to call an SUV)…until she realized she could still touch the back of her brother’s head with her foot.  “Get your stinking foot out of my hair!”  “I don’t have a stinky foot.  YOU have a stinky foot!”  “Well your whole BODY is stinky!”  “Mom, he said my whole body is stinky!”  “No, I meant her whole body is REALLY stinky!”  Etc., etc., etc. 

Was sitting in the car better than going into the store?  I’m not sure.  

What happened to the gift?  My son decided a gift card would be best.  Little did he know he sealed his fate of waiting in the car with his sister when he made that decision.   Lesson learned.

Happy Birthday-Super Simple

CHFHBSB

So what do you do with a gift card when you have no card to slip it in?  I had “gift card” and “card” on the list my husband carried into the store, but his thought was why in the world should he buy a card when I have stacks and stacks of them in my stamp room.  I’ll tell you why.  Because I don’t have anything for a ten-year old boy and a ten-year old boy couldn’t care less if a card is handmade or not so why waste my time or supplies?

So I had to put on my thinking cap.  I needed something quick.  And easy.

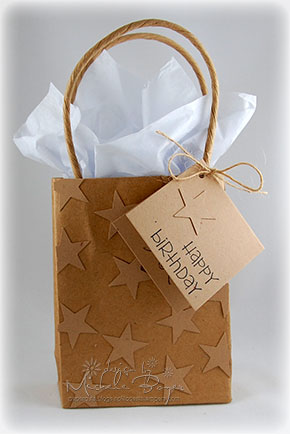
I try to keep on hand various sizes of gift bags.  Some are pretty small but just the right size for a gift card.  So I punched a bunch of stars from kraft cardstock and glued them to the front of the bag, clipping off the portions that hung over the edges.  The card is 2 1/2″ square.  So I think I used a 3 1/2″ strip of cardstock, total.  Super easy, super quick and I think it looks ok.  (?)  I’m sure my son’s friend only cared about what was inside anyway. 

Thanks so much for stopping by!  Have a great day!

Stamps:  Cornish Heritage Farms “Tag! You’re It!” (Kim Hughes Collection)   Ink:  Memento Tuxedo Black   Cardstock:  Stampin’ Up Kraft   Accessories: Stampin’ Up Star punch, natural jute string, hole punch. 

A Book Box and Switching Heads

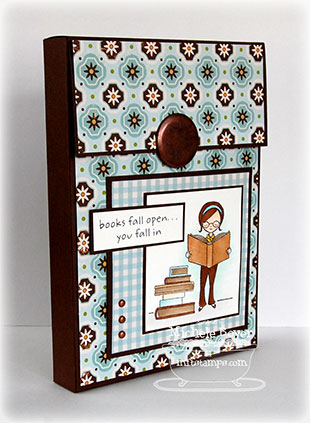
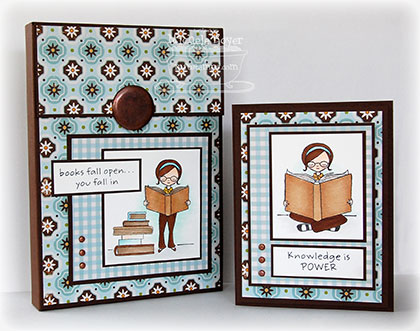
I often like to give books as gifts.  Yesterday, as I was beginning to work with I {heart} Books, one of My Favorite Things’ newest releases, I thought to myself…I wonder if I can make a sort of book “gift box.”  And I did!

Books Fall Open…

   MFTBFOBS

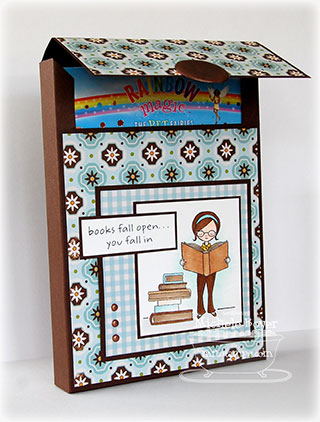
Here’s another view of the box.

                 MFTBFOBSV

And opened.

                 MFTBFOBO

I sized this box to fit three Rainbow Magic books for a very special little girl who happened to just get glasses this week.  😉   A Basic Grey snap magnet holds the flap in place.

ETA:  I’ll post a tutorial soon in the MFT Member Forum at SplitCoast.  (I’ll let you know when it’s up.)

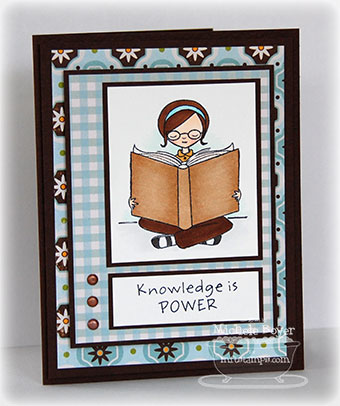
I wanted a matching card, but I didn’t necessarily want to use the exact same image, so I experimented a bit. In the stamp set, there is the girl image I used on the box and there is also a boy image.   Guess what?  Their heads are the same size so I switched the boy head for the girl head.  I was tickled! 🙂

Knowlege is Power

         MFTKIP

Pretty cool, huh?

Thanks for stopping by!  Have a great day!

Stamps:  My Favorite Things “I {heart} Books”   Ink:  Memento Tuxedo Black   Cardstock:  Prism Suede Brown Dark, Natural Smooth   Patterned Paper:  October Afternoon Weathervane “Chilly Mornings” and “Sweater Weather”   Accessories:  Copic markers (E000, E00, R20, E31, E33, E57, E50, B000, B00, YR23, W7), Karen Foster Biggie Brad, American Crafts mini copper brads, dimensional boosters and red line sticky tape.  Card size 4 ¼” x 5 ½”.  Box size 5 ½” x 1” x 7 ¾”.

Weekly Spotlight: MFT Kits — Just Add Color

MFTSLWe are pleased and proud to introduce something fresh, fun and completely distinctive – MFT kits!

Each month, My Favorite Things will reveal a new kit complete with an exclusive, unreleased stamp set and the items you’ll need to complete a very special project (or projects).

The set included with your MFT kit is a brand new, unreleased set and will not be available for a period of at least three months after the MFT kit containing the set is released.

By the Seashore is MFT’s July kit.  You can find it here.  (Available in limited quantity.)

Live in the Sunshine

MFTPB3Kit supplies include:

*On The Pier (mini-stamp set)

*6 die-cut tall gable boxes in ocean blue (assembled boxes measure approximately 2-1/2″ x – 1/2″ x 4-1/2″ including handle)

*15 yards of hemp in natural

*6 Perfect Paper Panels

*5 yards 3/8″ twill in natural

*100 aged copper brads

*Memento Dew Drop-Rich Cocoa

*Project sheet download

Just Add Color: (Copics)

Skin:  E0000, E00

Shirt:  E43 shaded over with B93

Pants:  E43 shaded with E33

Flip flops:  B93

Dog:  E31 shaded with E33

Sky:  B0000

Pier:  Combo of E11, E31, E33, W3

Hat:  Prismacolor pencils (golden crisscrossed with blue then blended a bit)

Tips & Tricks:

-Use MFT’s By the Seashore for additional image combinations and sentiments.  (I added the hat from this set.)

-Using a straight edge, add wood edges to pier.

-Lightly outline image using W3 marker to add shadow and depth.

-Mat colored image onto medium brown cardstock to increase contrast.

-Add strip of brown gingham from MFT’s Simply Spring Digi Patterned Paper Collection around outside of box.

YOUR SPOTLIGHT SAVINGS:  10% off ALL digi-papers.

FIRST 50:  Memento Dew Drop Collection, Week 2!   Color: Bahama Blue

HOOK-UP:  Purchase the MFT Kit between 7/8-7/14 and you will receive a discount code good for a FREE digi-paper download ($2.95 value) as well as a coupon for a future order.

Thanks so much for stopping by!  Have a great day!  🙂