Category Archives: Altered Items/3D

MFT Previews, Day 4 – Open if You Dare

Hi everyone!  I’m back today with another sample using My Favorite Things‘ August release.  Today I have a cute spider card (if you agree that is possible) along with a coordinating treat bag. 🙂

To create the sentiment on my card, I used one of the Trick or Sweet labels, stamped in new Sweet Tooth Pigment Ink then white embossed.  The label was then die-cut using the circle from Layered Treat Tag Die-namics and popped up on foam tape.  (Both the Trick or Sweet stamp set and Layered Treat Tag Die-namics will only be sold in the MFT Boutique.)

The spiders (from Paper Bag Peek-a-Boos) and chevrons  (from Peek-a-Boo Chevrons) were die-cut from Limeade, Grape Jelly and Black Licorice card stock.


On the inside, I stamped BOO in Black Licorice ink. The spider was die-cut from the white panel, creating a spider “window,” allowing the black to show through.

To create the matching bag, I die-cut two Paper Bag Treat Box pieces, scored and folded along the embossed lines and adhered the two using X-Press It Double-Sided tape.  Before assembling the bag, I die-cut the spider and web using Paper Bag Peek-a-Boos, drew in the string and adhered a panel of Grape Jelly card stock to the inside.  BOO was stamped in Sweet Tooth Pigment Ink and white embossed.  Lastly, the sentiment strip was die-cut using Fishtail Flags STAX.

Don’t forget to check out the MFT blog for direct links to more samples, details regarding the August 6 release and info on TEASER PRIZES!

Thanks for stopping by!  I’ll be back tomorrow!  🙂

Stamps: MFT Trick or Sweet   Ink: MFT Black Licorice, Sweet Tooth  Paper: MFT Black Licorice, Sweet Tooth, Limeade, Grape Jelly   Accessories: MFT Peek-a-Boo Chevrons, Paper Bag Peek-a-Boos, Layered Treat Tag, Blueprints 6, Fishtail Flags and Paper Bag Treat Box Die-namics, X-Press It Foam Tape, Inkssentials white opaque pen, white embossing powder, Corner Chomper.  Finished card size 5 1/2″ x 4 1/4″.  Bag size 2 1/2″ x 3 3/4″ x 1 1/2″.

Teacher Appreciation Week

I can’t believe it’s that time already.  Time to thank our teachers for their hard work and dedication to our children.  This is my daughter’s last year in elementary school and it is bittersweet.  I’m so proud of the young lady she is becoming, but I’m also saddened that time has gone by so quickly.  We’ve been fortunate all of her elementary years, loving every one of her teachers.  I think she is (“we are”) going to have a hard time saying goodbye.  Note to self:  Have tissues on hand.

I created a frame/card set last year.  I guess my daughter really liked it as she asked me to make a similar one for this year’s teacher.  How could I refuse.

I stained a $1 Michaels frame with Walnut Stain Distress Ink, using this month’s MFT Triple Scoop set, Chalkboard Greetings and Pure Innocence You Make the Grade.  The “chalkboard” was created using new Vertical Frame Die-namics and Steel Blue Cardstock.  I used Hot Fudge ink and Western Backgrounds to stamp the woodgrain on the chalkboard frame (die-cut from Kraft cardstock).

Across the top, I strung a banner using Mini Pennants Die-namics and Typewriter Alphabet.

For the card, I used a base of Steel Blue cardstock. Across the top, I added a strip of Dotted Scallop Border Trio with a Steel Blue button and bow from Blueprints 3.

My image was stamped onto a panel of X-Press It Blending Card and colored with Copic markers.  The greeting is white embossed.

On the inside, I gave my daughter’s teacher a grade of A+.  🙂


I hope she likes it.

Thanks so much for stopping by!  Have a great weekend!


Stamps:  MFT Pure Innocence You Make the Grade, Chalkboard Greetings, Western Backgrounds, Typewriter Alphabet  Ink:  Ranger Walnut Stain Distress, MFT Steel Blue and Hot Fudge   Paper: MFT Steel Blue, Hot Fudge, Banana Split, X-Press It Blending Card, Lily Bee Design Sweet Shoppe (6×6)  Accessories:  Copic markers (E00, E11, BV000, R02, E50, E53, E31, E33, E35, E40, E41, E42, Y21, Y35, Y38, BG72, BG75, BG93, W00, W1), MFT Vertical Frame, Blueprints 3, Dotted Scallop Border Trio and Mini Pennants Die-namics, Steel Blue button, white embossing powder, My Mind’s Eye Enamel Dot, string, wood frame.  Finished frame size 5 3/4″ x 7 3/4″ with 4″ x 6″ opening, card size 4 1/4″ x 5 1/2″.

MFT November Creative Challenge – Merry Christmas

Welcome to this month’s Creative Challenge with My Favorite Things.  The MFT Design Team Creative Challenge is a monthly feature where we are challenged to explore our creative side using a specific theme, product or technique.  This month we were challenged to create holiday home decor. Be sure to check out the MFT Blog for a list of all participating designers who have a project to share with you today!

I created a holiday frame using Lisa Johnson’s Stitched Stockings and Darling Dots, as well as Stocking Trio and High Rise Alphabet Upper Case and Lower Case Die-namics.

I first stamped the dotted background onto (pinkish) lightly patterned paper using Wild Cherry ink.

I die-cut the letters first from Whip Cream cardstock, then dotted paper.  The letters were layered and then adhered to the dotted paper using X-Press It foam tape.

On the left, I added a long stocking stamped in Jelly Bean Green ink.  Using hemp cord, I stitched on a Wild Cherry button, adhered the stocking using foam tape and wrapped the hemp cord ends to the back, securing with tape.  I then tied a tiny bow around the base of  the hemp cord, close to the stocking.

The shorter red stocking was stamped in Wild Cherry ink.  I stitched a small Jelly Bean Green button and wrapped the hemp ends to the back as with the green striped stocking.  This one, however, is not raised on foam tape but secured directly to the stamped/dotted paper.

On the right, I stamped and adhered the stocking as on the left side.  One is flat, one is raised.

Finally, to add just a bit of additional depth to the frame, I adhered strips of foam tape all the way around the inside edges of the frame before inserting my assembled panel.

Be sure to check out the MFT blog for more holiday home decor inspiration!

Thanks for so much for visiting today!  🙂

Frame (11 1/2″ x 4 1/2″ opening), Card 5 1/2″ x 4 1/4″    Stamps:  My Favorite Things “Stitched Stockings” and “Darling Dots” (Lisa Johnson Designs)   Ink: MFT Wild Cherry and Jelly Bean Green   Paper: MFT Whip Cream and Paver Red, Echo Park “Very Merry Christmas” (6×6) and Lily Bee Design “Jingle” (6×6)   Accessories:  MFT Stocking Trio, High Rise Alphabet Upper and Lowercase and Sentiment Strips Die-namics, MFT Jelly Bean Green and Wild Cherry buttons, Hemp Cord, X-Press It foam tape, frame.

MFT October Creative Challenge

Hi everyone.  I’m back today with the My Favorite Things October Creative Challenge.  The MFT Design Team Creative Challenge is a monthly feature where we are challenged to explore our creative side using a specific theme, product or technique.  This month we were challenged to create a custom banner.  Be sure to check out the MFT Blog for a list of all participating designers who have a project to share with you today!

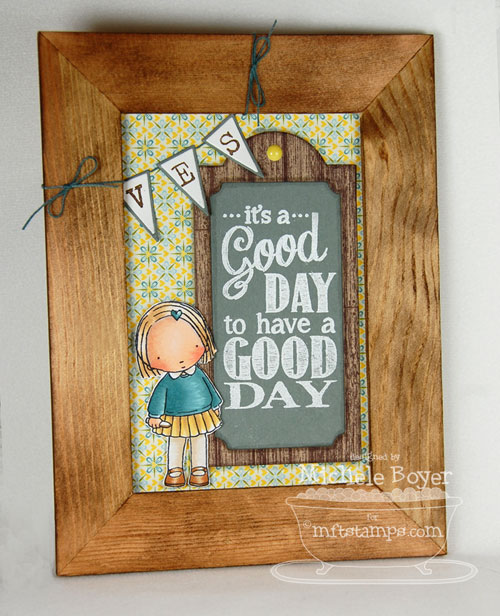
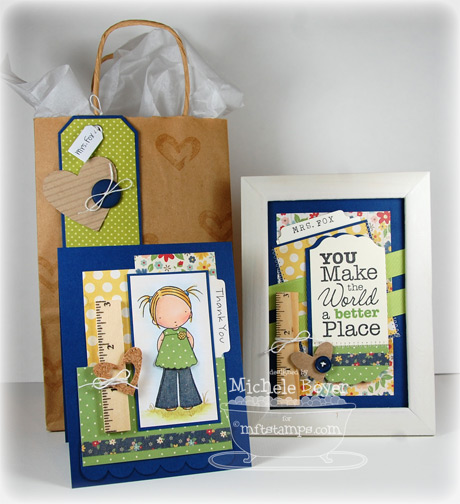
My project was totally inspired by something I saw on Pinterest.   Someone had created a frame with the word “Welcome” hanging from tags.

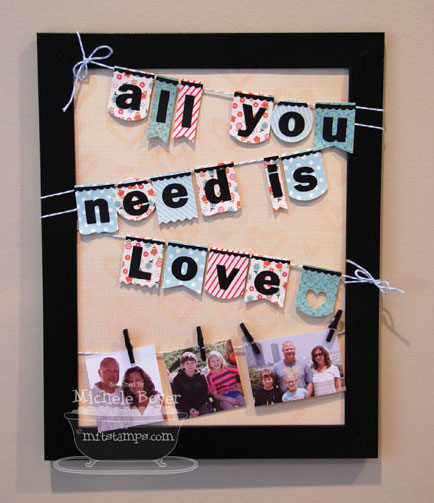
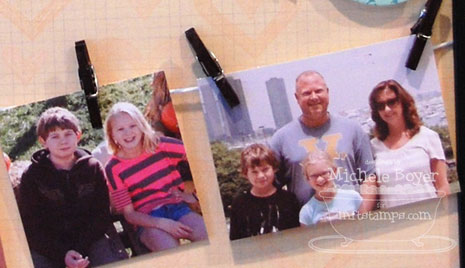
I thought it would be fun to use the phrase “All you need is love” and have an extra string for hanging photos.  By using the tiny clothes pins, I can switch the photos whenever I’d like.

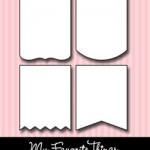
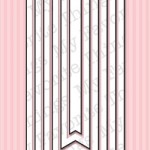
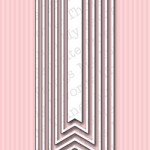
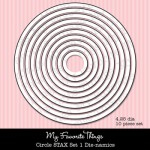
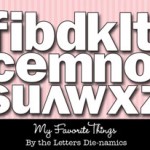
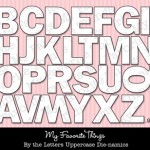
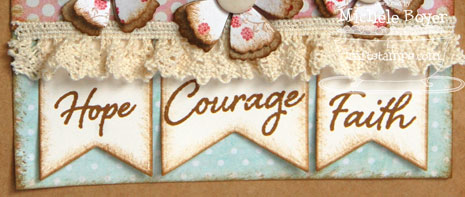
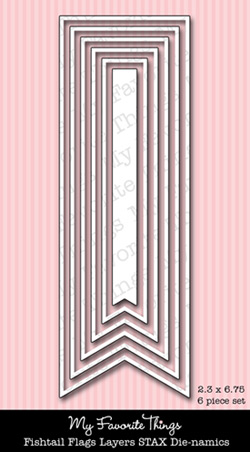
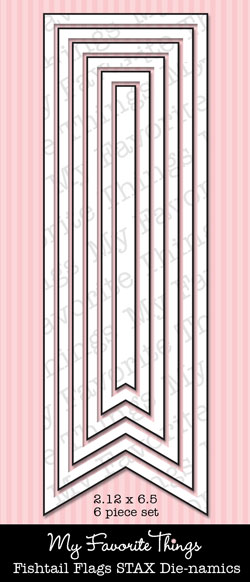
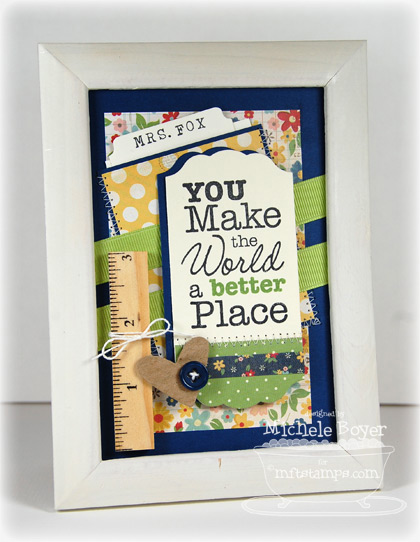
I used Mix Match Banners, Fishtail Flag STAX, Fishtail Flags Layers STAX and Circle STAX to create the flags.  The letters were die-cut from Black Licorice cardstock using By The Letters Die-namics.

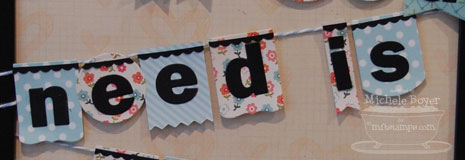
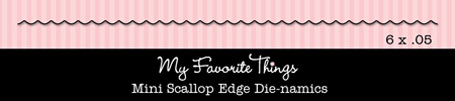
Across the top of each banner flag, I adhered a thin strip with one edge die-cut using Mini Scallop Edge.

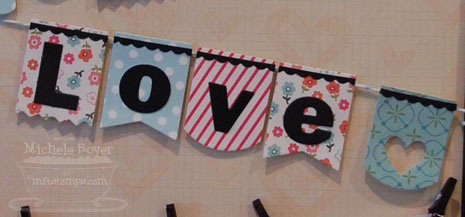
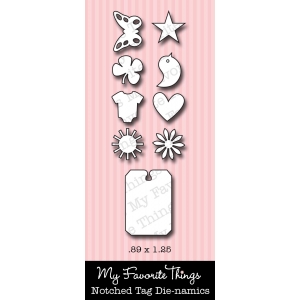
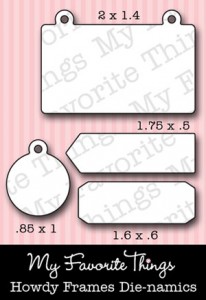
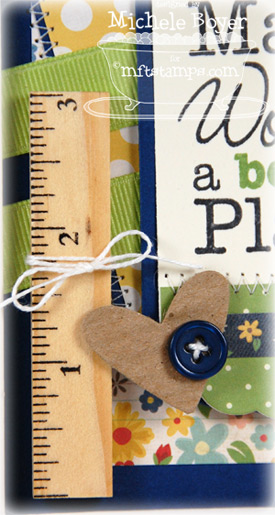
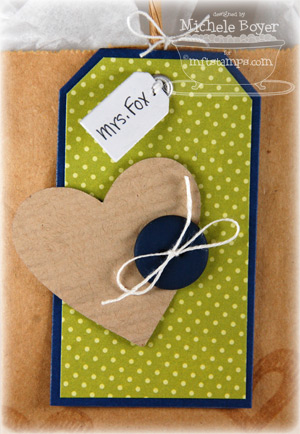
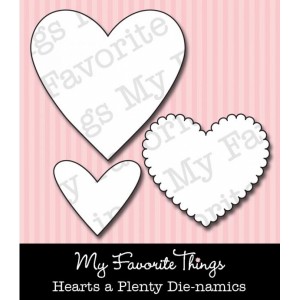
The uppercase L was cut using By The Letters Uppercase, and my favorite little flag (on the right) has a heart cut out using the small heart from Notched Tag Die-namics.

On the background paper, I used Amuse Studio Wheat ink to stamp the sketchy heart from Pretty Pocket and the tiny clothes pins were colored using a black Copic marker.

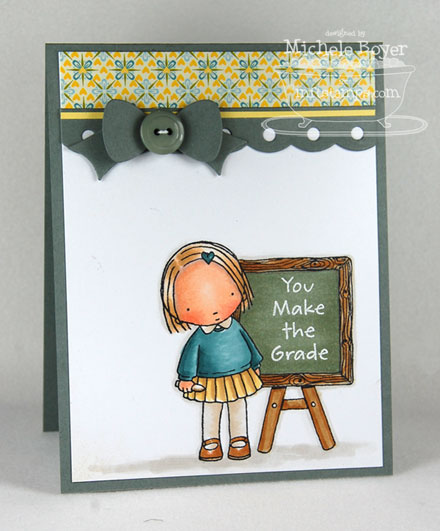
In case you haven’t heard, MFT is retiring LOTS of stamp sets (found here) …even some beloved à la modes.  Although it’s sad, I know that we are making room for new fun sets.  🙂

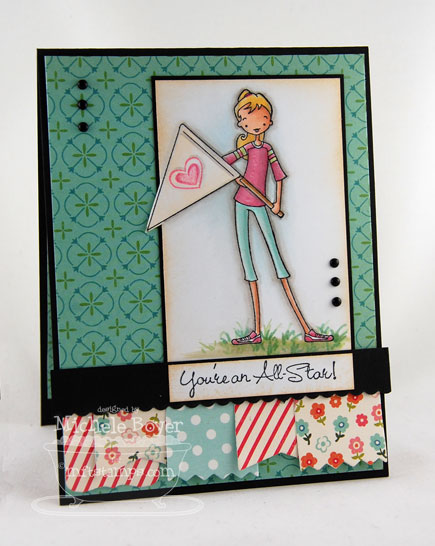
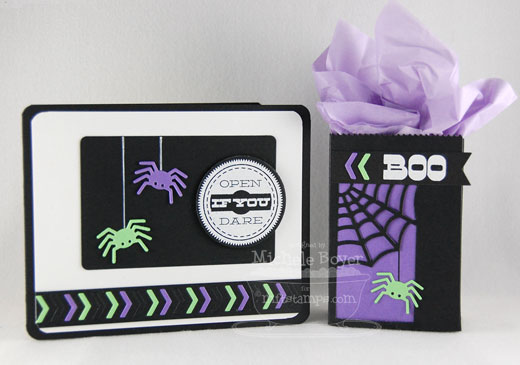
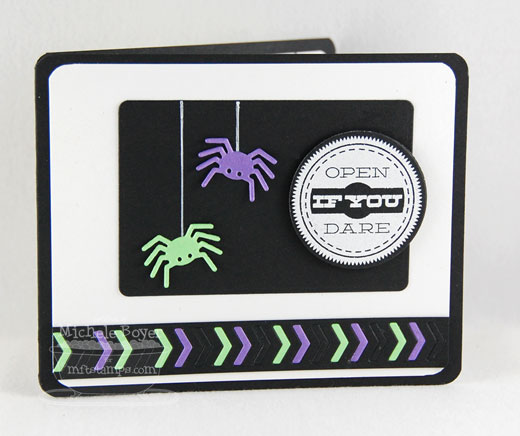
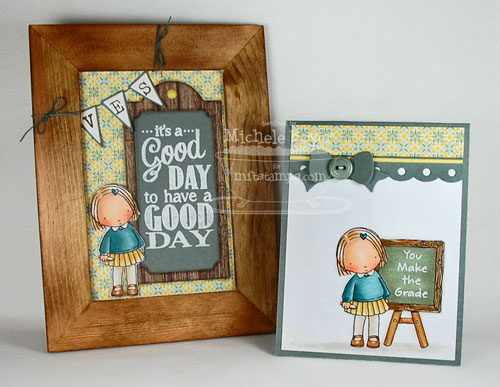
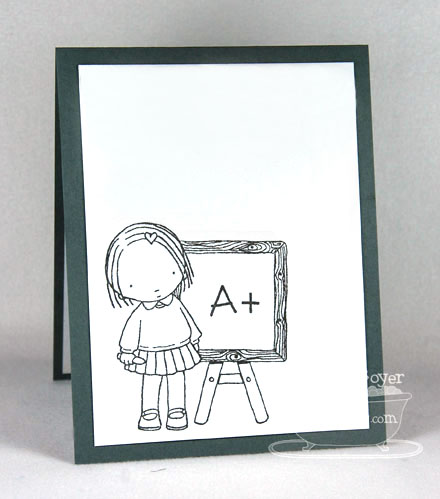
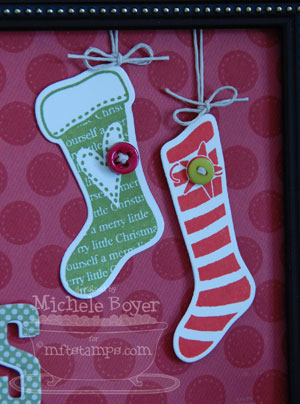
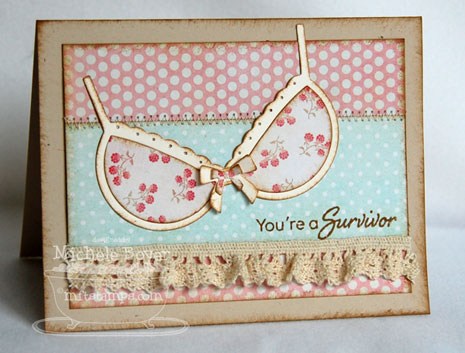
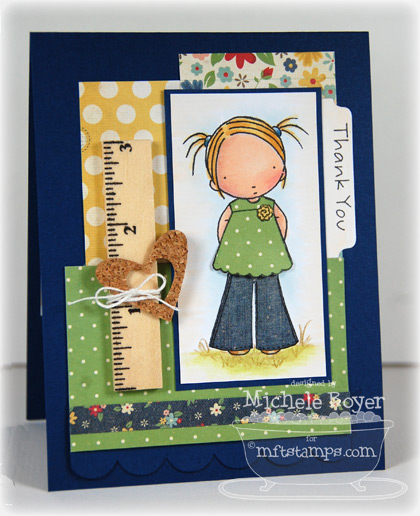
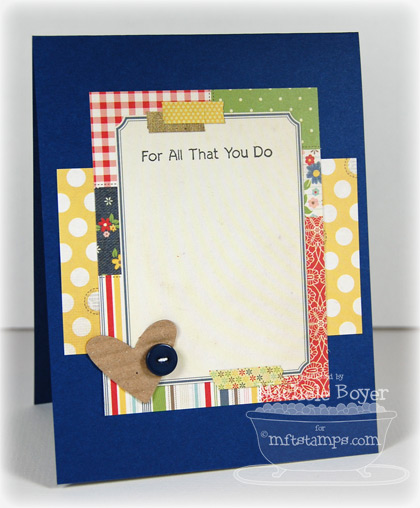
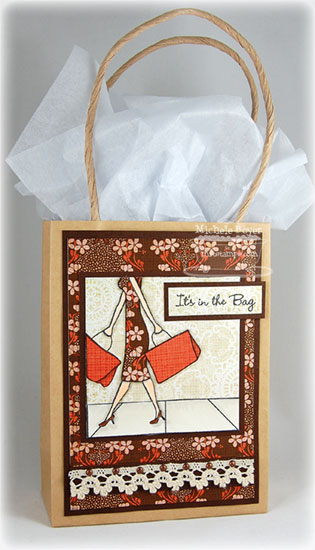
Since this one, All Star, uses a flag, and it will soon be gone (sniff-sniff), I thought I’d take the opportunity to use it one last time (officially, anyway).

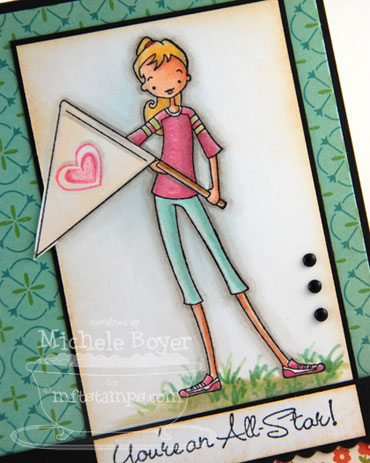
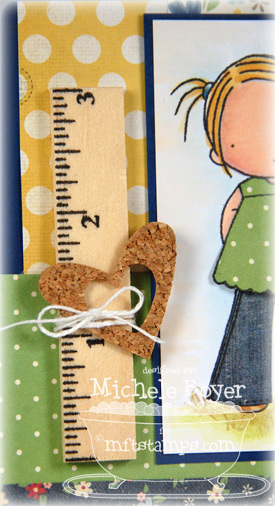
After coloring the image with Copics, I stamped a little heart (from Pretty Pocket) onto the flag using Amuse Grapefruit ink.  Since the patterned papers I used are more of a creamy color, I sponged the edges of my X-Press It Blending Card using Ranger’s Antique Linen Distress Ink.

Along the bottom, I added extra flags leftover from my frame.  I used the Mini Scallop Edge die to cut the bottom edge of the black band (beneath the sentiment).

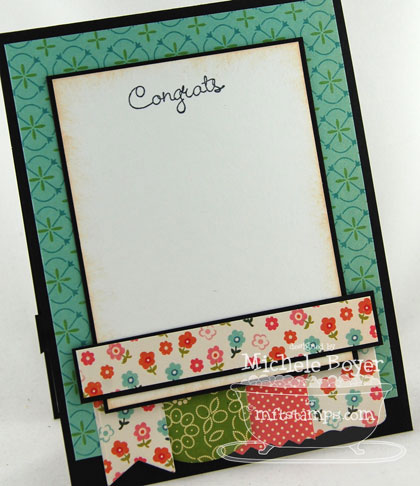
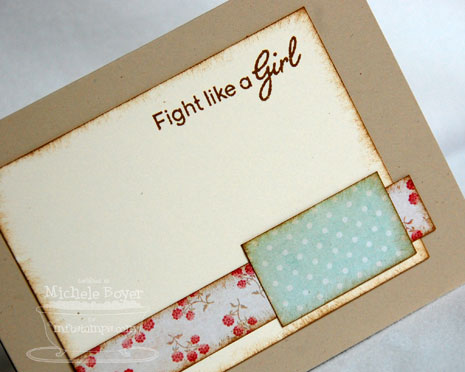
On the inside, I used the rest of my flags, securing each beneath the sentiment panel.

Be sure to check out the MFT blog for more inspiration!

Thanks for so much for visiting today!  🙂

Frame Stamps:  MFT Pretty Pocket  Ink: Amuse Studio Wheat   Paper: MFT Black Licorice, October Afternoon Woodland Park (8×8), Echo Park Dots & Stripes Homefront (6×6), grid paper (manufacturer unknown)   Accessories: MFT Mix Match Banners, Fishtail Flags STAX, Fishtail Flags Layers STAX, Circle STAX, By The Letters, By the Letters Uppercase, Notched Tag, Mini Scallop Edge Die-namics, The Twinery Shore twine, Copic marker (100), Canvas Corp mini clothes pins, X-Press It 1/4″ foam tape, frame (Ikea $1.99).  Frame opening 8×10.

Card Stamps:  MFT All Star (à la modes), Pretty Pocket   Ink: Memento Tuxedo Black, Amuse Studio Grapefruit, Ranger Antique Linen Distress  Paper: MFT Black Licorice, Whip Cream, X-Press It Blending Card, October Afternoon Woodland Park (8×8), Echo Park Dots & Stripes Homefront (6×6)   Accessories: Copic markers (E00, E11, Y21, E31, R81, R83, R85, BG11, BG13, W00, W1, W3, YG91, G43, G46), MFT Mix Match Banners and Mini Scallop Edge Die-namics, Michaels mini brads.  Finished size 4 1/4″ x 5 1/2″.

My Favorite Things October New Product Tour

It’s finally time to share My Favorite Things‘ newest releases!  The new products are now available in the MFT Boutique right HERE.

You can find direct links to all samples HERE on the MFT Blog.  Don’t forget to leave comments as you look!  One lucky winner will receive a $50 gift voucher to the MFT Boutique!

This month I created a gift set using new Have Hope stamp set and Support Hope Die-namics.

I used several Die-namics on the gift bag…Support Hope, Layered Rose, Fishtail Flags and Fishtail Flags Layers.

The bra base and flags were die-cut from Whip Cream cardstock.  The larger flower layers were cut from Kraft.

After die-cutting the pieces of the bra, I sponged the edges using Ranger’s Walnut Stain Distress Ink (totally inspired by Jodi).

Once I had sponged, I used a paper-piercer to create an eyelet-like appearance along the scalloped edges.

I layered three Layered Roses, sponging the edges of each, lifting the petals and stitching a Natural button using Hemp Cord.

I used both Fishtail Flags and Fishtail Flags Layers for the sentiments.  (I LOVE now having the wider range of widths!)

Of course I needed a coordinating card.  😉

Card base is Natural.

The sentiment, from Have Hope stamp set, was stamped in the same ink I used for sponging.

On the inside I used scraps of the patterned paper…already cut and too nice to toss.

The journal is my favorite piece of the set.  (I pray I will never need it and that I’ll never have anyone to send it to.)

The base journal started out as a $1 bright green Christmas notebook from Michaels.  As a matter of fact, there was a big cartoon reindeer on the front.  I removed the front and back covers, painted with Martha Stewart Root Beer Float then Putty acrylic craft paints then sponged the edges using the distress ink.

I added a couple more Layered Roses, added some trim and lots of stitching.

My tags were die-cut using pieces from Howdy Frames (also new this month).  The sentiments on each are from WTG Chooses Hope.

Here’s a close-up of the dimension.  I ♥ this book.  🙂

Be sure to check out the MFT blog for direct links to more samples using this month’s stamp and Die-namics sets!

Thanks for visiting! :)

Stamps:  MFT Have Hope and WTG Chooses Hope   Ink: Ranger Walnut Stain Distress   Paper: MFT Natural, Kraft, Whip Cream, My Mind’s Eye The Sweetest Thing “Lavender” (6×6)  Accessories: MFT Support Hope, Layered Roses, Howdy Frames, Fishtail Flags and Fishtail Flags Layers,MFT Natural buttons, hemp cord, Martha Stewart Root Beer Float and Putty acrylic paints, Maya Road trim, safety pin, X-Press It double-sided adhesive.  Finished sizes: Gift Bag 5 1/4″ x 8 1/2″ x 3 1/4″; Card 5 1/2″ x 4 1/4″; Journal 5 1/4″ x 5 1/4″.

MFT June Creative Challenge – Frame It!

Welcome to this month’s My Favorite Things Design Team Creative Challenge. The Creative Challenge is a monthly feature where we are challenged to explore our creative side using a specific theme, product or technique.  This month we’ve been asked to Frame It!  Be sure to check the MFT Blog for a list of all the designers who have put their MFT stamps and/or Die-namics dies to work to create a framed piece of art for you.

I took this opportunity to create a gift for my daughter’s teacher.


I just happened to have a frame lying around with a 4″ x 6″ opening.  I thought this was the perfect size for a desk…not too big, not too small.

For the focal panel, I used Vertical Greetings stamp and die set, inking the word “better” in green for emphasis.

The yellow dotted panel is actually a pocket, created to hold a small note card. The tab was cut using Mini Tabs Foursome Die-namics and Mrs. Fox’s name was stamped using Typewriter Alphabet.

My daughter wrote a short, encouraging note “for one of those days.”  🙂

I adhered a small ruler using Copic’s 1/4″ double-sided high tack tape.  (That ruler is NOT going to come off.)  The heart was die-cut from Hearts a Plenty Die-namics and thin cardboard.  After die-cutting, I ran the heart through my paper crimper for a corrogated look.

For the card, I used one of my all-time favorite Pure Innocence sets, Being Cute is What I Do. I pieced her pants and top, placing a small foam booster beneath the center bottom edge of her shirt to add a little dimension.  The “thank you” (from Pure Innocence All Occasion Sentiments) was stamped onto another Mini Tabs Foursome.

To create the open heart, I die-cut a small heart shape using Hearts a Plenty Die-namics and My Favorite Cork. I then centered the tiny heart die from Notched Tag Die-namics and ran the cork heart through the die-cutting machine a second time. On the inside, I completed the “thank you” with “for all that you do” (from Thanks a Bunch).  A second die-cut heart finished off the inside.

On the gift bag, I used Ranger’s Antique Linen distress ink and the heart from Pretty Pocket to stamp a subtle pattern. I used Traditional Tags STAX to die-cut the tag shapes and the largest heart from Hearts a Plenty, again, run through the paper crimper.


Don’t forget to check out the MFT blog for more inspiration!

Thanks for visiting today!  🙂

Stamps:  My Favorite Things “Vertical Greetings,” “Being Cute is What I Do” (Pure Innocence), “All Occasion Sentiments” (Pure Innocence), “Typewriter Alphabet,” “Thanks a Bunch”   Ink: Memento Tuxedo Black and Bamboo Leaves, Range Antique Linen Distress   Paper:  Prism Twilight Dark, X-Press It Blending Card, MFT Whip Cream Replenishments, Simple Stories “Summer Fresh”  (6×6)   Accessories:  Copic markers (E00, E11, BV000, R20, Y21, YR23, B93, B95, B97, BG70, E50), Prismacolor pencils, MFT Vertical Greetings, Hearts a Plenty, Mini Tabs Foursome, Simply Scallops Small, Notched Tag and Traditional Tag STAX Die-namics, Maya Road Vintage Wood Mini Rulers, My Favorite Cork, cardboard, paper crimper, buttons, string, MFT Sour Apple Grosgrain Ribbon, Copic 1/4″ double-sided high tack and 1/4″ foam tapes, frame.  Finished frame size (opening) 4″ x 6″, card size 4 1/4″ x 5 1/2″.


A Faux Feel

Hi everyone!  I’m filling in, kind of last minute here, for Julia’s WT challenge at SCS.  Today we’re creating “faux feel.”  We can use patterned paper that has a look of texture, create your own texture by embossing or by using one of the SCS resources such as Faux Suede, Linen.  (There is also a new Brick Wall tutorial that looks interesting.)  How can you create a faux texture?

I have a little gift bag using one of MFT’s latest releases, Gifty Girl.  This set is also available in a kit here but can now be purchased on it’s own.

‘It’s in the Bag’ Bag

                MFTIITBB

My girl is all paper-pieced, right along with her pretty shopping bags and background.  At the bottom, I added a strip of crocheted trim with metal baby braddies over a strip of dark brown cardstock.  Here’s a closer pic:

                        MFTIITBCU
.

You Warm My Heart

      MFTYWMH3

Here I’ve used a small scrap of red woodgrain paper for the heart.  (Another of MFT’s newer releases, Polar Love.)

If you’d like to play along with the challenge, you can find it HERE.  Thanks so much for stopping by!  Have a great day!

Gift Bag:  Stamps: MFT “Gifty Girl”   Ink: Memento Tuxedo Black   Cardstock: Prism Suede Brown Dark, Natural Smooth   Patterned Paper: Basic Grey Nook & Pantry 6×6 paper pad   Accessories: Copic markers (E00, E37, W1, W3), Spare Parts trim, MFT metal Baby Braddies, gift bag.  Finished size 4” x 5 ¼”. 

You Warm My Heart Card:  Stamps: MFT “Polar Love”   Ink: Memento Tuxedo Black   Cardstock: Prism Crabapple Dark, Super Smooth White   Patterned PaperEskimo Kisses 6×6 paper pad   Accessories:  Copic markers (C00, C1, C3, C5, R20, B0000), button, cream jute string, dimensional boosters.  Finished size 5” x 5”.

My Little To-Do Notebook

Hi everyone.  I have another little altered notebook to share today.

One Day at a Time    GFODAAT

I picked up a couple of these little “travel-themed” note pads at Michaels for $1 each.  They are SUPER fast to alter.  The notepad is only 3 1/2″ x 4 1/2″ so it’s the perfect size for using scraps (which is what I did here).   A small strip of the striped patterned paper was the perfect size for covering the pen.

I colored and cut out The Greeting Farm’s Laundry image, adhering it over a bit of crocheted trim (gift from my friend, Jody). 

The sentiment, which I think is the perfect companion to this image, is part of the Encouragement Expressions set by Cornish Heritage Farms.

This was so quick and easy to alter.  I may go back and get a few more.   🙂

Thanks so much for stopping by! Have a great day!

Stamps:  The Greeting Farm “HG Laundry”, Cornish Heritage Farms “Encouragement Expressions” (Mona Lisa Moments)   Ink: Memento Tuxedo Black   Cardstock: Prism Natural Smooth   Patterned Paper: Cosmo Cricket Early Bird Mini Deck   Accessories:  Michael’s note pad, Copic markers (E000, E00, E21, E31, E33, E35, E50, YR23, YR31, YG63, BG09, BG01, BG0000, R14, R17, W1, W3), Spare Parts trim, buttons, white string, Fiskars Rotary trimmer/scallop blade, corner rounder.

“It’s my Policy” and a big yawn

Hi everyone.  I’ve been up since about 3:30.  My daughter came into my room because she was cold. Normally I’d pop into the spare bedroom with her but our company arrives today and that room is not to be touched.  So instead I teetered on the edge of her twin bed for the next three hours.  I had hoped to sneak away after about 30 minutes but she wasn’t sleeping very soundly and I didn’t want her up and about again.  **YAWN**

A couple weeks ago, I picked up a few notebooks from Michael’s dollar section.  After removing the front and back covers, adding some black paint and patterned paper, I had this:

What’s the Story

    MFTWTSNB

I made a little rug for my bunny by trimming the long end of a piece of twill and pulling threads until I got the amount of fringe I wanted.  It is adhered to a thin black strip and then tucked under the bunny.  (I used a craft knife to cut along the bottom edge of the bunny so the black strip/twill slid beneath.)

The big clip was another Michael’s dollar section find.  They came in packs of two.  This one can be used as a book mark of sorts or to clip something to the inside cover.

MFTWTSONBHere’s a pic of the original notebook.  Kind of cute…but not exactly what I wanted.  (What I DO like is that the paper inside is lined…with no pictures.)

I thought about giving this to my daughter.  I noticed last night as I was helping with her homework that she was not writing her words on the lines.  I said, “Katie, why don’t you try writing ON the lines.”  Her very matter-of-fact response was, “It’s my policy to write the words over the lines.”   Well, ok then.  lol.  And I also remembered the 16…or was it 18? …notebooks of varying sizes I found throughout her room the other day when I was cleaning.  So I suppose I’ll keep this one for myself…or give it away.  I don’t know. 

Thanks so much for stopping by!  Have a great day!

StampsMy Favorite Things “What’s the Story”   Ink:  Memento Tuxedo Black   Cardstock:  Prism Natural Smooth   Patterned Paper: October Afternoon Detours: Gazebo and Hometown: Norm’s News   Accessories:  Copic markers (E50, R20, E31, W00), Bazzill crocheted flower, Prima crocheted lace, Papertrey Ink button and cream jute string, Michael’s notebook and clip, twill, Making Memories “Asphalt” acrylic scrapbook paint, sponge brush.

I’ll Keep an Eye Out for You…and a SALE!

Hi everyone!  TGIF!

I have a fun little jar to share today.   (It’s kind of creepy but fun too.)

My Eyeball Jar

      MFTEBJ

I used MFT’s new Ghoulish Label set on a 16 oz. square jar.  I cut thin strips of white cardstock, sponged the edges with Ranger’s Old Paper Distress Ink and then adhered them to the jar.  To finish off the top and bottom edges, I adhered thin strips of black cardstock. 

MFTEBJTFor each eye, I stamped the eyeball twice, once in red, once in black.  I punched out the red eye, then colored the black image with a blue marker and punched out that part, adhering it over the red.  The outside eyeball (and lid eyeball) are raised on dimensional boosters.  I also traced over all of the red lines with a clear gel pen so they look wet and icky.

I made a matching card as well.  And please notice….NO PATTERNED PAPER!  I’m so proud of myself.  🙂  (My friend, Lynette, had challenged me to not use patterned paper.  That’s a really hard thing for me.)

   MFTHHJS

SALE:  The sets I used here (along with several others) are 25% off this weekend only!  Check these out:

Too Cute to Spook  –  Trick or Treat w/WTG  –  Who’s that Ghost Flopsey

Party Girl   –   Totally Witchin’   –   GHOULISH LABEL SET

Thanks so much for stopping by!  Have a great day!

Stamps:  My Favorite Things “Ghoulish Label” and “Trick or Treat with Who’s That Girl” (card sentiment)   Ink: Memento Tuxedo Black, Ranger Old Paper Distress, Adirondack Red Pepper   Cardstock: Prism Super Smooth White, Black   Accessories:  1 ¼”, 1 3/8” and 1” circle punches, Sakura clear 3-d glaze pen, Copic marker (B32), Martha Stewart border punch, MFT square jar, circle Nestabilities (for slightly larger black mat around eyeballs), Recollections mini-brads, sponge, dimensional boosters.  Card size 4 ¼” x 4 ¼”.