Monthly Archives: April 2018

Gnome Love (stamping bella)

Hello everyone.  Today the Stamping Bella team is revisiting images from the latest release. I chose one of the super-cute gnomes.  🙂

Stamping Bella Gnome Bouquet

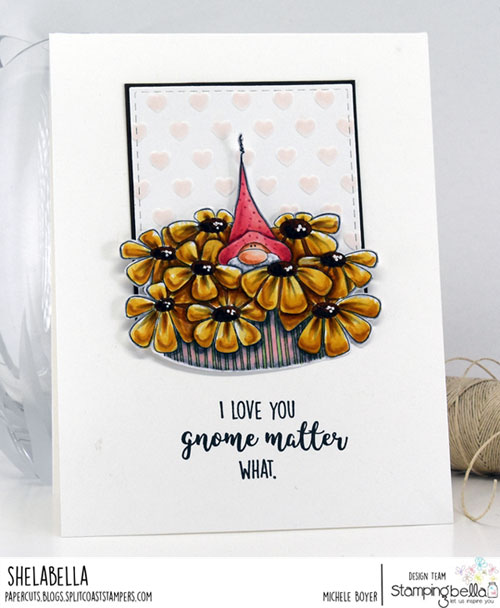
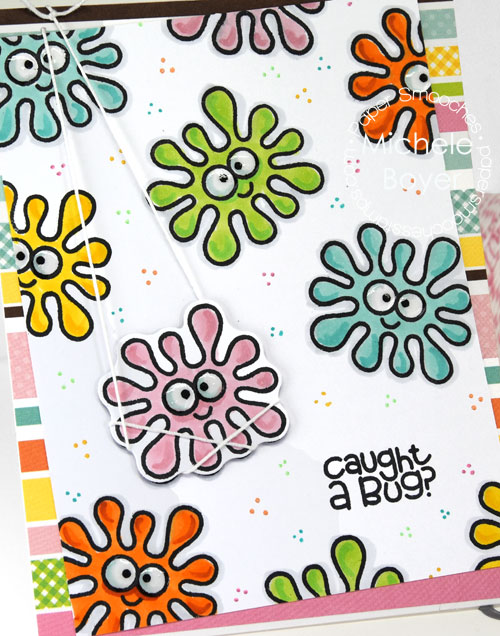
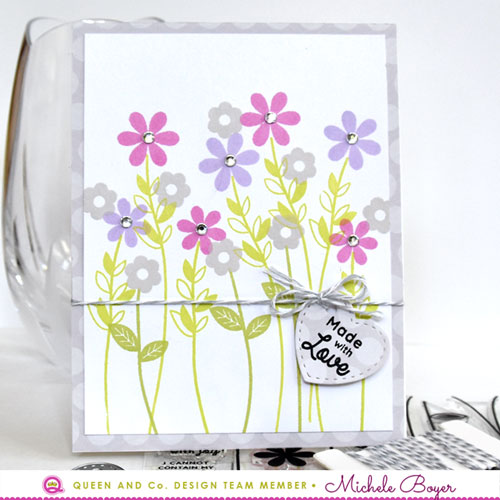
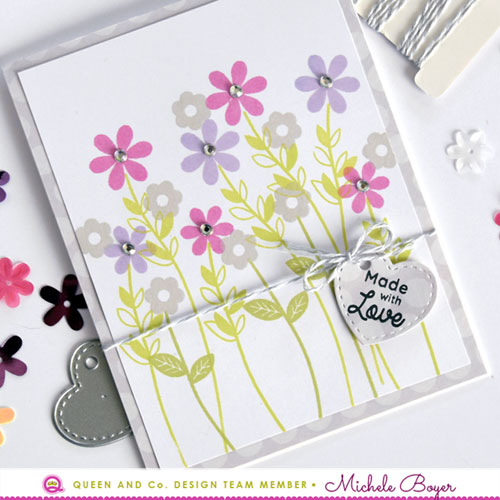
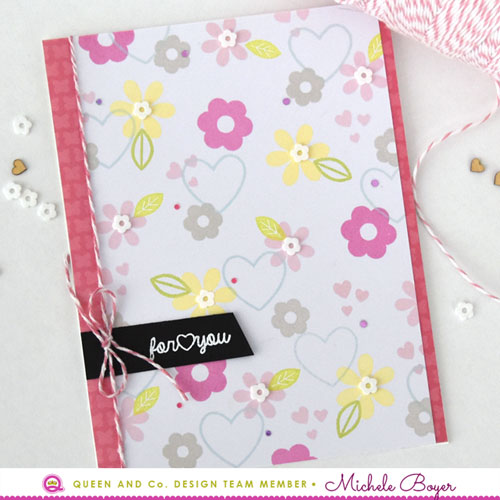
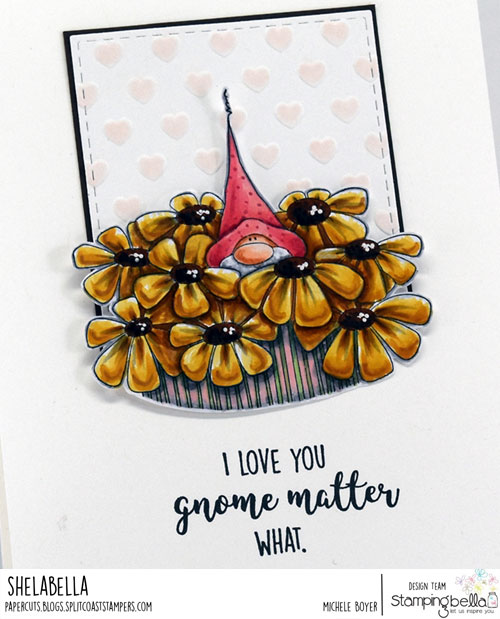
My Gnome Bouquet is full of Black Eyed Susans, colored with Copic markers. In the center of each, I added a few dots using a White Pearl Kirarina Wink glitter pen.

Stamping Bella Gnome Bouquet (close-up)

Copic markers – C1, C2, C3, E00, E01, E11, E31, E33, E35, E37, E49, E59, G43, G46, R0000, R21, R32, R43, R46, Y21, YR23, 100; Kirarina Wink White Pearl glitter pen

Behind the gnome, I added a block of white card stock, embossed using Swiss Hearts embossing folder. I lightly colored over each heart with an R0000 marker.

Also, posted on Instagram this week, Edna’s Cup of Tea.  (Copic markers used listed below photo.)

Stamping Bella Edna's Cup of Tea

Copic markers – BG0000, BG11, C00, C1, C2, E00, E01, E11, E31, E35, E37, G40, G43, G46, R0000, R000, R00, R01, R02, R20, R39, R83, R85, RV11, RV32, Y21

NEXT WEEK’S CHALLENGE

Use any current Stamping Bella image. (No restrictions.) If you’d like, email your card to [email protected] by next Thursday to be featured on the SB blog. By doing so, you’ll also be entered to win some Bella Bucks! All challenge details can be found HERE.

Thanks so much for visiting today!

1amichele siggy

Fun with Fruit (queen & company)

Hello everyone!  It’s been so very cold and dreary lately, I decided to pull out some fun bright papers and dies. Queen & Company’s Fruit Basket was the perfect fit!

First I whipped up a sweet orange card using the fruit slice die from the kit.

Queen & Company's Fruit Basket shaker kit

I sponged Twisted Citron and Cracked Pistachio Distress Oxide inks as a background, spritzed a bit of water, then added the striped paper (from the Fruit Basket paper pad included in the kit).  Before die-cutting the orange slices, I sponged Spiced Marmalade Distress Oxide ink and spritzed with water. After die-cutting, I added a bit more ink to the bottom of each slice.

Queen & Company's Fruit Basket shaker kit (close-up)

The shaker was filled with Fruit Toppings (extras HERE) and Jewels, and new Orange Epoxy Dots were added after stamping the sentiment.

Supplies: Fruit Basket kit, Jewel Toppings, Epoxy Dots, Sheer Glue

Before I get to my next card, I wanted to share how I store those super cute topping containers.

Topping-Trunk

Queen & Company’s new Topping Trunk INCLUDES 62 containers of the most popular toppings! I absolutely love it. It’s so nice to have them contained, all in one pretty sparkly pink place.  🙂  You can find a list of the toppings included HERE.

Next, I created a fun hippy slice of watermelon. (It’s a bit different…)  🙂

Queen & Company's Fruit Basket kit

I die-cut the green and pink pieces from the Fruit Basket paper pad, adding a bit of darker pink ink to the top of the slice. After gluing strands of pink and green Sparkle String across the rind, I punched a few holes and inserted two more strands. The ends are secured with tape on the back side. To accommodate for the bit of thickness on the back, I raised the main panel on foam tape after stamping the sentiment.

One-in-a-Melon-CU-500

I adhered two of the included black Twinkle Drops as eyes and a die-cut mouth (from Taylored Expressions’ Spare Parts).  As a finishing touch, I die-cut some small circles and randomly adhered around the watermelon.

Supplies: Fruit Basket kit, Sparkle String, Sheer Glue

Thanks so much for visiting today!  : )

1amichele siggy

cutest “bug” (paper smooches)

Hi everyone. While bugs and viruses can be no joke, this little germ from Paper Smooches, I’m sure, is among the cutest.

Paper Smooches Healthy Vibes

He’s from Healthy Vibes stamp set which includes six main images, three sentiments and seven accent images. It’s a really cute set for quick and easy get well cards.

Paper Smooches Healthy Vibes (close-up)

Copic markers – BG11, BG13, C1, RV11, RV32, Y17, Y18, YG03, YG06, YR16, YR18; Kirarina Wink Dandeliion, Spearmint, Lime, Pink, Orange

I stamped all of the germs onto X-Press It Blending Card and colored with markers. I stamped an extra which I die-cut, popped up on foam tape and “caught” in a bit of white string. Once all germs were colored, I added Glossy Accents to all of the eyes and in the background added dots using various Kirarina Wink glitter pens.

I hope you remain germ/bug-free!  With this strange “spring” we’re having, I hear there has been a resurgence of the flu. Yuck!

Thanks so much for visiting!

1amichele siggy

More from Queen & Company’s Love Jar Kit

Hello everyone! I have two more cards to share using Queen & Company’s amazing Love Jar kit!  I love this kit so much. (If you missed my first two, you can find them HERE.)

Queen & Company Love Jar Kit

First I created a shaker filled with both stamped flowers and sequins. With some flowers stamped inside, the jar appears more full, even if the sequins are pooled at the bottom.

After determining the jar placement, I masked off that section with removable tape then stamped random flowers within. I adhered the foam shape, added a sprinkling of sequins and white flower toppings then adhered the acetate. Before gluing the jar and lid die-cuts, I sponged the bottom of the jar with a bit of blue ink.

Made-with-Love-500-R2-CU

I added some texture to the background by scoring vertical lines every ¼”. Then I tied the string and added the stamped tag. The strip of dotted paper was added after die-cutting just the bottom of the jar from one edge, then neatly snuggled up to the foam shape. Beneath, I stamped a row of hearts.

I adhered a few sequins outside of the jar then created a small heart from one of the flower sequins as follows:

Heart-Sequin-500

I nipped off two of the petals just above the hole. This creates the top of the heart. Then from the remaining (leftover) piece, I cut a small triangle from one of the petals. Once fitted together beneath the string, the two pieces create the appearance of a heart.

Supplies: Love Jar kit, Sheer Glue

Stamped-Flowers-Made-for-You-500

On my next card, I created a bit of a garden scene, stamping two of the stems and leaves from the stamp set in two different shades of green, bending each slightly in different directions.

Stamped-Flowers-Made-for-You-500-R2-CU

After stamping the flowers, I adhered the panel to a block of gray dotted paper from Flirty Florals (included in the kit). The tag was die-cut from the same gray dotted paper then stamped and tied on with gray twine. As a final touch, I adhered iridescent rhinestones (also included in the kit) into the centers of some of the flowers then adhered the assembled panel to my card base. Super easy!  : )

Supplies: Love Jar kit

Also available are foam and acetate refills as well as the Flirty Florals paper pad. (I think I’m on my fourth of this paper. That’s how much I love it.)

Thanks so much for visiting today!

1amichele siggy

You Know You’re in Love (stamping bella)

Hello everyone! TGIF! It’s been a long week here so I am very happy for the weekend! Today the Stamping Bella team is revisiting the Bella Exclusive Images category found HERE, HERE and a couple HERE.  The Stamp of the Month, Chocolate Bunnies, is also within the Bella Exclusive Category and is available at 20% off through 4/30.

Stamping Bella Close-Ups "In Love"

This week I used Close-Ups “In Love.”  The couple is so cute hiding behind the bouquet.  🙂

Stamping Bella Close-Ups "In Love" (close-up)

Copic markers – BG0000, BG96, C00, C1, C2, E00, E01, E11, E30, E31, E33, E35, E37, G17, R20, R30, R32, R35, R39, Y21, YG09, YG17, YR23

Striped paper is from Queen & Company‘s Simple Stripes paper pad. Markers used are listed above.

Below is a card I shared on Instagram this week. It’s me watching the Washington Capitals playoff games. (It’s super-stressful.)  lol.

Stamping Bella The Squidgy Who Couldn't

Copic markers – BG0000, BG13, BG15, BG18, C00, C1, C2, E00, E01, E11, E31, E35, E37, E50, R20, R83, R85, RV32, Y21

I used The Squidgy Who Couldn’t with the frame from Tiny Townie Room Decor. I simply printed the Caps logo from my computer, stamped the frame over it and die-cut with the coordinating Room Decor die. Copic markers used are listed below photo. Pretty paper is from Queen & Company‘s Picture Perfect paper pad.

NEXT WEEK’S CHALLENGE

Use an image from the latest release.  If you’d like, email your card to [email protected] by next Thursday to be featured on the SB blog. By doing so, you’ll also be entered to win some Bella Bucks! All challenge details can be found HERE.

Thanks so much for visiting today!

1amichele siggy

i ♥ you sew much (paper smooches)

Hello everyone.  I hope you had a nice weekend. We’re back to cold, wet weather here. Seriously…enough is enough. Ugh.

Today I’ve used Paper Smooches‘ super cute Needle Little Love stamp set with coordinating dies. There are so many cute images in this set.  I chose a few to create a little sewing station.

Paper Smooches Needle Little Love

I stamped all pieces onto X-Press It Blending Card and colored with Copic markers.

Paper Smooches Needle Little Love (close-up)

Copic markers – BG10, BG11, BG13, C1,C2, C3, E51, G03, G05, G07, R17, R27, R35, R39

Beneath the pieces, I used two patterned scraps. The cherry print was a strip across the top of another pattern.  There was a hole in the middle (where the paper pad would hang) which I strategically covered with the pin cushion.

Thanks so  much for stopping by today.  🙂

1amichele siggy

A Huge Thank You (stamping bella)

Hi everyone! Welcome to another fun Bellarific Friday with Stamping Bella!  For this week’s challenge we’re revisiting older images (anything not from the latest release). I chose an image from Bella 2.0.

Stamping Bella Flowers Behind My Back-aBella

I adore FlowersBehindMyBackABELLA …the flowers, the big skirt. She’s fun to color.  🙂  After coloring with markers (listed below),  I added tiny white dots using a Kirarina Wink White pen.

Stamping Bella Flowers Behind My Back-aBella (close-up)

Copic markers – BG0000, BG10, C00, C1, C2, E00, E01, E11, E31, E35, E37, R01, R27, R32, R35, R43, RV23, Y18, Y21, YG06, YG09, YR23, Kirarina Wink White Pearl pen

I stamped part of the sentiment on the main panel with the last portion stamped on black card stock, white embossed and trimmed to fit. Lastly, I added a few Epoxy Dots from Queen & Company. (I like these dots as they are slightly flatter than most dots.)

NEXT WEEK’S CHALLENGE

Use an image from the same category as the March Stamp of the Month (Chocolate Bunnies) which includes Stamping Bella Exclusive (or miscellaneous) Images found here, here and there are a couple here. If you’d like, email your card to [email protected] by next Thursday to be featured on the SB blog. By doing so, you’ll also be entered to win some Bella Bucks! All challenge details can be found HERE.

Thanks so much for visiting today!

1amichele siggy

Queen & Company’s *fab* new Love Jar Kit

Hi there!  I’m super excited to be sharing my first two samples today using Queen & Company‘s new Love Jar kit. It’s my new favorite! The kit includes one of my most beloved paper pads – Flirty Florals, jar dies with two stitched tags, NINE pre-cut foam and acetate shapes, a lovely stamp set filled with hearts, flowers, stems, leaves and sentiments, five colors each of twine and rhinestones, flower sequins and, of course, super-cute toppings!  There are six colors of tiny flower shapes, clear diamonds (another of my favorites) and adorable teeny tiny wood circles, stars and hearts! Oh my. So much love!

Filled-with-Thanks-500

To create my first card, I used removable tape to mask off a small section for sponging light blue ink inside the jar. I stamped the flowers, stems and leaves then adhered the jar foam shape. Inside, I placed some white flowers, clear diamonds and wood hearts.

Filled-with-Thanks-500-CU

After adhering the acetate, I die-cut the jar and jar top from white card stock and the little frill of scalloped trim from pink gingham. Once the jar was assembled, I die-cut and stamped the cute heart tag and tied to the jar with pink twine. I used three tiny hearts along the left side as an extra embellishment.

Supplies: Love Jar kit, Sheer Glue

For-You-500

Next, I used the stamps to create my own patterned paper, using white flower toppings as flower centers. The sentiment was stamped onto black cardstock using white ink, then white embossed.

For-You-500-CU

Within the bag of mixed flower sequins, there are itty bitty circles from the sequin centers. I used a sprinkling of them on my card to add bits of colorful shine. I applied a tiny dot of glue then used a Quickstick (any tacky ended tool will do) to place the tiny sequin piece in the glue.

Supplies: Love Jar kit, Sheer Glue

In addition to the Love Jar kit, refill foam and acetate shapes are available. You can find an extra Flirty Florals paper pad HERE and a variety of sparkly diamonds HERE.

Thanks so much for visiting today!

1amichele siggy

big birthday wishes (stamping bella)

Hello everyone. Thanks for stopping by today.  🙂

I’ve been on a bit of a sponged cloud kick lately. (I know, kind of random.) In today’s sky, I’ve placed Stamping Bella‘s Blossom Loves Balloons. I think she was the very first Tiny Townie I ever saw so she has a special place in my heart.  🙂 

Stamping Bella Blossom Loves Balloons

I first stamped the image then sponged in the clouds,  taking care not to apply ink too terribly close to the image lines.

Stamping Bella Blossom Loves Balloons (close-up)

Copic markers – BG0000, BG10, BV02, BV20, C00, C1, C2, C3, E00, E01, E11, E31, E35, E37, G43, R0000, R00, R01, V20, Y0000, Y00, Y21, YR61; Kirarina Wink White Pearl, Dandelion, Orange, Violet and Lime Green opaque glitter pens

I colored with markers  then added dots to the balloons using Kirarina Wink glitter pens. The sentiment is from new Birthday Sentiment Set. On the stamp, the words are in one line but  I used my MISTI to reposition each word to better fit my space.

I’ll be back soon. Have a great day!

1amichele siggy

Garden Greetings (paper smooches)

Hello everyone! I hope your Monday is off to a great start. Today I have a card to share using Garden Greetings from Paper Smooches.  (There is a coordinating die set as well although I didn’t use it on my card today.)

Paper Smooches Garden Greetings

Since I’m still missing the southwest (and freezing), I’m totally gravitating toward that little barrel cactus on the right.

Paper Smooches Garden Greetings (close-up)

Copic markers – BG10, BG96, C00, C1, C2, E42, E43, E44, G21, G24, R20, R21, R30, R83, R85, RV32

Each image was stamped onto X-Press It Blending Card and colored with Copic markers.  The word “you” was stamped using Scripty Sayings.  It’s actually part of the “miss you” sentiment.

Thanks so much for visiting today!

1amichele siggy