Monthly Archives: January 2018

Queen & Company’s New Shaker Kit is SO sweet!

Hi everyone! Today I’m sharing two more cards I created using Queen & Company’s latest kit, Candy Land. It’s packed with pre-cut foam to coordinate with the candy and candy jar dies, pre-cut acetate, paper pad, stamps, eleven bags of toppings, four fiber packs and a handy storage pocket to contain all the sweetness!

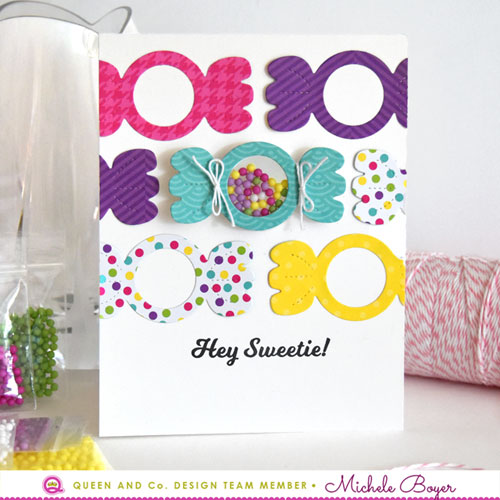
On my first card, I did something a little different and created a shaker that can be seen inside the card, like a little window of candy.

Hey-Sweetie-500

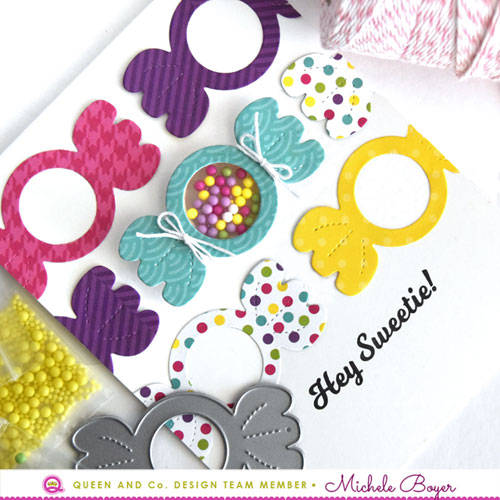
I used the candy die to cut shapes from several patterns in the Candy Land paper pad. I laid them out on my card front, adhering and trimming all but the one in the center. With the turquoise candy positioned in place (but not adhered), I lightly traced the inside of the circle with a pencil. I then used a slightly bigger circle die to die-cut an opening through the front of my card base. I adhered one of the pre-cut acetate shapes to the back of the card front covering the opening then adhered a white die-cut candy over the acetate. This creates a clean finish on the inside and provides a base for the toppings. (I highly recommend picking up a tube of Sheer Glue as I have found this to work best with acetate.)

Hey-Sweetie-CU-500

I then adhered the coordinating foam shape over the opening on the front of the card, filled with toppings and adhered a second pre-cut acetate circle. After adhering the turquoise die-cut over the shaker, I tied a bit of string around each side of the candy.

Supplies: Candy Land shaker kit, Sheer Glue

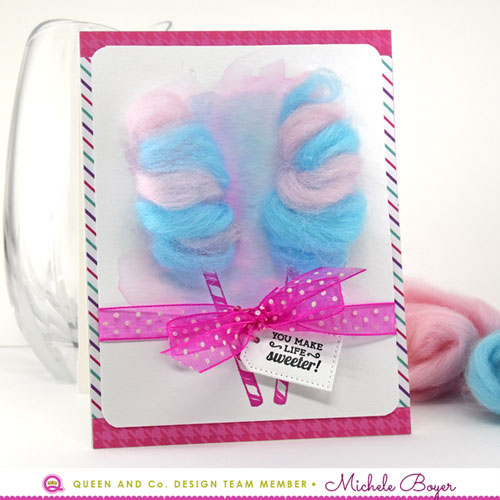
Next, I used the fun fibers included in the Candy Land kit to create two sticks of pink and blue cotton candy.

You-Make-Life-Sweeter-500

I first watercolored a bit in the background using pink and blue distress inks. Once dried, I stamped two candy sticks. I created longer sticks by first stamping the initial images. I then added a piece of clear removable tape across the bottom portion of the sticks, creating a mask. I aligned and stamped the additional impressions of each and removed the tape. The small bit of overlapping ink is covered by the ribbon.

You-Make-Life-Sweeter-CU-500

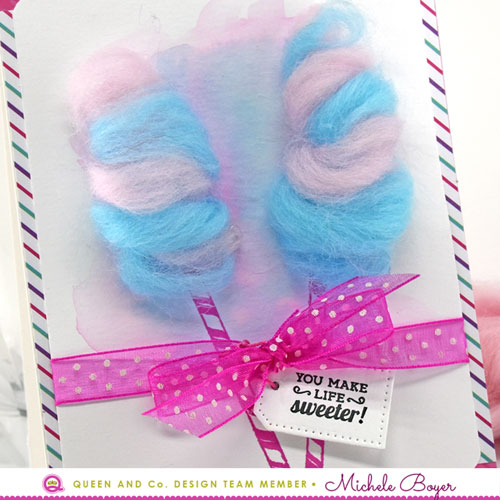
I pulled apart two thin pieces from the pink and blue fibers then rolled them together, pulling the fibers apart a bit in between the colors to sort of blend the two together. I used hot glue to attach each, shaping and tucking the fibers with a toothpick before the glue dried.

I stamped the sentiment then die-cut in a small tag shape and adhered to the ribbon with string (which I colored to match using a Copic marker).

Supplies: Candy Land shaker kit, Sheer Glue

Grab your Candy Land kit HERE. The Candy Land paper pad can be purchased separately HERE as well as foam and acetate refills HERE.

Thanks so much for stopping by!

1amichele siggy

The Best Place in the World (stamping bella)

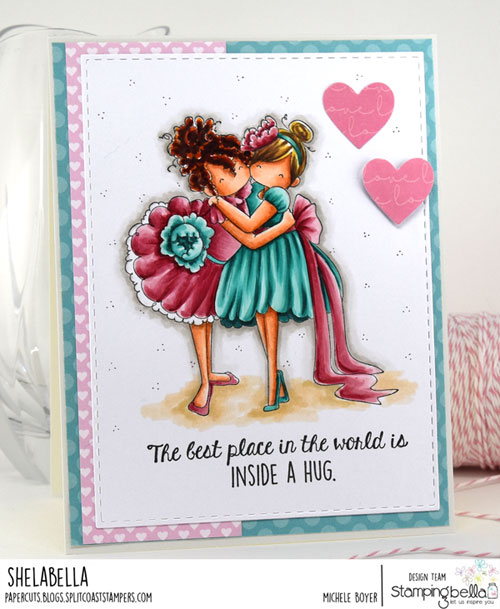
Hello everyone! TGIF, which means it’s Challenge Day with Stamping Bella. This week we were to use an image from the latest release (which can be found HERE).  Tiny Townie Huggy Friends was at the top of my list. (Pretty paper is Heart Throb by Queen & Company.)

Stamping Bella Tiny Townie Huggy Friends

These girls are so sweet, and the sentiment…so true. ♥  I stamped onto X-Press It Blending Card, colored with Copic markers and die-cut using a stitched rectangle.

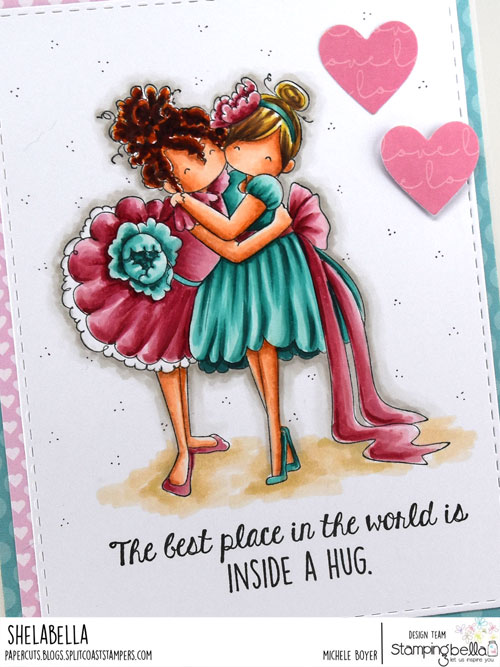
Stamping Bella Tiny Townie Huggy Friends (close-up)

Copic markers – BG11, BG13, BG15, BG18, E000, E00, E01, E11, E30, E31, E35, E47, R01, R39, R81, R83, R85, RV11, RV32, Y21, W00, W1, W2, YR04, YR14, YR18; 0.1 Wine Multiliner

After coloring and stamping the sentiment, I added tiny dots in the background using a 0.1 Wine Copic Multiliner. I die-cut two hearts (also from Heart Throb paper pad) and popped one up on a Kool Tak clear foam square.

NEXT WEEK’S CHALLENGE

Use any current Stamping Bella image. (No restrictions.) If you’d like, email your card to [email protected] by next Thursday to be featured on the SB blog. By doing so, you’ll also be entered to win some Bella Bucks! (All challenge details can be found HERE.)

Thanks so much for visiting today! 🙂

1amichele siggy

always on my mind (stamping bella)

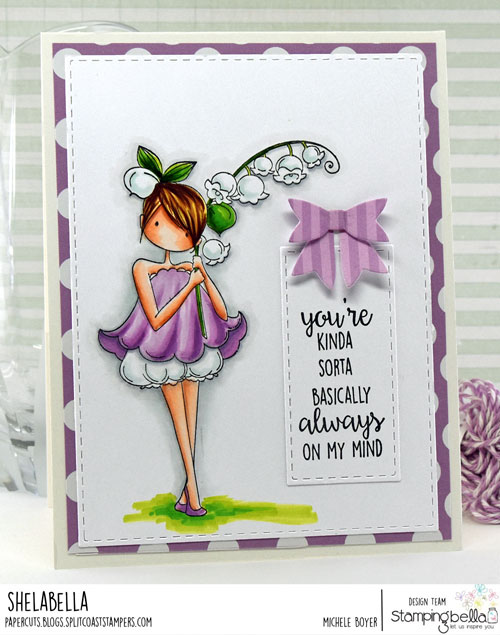
Hi everyone!  Happy Wednesday to you! I was digging through my stamps this morning and came across this very sweet Tiny Townie Garden Girl Lily of the Valley from Stamping Bella. Lily of the Valley is one of my favorite flowers. They’re so dainty. I had to color her.   🙂

Stamping Bella Tiny Townie Garden Girl Lily of the Valley

After stamping and coloring with markers, I die-cut the panel with a stitched rectangle die then did the same with the sentiment.

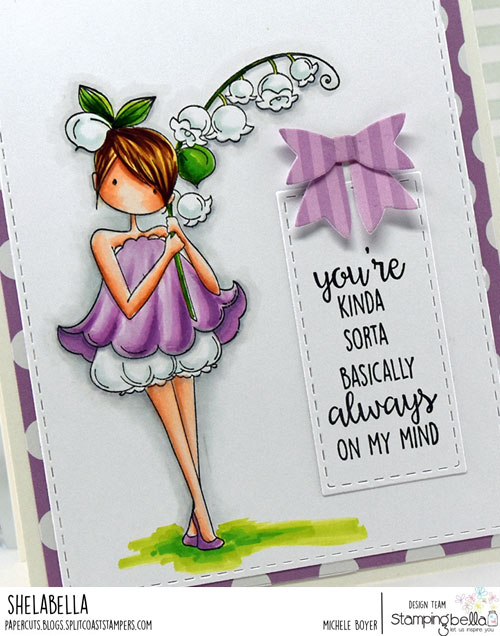
Stamping Bella Tiny Townie Garden Girl Lily of the Valley (close-up)

Copic markers – BG10, BG70, BG72 (custom), C00, C1, C2, E000, E00, E01, E11, E31, E35, E37, R01, V01, V12, V15, Y21, YG03, YG06, YG09, YG17

I had a bit of extra room at the top of the sentiment panel so I added a baby bow. The adhesive was applied only in the center, allowing each of the bow ends to bend up just a bit.

Isn’t she the sweetest ever?

Thanks for visiting today.

1amichele siggy

Stitched Get Well Wishes (paper smooches)

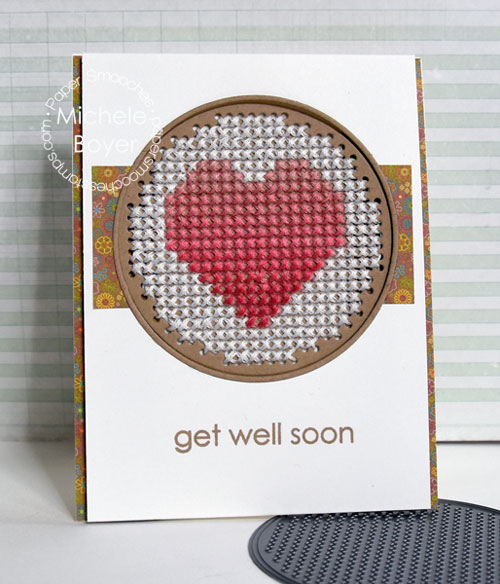
Hi everyone!  Today I’m sharing a card I created using Paper Smooches‘ new Stitched Circle die.  As a former cross-stitcher, I just love that this style is trending.

Paper Smooches Stitched Circle die/Smooches stamp set

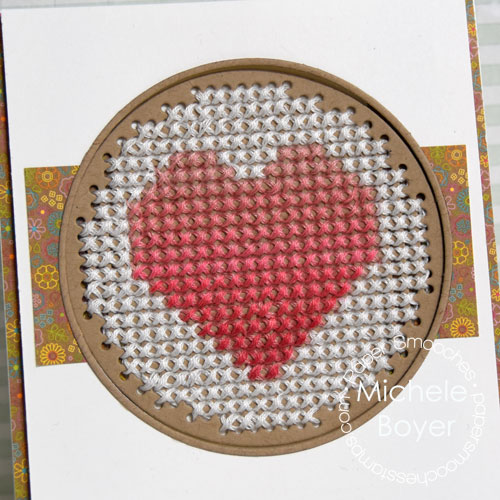
I pulled out my DMC thread and stitched a pink heart into the center then finished with white all around. After stitching, I decided to add a bit more color so I pulled out a few of my Copic markers and colored over the thread, creating an ombre look.  (Coloring the thread was WAY easier than transitioning with different shades of string.)

Paper Smooches Stitched Circle die (close-up)

Copic markers – RV02, RV10, RV13, RV14

To assemble the card, I adhered patterned strips along the left and right sides of my base card. I adhered the horizontal strip of patterned paper to another block of white card stock trimmed slightly more narrow than the card front. I then die-cut the circular opening and stamped the sentiment (from Smooches stamp set) below. I adhered the panel to the card front using foam tape and adhered the stitched piece inside the circular opening.

Also available is a Stitched Square Die and a super cool Cross Stitch Die that only die-cuts the holes. So much fun.  🙂

Thanks for stopping by today! I’ll be back soon.

1amichele siggy

I Like You a Lot (simon says stamp)

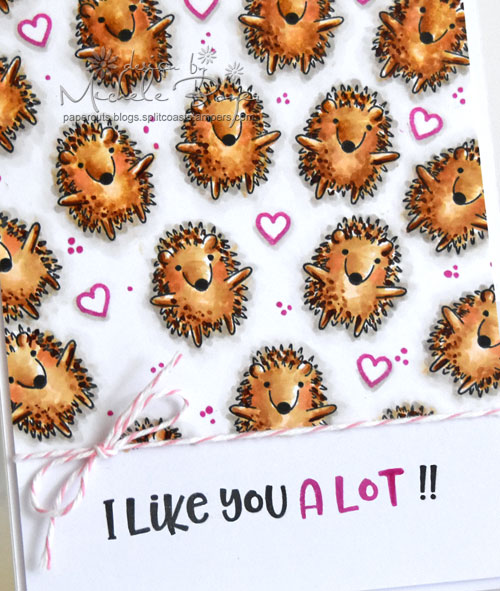
Hi everyone! I’m still playing with Simon Says Stamp’s new Best Friends stamp set. It’s just so cute, and I love this little hedgie.

Simon Says Stamp Best Friends

I stamped this little guy ramdonly onto X-Press It Blending Card and colored with Copic markers (listed below the close-up photo).

Simon Says Stamp Best Friends (close-up)

Copic markers – E30, E31, E33, E35, E37, R02, RV17, W00, W1, W2, W3

I used my MISTI to stamp the sentiment in two different inks. After stamping the pink hearts (from Kind Flowers), I decided to fill some of the blank white space with small dots created using an RV17 Copic.

I encourage everyone to participate in The Daily Marker 30-day Color Challenge. There is no obligation to turn your work into a card or to post online. It’s more of an incentive to simply take time each day to color.

Happy Saturday, friends!

1amichele siggy

A Best Friend Loves You…(stamping bella)

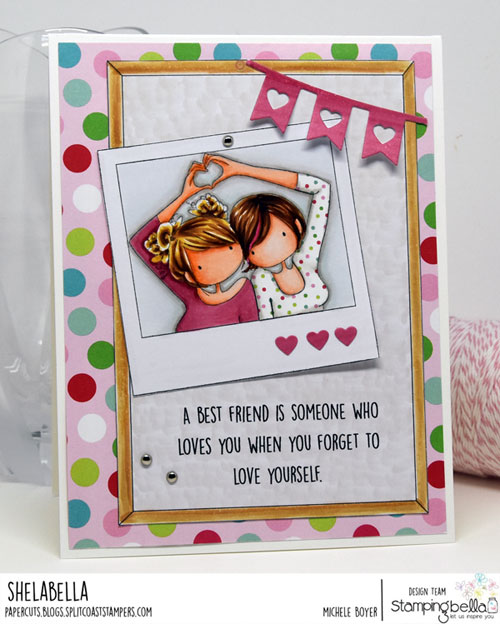
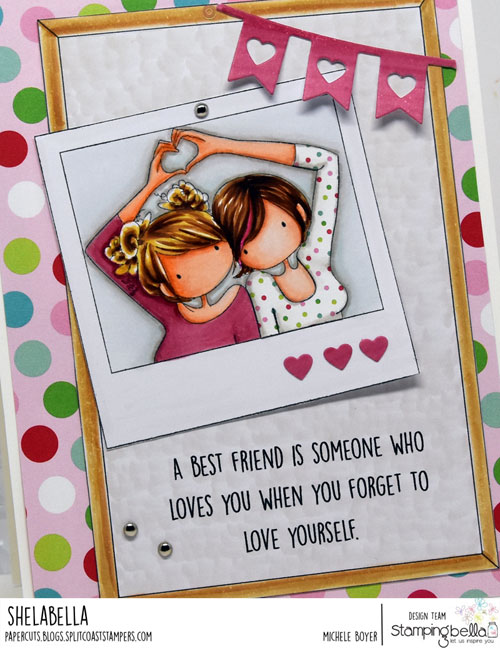
Hi everyone! It’s another Bellarific Friday with Stamping Bella! This week we were to use an image from the Backdrop category. I chose the Corkboard (mostly because I wanted to color I Heart You Snapshot). They’re a perfect match.

Stamping Bella Corkboard Backdrop and Snapshots I Heart You

I stamped onto X-Press It Blending Card and colored with Copic markers. Once colored, I stamped the girl on the right again onto dotted patterned paper (Doodlebug Milk & Cookies), carefully cut out the shirt then adhered over the image and added a bit of shading with a gray marker.

Stamping Bella Corkboard Backdrop and Snapshots I Heart You (close-up)

Copic markers – BG10, BG70, E000, E00, E01, E11, E31, E33, E35, E37, R01, R39, R83, R85, RV06, W00, W1, W2, Y21

I adhered a small heart banner in the corner and added three of my hundreds of unused brads. (The hearts at the bottom of the snapshot were removed from the banner.)

NEXT WEEK’S CHALLENGE

Use a stamp from Stamping Bella’s latest release.  You can find all of those options HERE. If you’d like, email your card to [email protected] by next Thursday to be featured on the SB blog. By doing so, you’ll also be entered to win some Bella Bucks! (All challenge details can be found HERE.)

Thanks so much for visiting today! 🙂

1amichele siggy

LOVE you (queen & company)

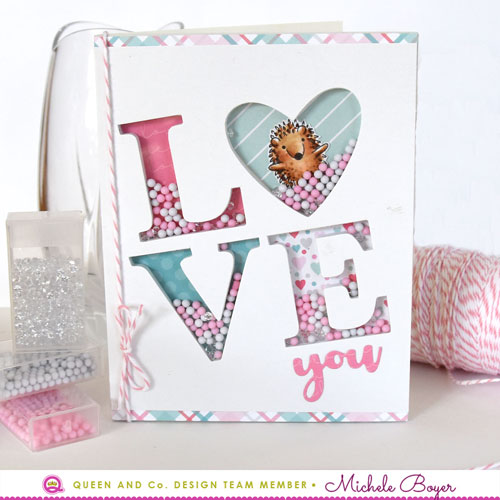
Hi everyone. I wanted to do a bit of coloring for today’s The Daily Marker 30-day color challenge, but I didn’t have a lot of time. So I colored my favorite critter from Simon Says Stamp‘s Best Friends stamp set (I’m a bit obsessed with it at the moment) and placed him inside the LOVE foam front shaker kit from Queen & Company.

Queen & Company LOVE foam front/Simon Says Stamp Best Friends

It was super quick and easy. Inside the shaker, I placed paper from the Heart Throb paper pad along with Pops and Diamonds.

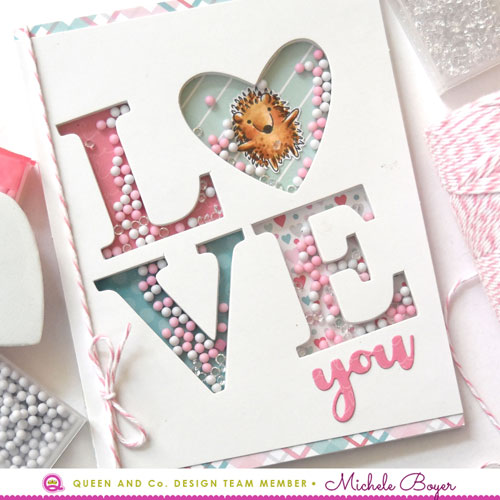
Queen & Company LOVE foam front/Simon Says Stamp Best Friends

Copic markers – E30, E31, E33, E35, E37

Before adhering the card front over the assembled shaker, I removed about 1/4″ from the top and bottom edges. I adhered two thin strips of plaid paper to the acetate on each end then added the card cover over top. Lastly, I die-cut and  adhered “you” from Word Dies 1.

Thanks for stopping by today!  I’ll be back tomorrow.  🙂

1amichele siggy

You Have a Kind Heart (simon says stamp)

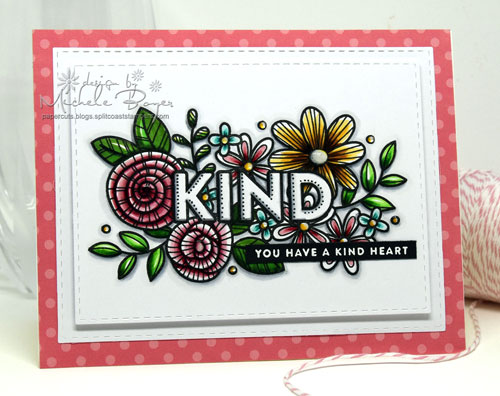
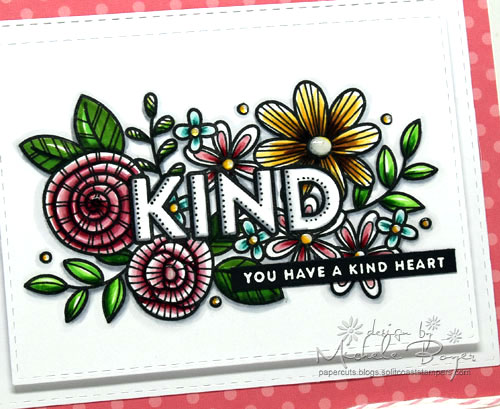
Hi everyone.  I recently purchased a couple stamp sets from Simon Says Stamp‘s latest release. The other day I colored Best Friends (super-super-cute set) and posted on Instagram.  Today I colored the larger image from Kind Flowers. It’s a lovely set filled with flowers and quite a many kind sentiments.

Simon Says Stamp Kind Flowers

After stamping onto X-Press It Blending Card, I colored with Copic markers then stamped the smaller sentiment using white ink on black card stock then white embossed.

Simon Says Stamp Kind Flowers (close-up)

Copic markers – BG10, BG13, BG15, BG18, C00, C1, C2, C3, E35, G28, R39, R83, R85, RV11, RV32, Y21, YG03, YG06, YG09, YG17, YR23

I also added a little plop of Glossy Accents into the flower centers and surrounding dots.

Thanks for visiting today. I’ll be back soon.  🙂

1amichele siggy

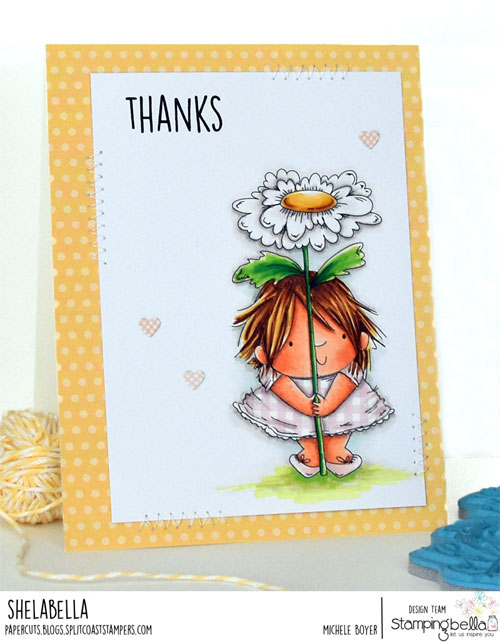
Squidgy Thanks (stamping bella)

Hi everyone. Today I did a bit of coloring for The Daily Marker 30-day color challenge on Instagram. (The challenge isn’t limited to Instagram.  That’s just where I choose to post. If you’d like to keep up with ALL of my work, you can find it HERE. It’s easier to see everything together rather than scroll through blog pages.)

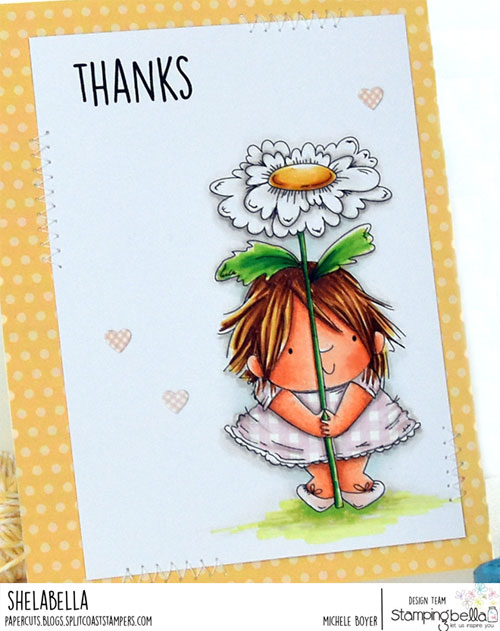
I’ve used Daisy Squidgy from Stamping Bella. She’s my favorite of the squidgies.

Stamping Bella Daisy Squidgy

After coloring with markers, I paper-pieced the dress then added a bit of stitching around the panel edges. Paper is my favorite from Queen & Company, Flirty FloralsI love, love, love it.

Stamping Bella Daisy Squidgy (close-up)

Copic markers – BG10, BG70, E00, E01, E11, E31, E35, E37, G19, G46, R000, R00, R01, R02, W00, W1, W2, Y21, Y32, YG03,YG06, YG09, YR23, YR24, YR27

If you like to color, using any medium, you should check out the 30-day color challenge. The idea is to simply color for 10 minutes each day. That’s it.  🙂

Thanks for visiting today!

1amichele siggy

Queen & Company’s new Candy Land Shaker Kit

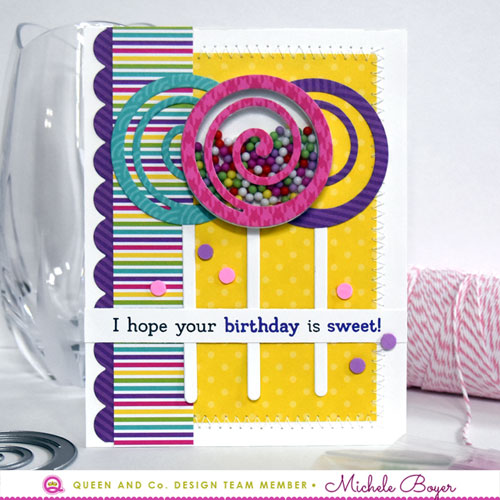
Hi crafty friends! Today I’m sharing two cards I created using a brand new kit from Queen & Company! (Coming soon!)  Candy Land is an adorable new kit packed with candy themed patterned paper, dies, pre-cut foam and acetate shapes, toppings, stamps and even fibers to create cotton candy! It’s totally adorable and perfect for sending sweet greetings and loads of birthday fun!

Birthday-Sweet-500

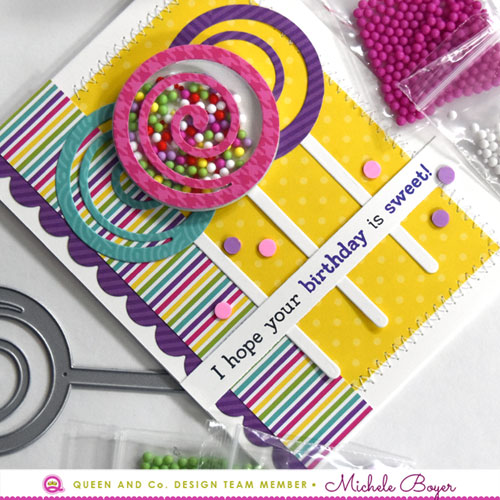
On my first card, I used the lollipop die to create a cute shaker filled with multi-colored candy dots. The kit includes five colors of dots, several of which have different sizes of candies. (Some are teeny, teeny tiny.  So cute!)

Birthday-Sweet-CU-500

After die-cutting the lollipop shape from three patterned papers, I trimmed away the sticks and replaced each with white die-cut sticks. Once the front panel was assembled, I added a bit of stitching as well as a scattering of pink and purple confetti toppings.  (There are six different colors of round confetti in the kit!) The sentiment was stamped in black with the words “birthday” and “sweet” stamped in purple.

To finish my card, I cut another panel of white card stock slightly smaller than the card front and adhered inside to hide the stitching.

Supplies:  Candy Land Shaker Kit, Scrap Happy Sheer Glue

Sweet-Hugs-500

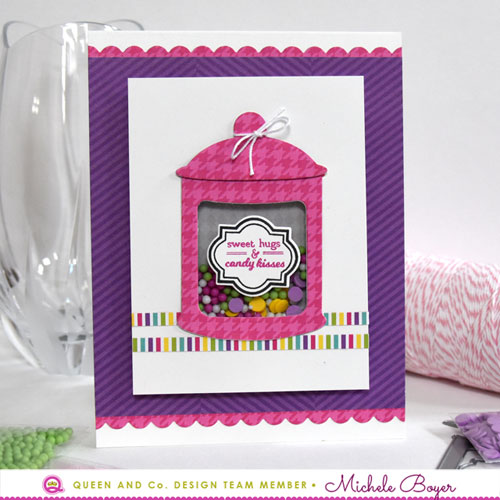
Next, I used one of the two candy jar dies to create a Sweet Hugs card. I placed the foam shape on the back so the jar is flush with the surrounding white card stock.

Sweet-Hugs-CU-500

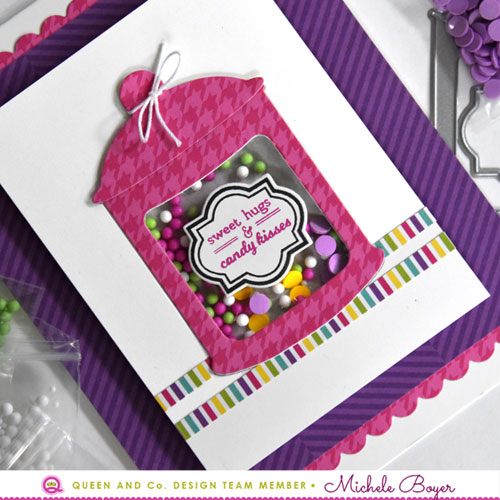
Inside the shaker, I placed an assortment of flat confetti and round dots then added a die-cut label/sentiment over the acetate.

Tip: To create level support around the foam shaker, trim and apply pieces of the leftover foam (from inside the shaker shape) around the back edges of the shaker panel.

Supplies:  Candy Land Shaker Kit, Scrap Happy Sheer Glue

The Candy Land Kit is so much fun! I’m certain it will be a big hit!  🙂

Thanks so much for stopping today!

1amichele siggy