Monthly Archives: November 2017

Emboss It (stamping bella)

Hi everyone! It’s time for another fun challenge with Stamping Bella! This week we were to include on our cards embossing of some kind.

Stamping Bella TIny Townie Natalie & the Nutcracker

I used new Tiny Townie Natalie & the Nutcracker with a Holiday Sentiment. I adore her and her poofy skirt.  🙂

I stamped the two together, masking the right side of the dress then colored with markers, fussy cut and adhered over a Holly embossed panel.

Stamping Bella TIny Townie Natalie & the Nutcracker (close-up)

Copic markers – BG10, BG11, BG13, BG15, E00, E01, E11, E13, E15, E35, E37, E40, R000, R01, R21, R29, R39, R59, N7, N9, Y21, YG03, YG06, YG17

The Holly embossing folder is from Taylored Expressions. I’m not sure if it is currently sold out or no longer available but I didn’t see it in the store to provide a link. After embossing the card stock, I used an R000 Copic marker to lightly color over the berries.

Next week’s challenge is to create using this photo as inspiration:

Nov 24

Use any current Stamping Bella image then email your card to [email protected] by next Thursday to be featured on the SB blog. By doing so, you’ll also be entered to win some Bella Bucks! (All challenge details can be found HERE.)

Thanks so much for stopping by!

1amichele siggy

Hand Lettering (baby steps)

Hi everyone! Hand lettering has become so big and I’ve admired it for so long now. I’ve finally decided to plunge in myself. I really wasn’t sure where to begin. At this point, I didn’t want to spend money on a class since I wasn’t sure just how dedicated I would be, but in the meantime, I did find a few great resources I thought I’d share here.

Capture3

On the Imagination International blog, David Sorrell has created a wonderful post, Hand Lettering with Copic, which is full of tips and helpful hints. He lists common hand lettering terminology and explains why each is important.

Untitled-1

He talks about choosing words/phrases, how to plan the layout with spacing, balance and details, then walks the reader through each step. I highly recommend checking it out.

Handlettering-Sheets

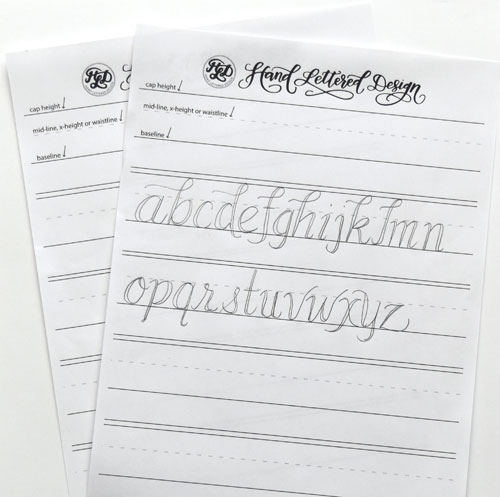
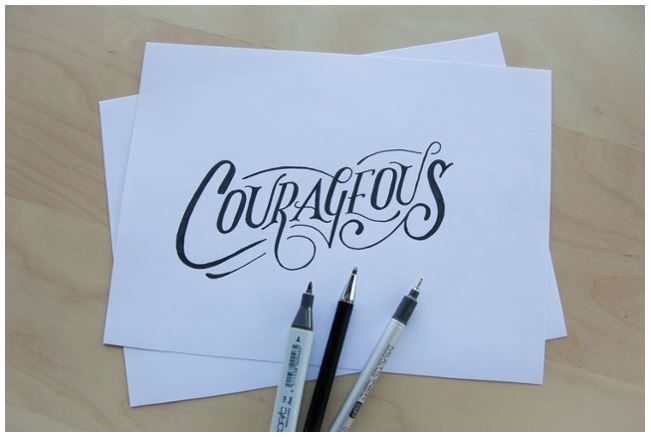
As another resource, I found Lisa Funk of Hand Lettered Design to be very helpful. While she has some amazing classes, I have so far only taken advantage of her free mini tutorial. She walks through the basics and provides free lined printouts (shown above) for practice.  (Those are my scribbles. I’m not ready to share any actual “hand lettering” yet. It is so very ‘not good,’ haha.)

Capture4

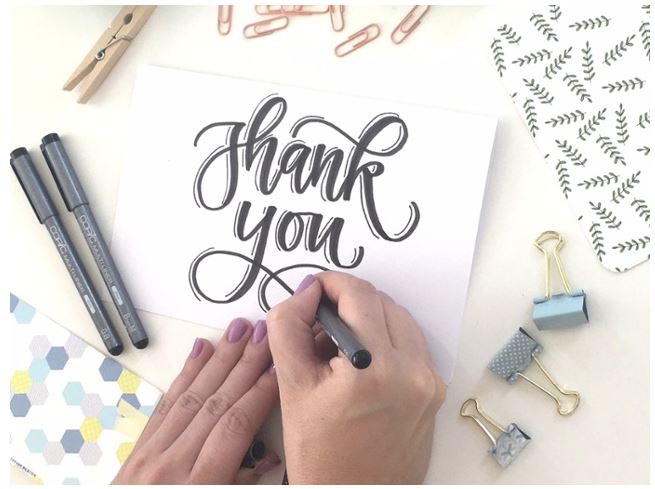
Also available on the Imagination International website is a tutorial for faux calligraphy.  It’s so easy, using a Multiliner Brush Medium Pen, the Copic Multiliner 0.8 Pen and the Copic Multiliner 0.5 Pen.

Capture5

To create this easy hand lettered Father’s Day card, Melody How used X-Press It Graphite Paper, a white gel pen, a gold Kirarina Wink pen and 0.5 Black Copic Multiliner.  You can find the full supply list as well as step by step instructions and free card template here.

Capture6

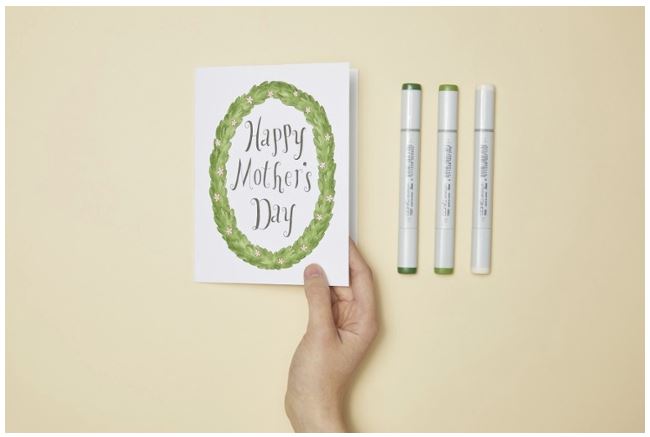
For an easy hand lettered Mother’s Day card, check out Melody How’s tutorial here using X-Press It Graphite Paper, a few Sketch markers and a 0.5 Black Copic Multiliner. (Card template also available.)

Hand lettering can be as simple or fancy as you’d like.  I’m taking baby steps, trying to practice 15-20 minutes per day. This is going to be a long process but hopefully I’ll reach a point soon where I won’t be too terribly embarrassed to share progress. We shall see.  🙂

I definitely recommend starting with David Sorrell’s hand lettering post as I found it to be super helpful. If you have any helpful sites, or tips/tricks, please share below. I’d love to see/hear what has helped you!

Thanks so much for visiting today!

1amichele siggy

Altered Candlestick Holders (Brass No More)

Hi everyone.  🙂  Today I wanted to share a couple of candlestick holders I altered to better fit my decor.

Candles-1

I’ve had these for years and never used them. I’m sure they were a gift of some sort.

Candles-2

I’ve never been a fan of brass so finally, after all these years, I decided to change them.

Candles-3

I first painted two coats of Tommy Art Milk chalk-based mineral paint.  Tommy Art chalk paints provide excellent coverage, dry very quickly, work with most surfaces with no preparation and are available in more than 35 colors.

Candles-4

Once the paint was dry, I used a paper towel to apply a thin coat of Antiquing Wax, concentrating a heavier application in the crevices. Tommy Art waxes are a creamy, solvent-based beeswax that can be used to add color or to create a seasoned look. Ideal for use with wood, plaster, and metal, each producing its own decorative effects. They are easy to apply and buff and are an excellent way to protect surfaces.

Candles-5

After just a few minutes, I buffed off the wax with another paper towel.

Candles-6

Lastly, I applied a thin coat of Neutral WaxNow, I will use the candlestick holders.  🙂

Before this project, I had never altered anything with paint and/or wax. This was so easy and fun. Now I want to paint all things.

Thanks so much for visiting today!

1amichele siggy

More from Queen & Company’s Merry & Bright Ornament Shaker Kit

Hi everyone! Today I have another card I created using Queen & Company‘s fab new Merry & Bright Ornament Shaker Kit.

Be-Merry-500

There are so many options in this kit. I chose one of the more ornate ornaments for this card, using gold foil card stock for the ornament.

Be-Merry-500-CU

The foam shape was adhered to patterned paper (included in the kit) then filled  with lovely pastel beads (included in the kit). I gold embossed the sentiment (stamp set included in the kit) and added small gold dots leftover from the ornament and top die-cuts. They make the perfect little faux metal accents.

In addition to the Merry & Bright kit, refill foam and acetate shapes are  available as are refill toppings. If you’d like additional toppings (shaker filling), you can find them HERE.

Thanks so much for visiting today!

1amichele siggy

Let’s squalk about it (paper smooches)

Hi everyone! Today I have a card to share using Paper Smooches‘ super cute Baby Birds stamp set and Baby Birds Icons dies.  🙂  Baby Birds stamp set is free for the month of November with any $60 retail order.

Paper Smooches Baby Birds

My bird was stamped onto white card stock and colored with Copic markers. After die-cutting, I perched him upon a stitched square frame, inserting a few die-cut branches behind him. I adore the sentiments in this set. So cute.

Paper Smooches Baby Birds (close-up)

Copic markers – B04, B06, G05, Y15, R29, RV04, YR68

The background was very lightly sponged with light blue ink, and the patterned paper is from Doodlebug Take Note (older 6×6 paper pad).

Thanks so much for visiting today!

1amichele siggy

Another Fab Queen & Company Kit – Merry & Bright Ornament Shakers

Hi there, and thanks for stopping by!  Today I’m sharing two cards I created with Queen & Company’s new Merry & Bright Ornament Shaker Kit.  The kit includes SIX ornament dies with an assortment of seven ornament tops, tiny toppings of snowmen, candy canes, green and red peppermints, gingerbread, several assortments of pearls (my personal favorite), an adorable holiday paper pad and holiday sentiment stamp set!  SO much fun!

Queen & Company Merry & Bright Ornament Shaker Kit

On my first card, I used two of the ornament dies, simply die-cutting the shapes from white card stock. I adore the detail of snowflakes in the round ornament. They’re so small and delicate! Inside, I placed an assortment of pastel pearls.

Queen & Company Merry & Bright Ornament Shaker Kit (close-up)

To add a bit of interest around the ornaments, I adhered the negative die-cut circles from the top of the ornament and ornament top dies.  I think they make  perfect little accents! The ornaments were tied at the top with blue stretchy string. To complete my card, I stamped the sentiment in white pigment ink then white/heat embossed.

Supplies: Merry & Bright Ornament Shaker Kit, Blue Stretchy String, Scrap Happy Sheer Glue

Queen & Company Merry & Bright Ornament Shaker Kit

Next I created a clean and simple card using one ornament die with an assortment of patterned papers and silver foil card stock for the tops. I filled the shaker ornament with bright pearls and tied/hung the ornaments with silver cord.

Queen & Company Merry & Bright Ornament Shaker Kit (close-up)

As on my first card, I used the negative space from the ornament and ornament top dies to create small faux metal accents. I especially like the look of the dots cut from foil card stock.

Supplies: Merry & Bright Ornament Shaker Kit, Scrap Happy Glue

My cards were so much fun to create! (More to come!) I think the recipients will enjoy them as well!  Thanks so much for visiting today!

1amichele siggy

Warmth-Joy-Happiness (stamping bella)

Hi everyone! Welcome to another Bellarific Friday with Stamping Bella! Kids in our area barely had school this week, and we were at the beach last weekend so time has absolutely flown for me.

Stamping Bella Angel Squidgies Ornament & Bells

A couple weeks ago, I used the bell squidgy from Angel Squidgies Ornament and Bells. This week I used the ornament. We were to create using this {Mojo}Bella sketch:

Nov 10

I elongated mine but pretty much stuck to the plan.  And yes, I know my reindeer are sideways.  Oops. (I’m not changing it.)   🙂

Stamping Bella Angel Squidgies Ornament & Bells (close-up)

Copic markers – BG0000, BG10, BG11, C00, C1, C2, E00, E11, E31, E33, E35, G07, R20, Y0000, Y21, YG09, YR21, YR23; Kirarina Wink Dandelion pen

I stamped onto X-Press It Blending Card, colored with Copic markers and framed my squidgy in a stitched circle frame. In the background, I used a Dotted Lattice embossing folder which mimics the design on the ornament. Around the squidgy, I added dots using a Kirarina Wink Dandelion pen. (Patterned paper is from Doodlebug Design Here Comes Santa Claus – from last year.)

Next week’s challenge is to use embossing…dry, heat, any type. Use any current Stamping Bella image then email your card to [email protected] by next Thursday to be featured on the SB blog. By doing so, you’ll also be entered to win some Bella Bucks! (All challenge details can be found HERE.)

Thanks so much for stopping by!

1amichele siggy

merry everything (stamping bella)

Hi everyone! I’ve been working on more Christmas cards… 🙂  Thanksgiving will be here before we know it and after that, I will likely have no time. So the more I do now, the better!

Today I’ve used Little Bits Elves, Winter Tree and Holiday Sentiment Set from Stamping Bella.

Stamping Bella Little Bits Set of Elves and Winter Tree

How cute are those elves? They’re working together to get that star atop the tree. I’m not sure they’re going to make it. 😉

Stamping Bella Little Bits Set of Elves and Winter Tree (close-up)

Copic markers – BG10, E00, E01, E11, E31, E33, G05, G07,G09, R24, R29, R59, Y21, Y23, YG03, YG06, YG09, YR23

After stamping onto X-Press It Blending Card and coloring with markers, I wrapped the tree in gold twine and added a few simple red die-cut circles.

I’ll be back tomorrow for Bellarific Friday! See you then, and thanks for visiting! 🙂

1amichele siggy


Quick and Easy With Sympathy (paper smooches)

Hi everyone! Today I’m using new Sympathy Sampler from Paper Smooches‘ latest release. Sympathy Sampler is a lovely set of sentiments with a very nice variety of phrases.

Paper Smooches Sympathy Sampler

I paired Sympathy Sampler with previously released Blossoming Buds, stamping each of the flower bouquets in the corners then coloring softly with Copic markers.

Paper Smooches Sympathy Sampler (close-up)

Copic markers – C00, C1, C2, E01, G20, G21, G24, G43, R83, RV32, YG07

Before adhering the panel to my card base, I slipped a new Deco Edge beneath the left side. It’s actually a die-cut strip of circles, partially hidden.

I think I’ll create a few more cards like this one but with slightly different sentiments from Sympathy Sampler. I’d rather have this type of card on hand than scramble to create one at the last minute. That’s always much more difficult.

Thanks so much for visiting today.  🙂

1amichele siggy

Fun with Card Maps

Hi everyone!  This month the Paper Smooches team created Card Map samples for Becky Fleck.  (She’s so nice.)  🙂   You can see each of the sketches and samples here.

Paper Smooches Bitty Bungalows

I used Bitty Bungalows with corresponding Bungalows dies.

Paper Smooches Bitty Bungalows (close-up)

Copic markers – E41, E42, E43, E44, RV32, R85, Y000, YG05

After coloring and die-cutting, I carefully trimmed along the right and top sides of the lower cottage door, allowing the door to be open…always. 🙂

Card Maps are a great starting point if the old mojo doesn’t seem to be flowing freely.  New sketches are posted each month so there is plenty of inspiration to be found! If you’re a scrapbooker, there are monthly Page Maps as well!  I also recommend adding the Page Maps Blog to your reading list.  🙂

Thanks so much for visiting!

1amichele siggy