
Today I have a step-by-step tutorial on coloring flowers and leaves with Copic markers. I’ve used many of the techniques found in Coloring Flowers with Copic Markers published by Imagination International and written/illustrated by Marianne Walker. The book includes tutorials ranging from basic to intermediate as well as line art that can be copied/printed for practice.
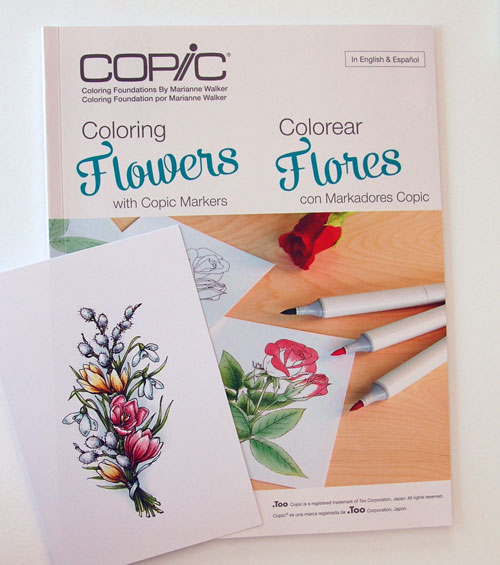
The book covers smooth coloring and blending, showing depth through color, coloring skies, adding a soft haze around an image as well as different ways to use the Colorless Blender. It’s a great resource for beginners as well as those with more coloring experience.
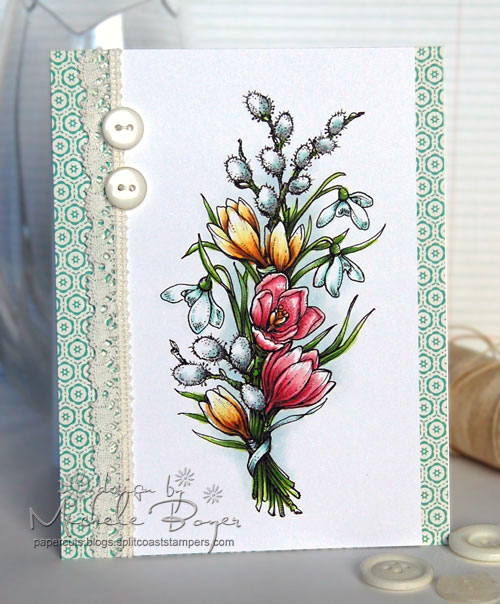
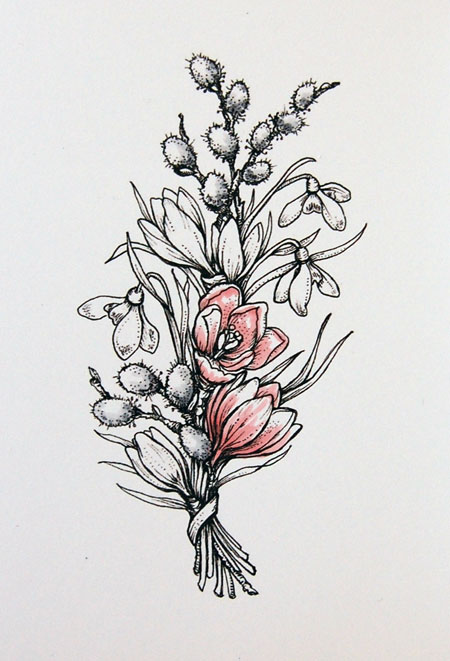
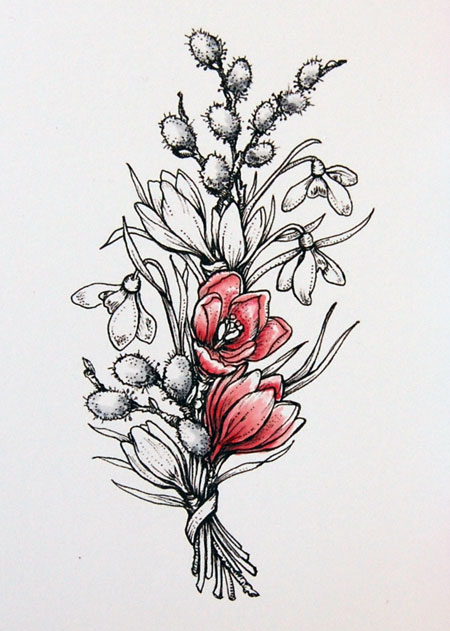
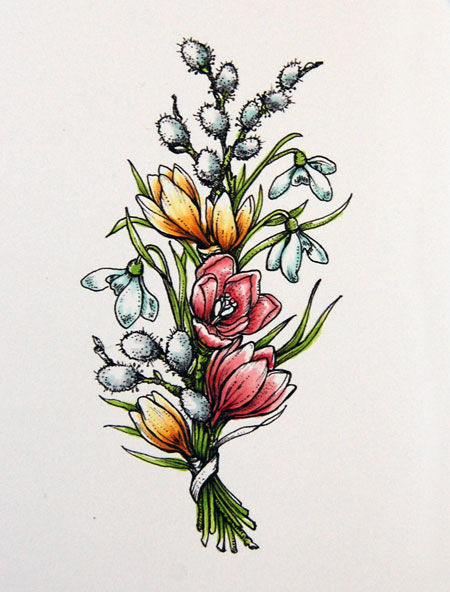
I printed this lovely Winter Pick Me Up digital image from Power Poppy onto X-Press It Blending Card. There is an accompanying sentiment but I chose to leave my card front sentiment-free.
C1, C3/RV32
Step 1:
Using the tip of C1, add dots of color to the pussy willow buds, dotting around the edges. This image provides tips on where to add the dots with the subtle shading already marked within the image. Use C3 in the lower/deeper shadowed areas then dot again with C1 to blend.
Using RV32, flick color up from the bottom of the flower petals up toward the tips. Be sure to lift the marker lightly off the paper before reaching the tips of the petals. By leaving white areas uncovered, highlights are easily created.
R83
Step 2:
Using R83, repeat the process used in Step 1, beginning in the deepest creases of each petal and lifting the marker sooner so that some of the R81 strokes remain. Look for petals that fall behind others and add more color in those areas.
RV34, RV32, 0
Step 3:
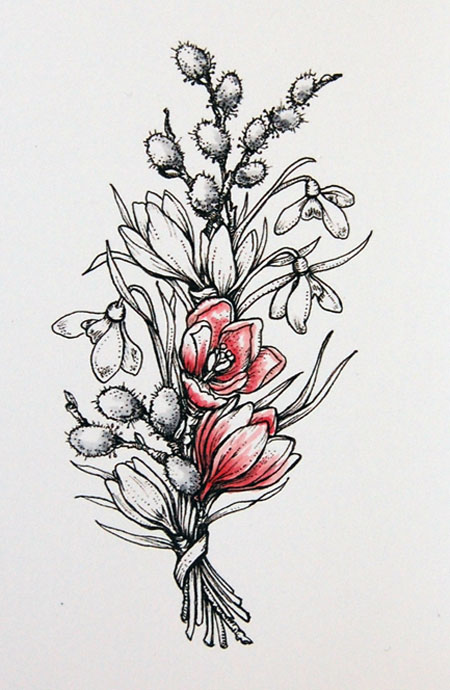
Continue to build deeper shadows using RV34, blending edges with RV32. Use the Colorless Blender (0) to blend the uppermost edges of pink into the untouched white on each petal. To do so, place the tip of the Colorless Blender at the upper tip of the petal and flick downward, lifting the marker just after reaching the edges of the lighter pink.
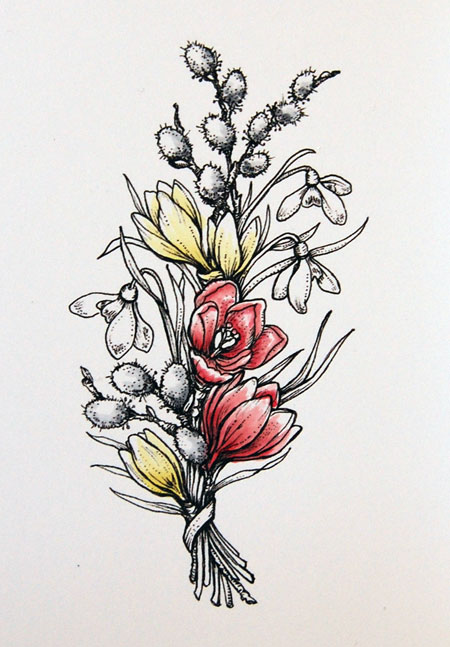
Y11
Step 4:
Using Y11 and the same technique used in Step 1, add base color to the yellow flowers. Remember to leave the tips white.
YR31
Step 5:
Using YR31, begin to build shadow in the deepest/tightest areas of the flowers. Again, use some of the extra shadow lines in the base image as a guide.

E33, Y11
Step 6:
Add deeper shadow using E33 then blend the edges using Y11.
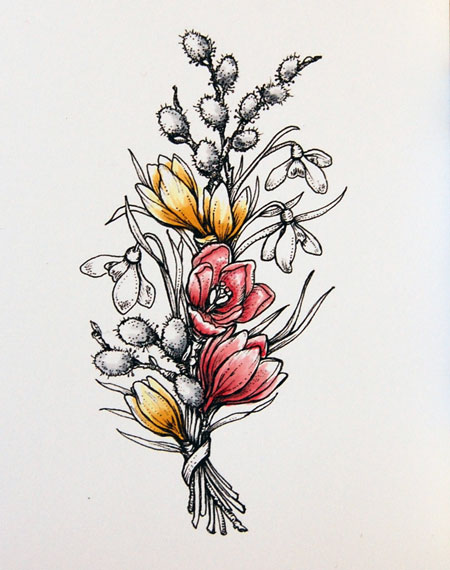
BG10, BG11
Step 7:
Since the remaining flowers are left white, only shadow is added. Use BG10 in tight areas and along some edges. Add small bits of BG11 to add hints of deeper shadow.
I decided to add hints of BG10 to the pussy willow buds as well.
YG23, YG25
Step 8:
Color all greenery using YG23 then YG25. Leave areas of YG23 to serve as highlights.
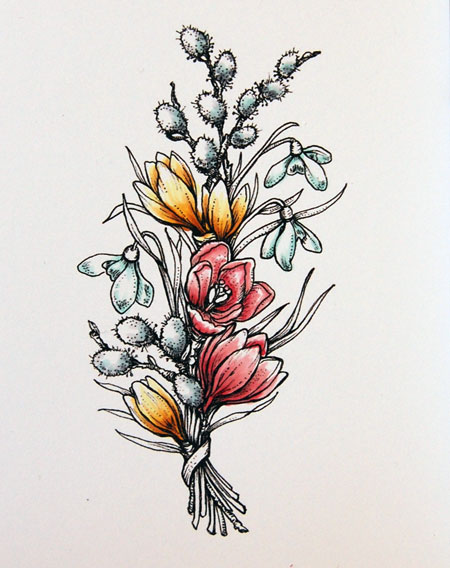
G85
Step 9:
Add deepest shadows within the greenery using G85, paying attention to which stems are in the foreground and which fall behind other stems, flowers or leaves.
YR31, E33
Step 10:
Use YR31 to color the stamen, leaving the tips white as highlights. Add shadow along the bottom using E33. Carefully blend edges using YR31.
E35, R85/BG11, C3
Step 11:
I decided to increase the depth of shadow within the flowers by adding small strokes of darker color in the deepest/tightest areas – E35 on the yellow flowers and R85 on the pink.
To color the ribbon, use BG11, leaving white in the center, then C3 in the tightest, more narrow areas to create darker shadow.
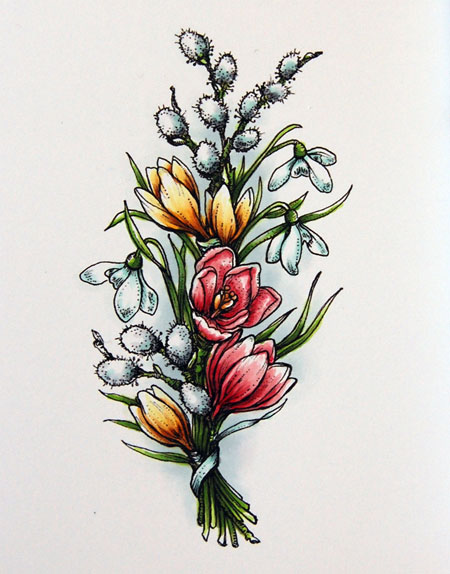
BG70, 0
Step 12:
Using BG70, add color around the innermost portions of the bouquet. Using the Colorless Blender and small circular strokes, “color” over the edges of BG70 to fade the color into the surrounding white area.
Copic markers used: BG10, BG11, BG70, C1, C3, E33, E35, G85, R83, R85, RV32, RV34, Y11, YG17, YG23, YG25, YR31,
1/8″ X-Press It Double-sided High Tack Adhesive Tape was used to adhere the lace trim to the card front.
Thanks so much for visiting. 🙂


5 responses to “Coloring Flowers with Copic Markers”