Monthly Archives: August 2014

Paper Smooches September Release Hop

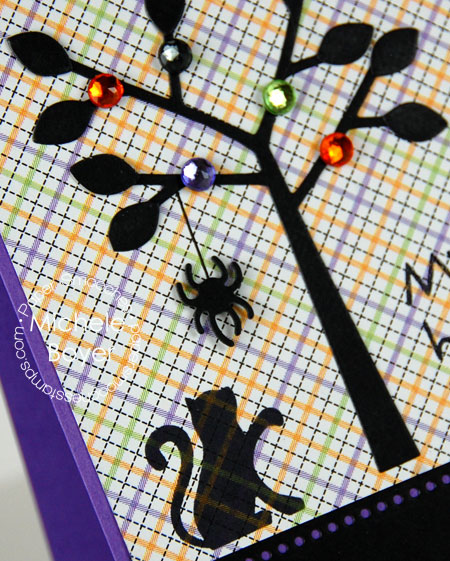
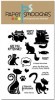
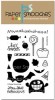
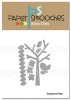
It’s Pep Rally week and we are here today to share a sampling of the NEW Paper Smooches September release!  FOUR new stamps and EIGHT new dies will be available to purchase on September 1st and  you will find them HERE.  

To add extra fun to our blog hop…we are offering up a prize – $25 gift code to choose what you like at the PS online store.

Here are the details:

  • FOUR winners will be chosen at RANDOM from any of the design team blogs and the PS Blog to win the $25. prize.
  • Just leave a comment on any of the design team blogs listed below or the PS blog for your chance to win!  (You do not need to comment on all blogs to qualify but it increases your chances.) 
  • Deadline: You have until midnight MT on Sunday, August 31st to leave a comment. 
  • Please check the Paper Smooches blog on Monday, September 1st to see if you are one of the FOUR lucky winners.  

 Ashley Marcu

To increase your chances of winning:

  • Tell us that you Facebooked about our blog hop
  • Tell us that you Tweeted about our hop
  • Tell us that you posted on your blog about our blog hop

            (meaning you have up to three extra chances to win on each blog)

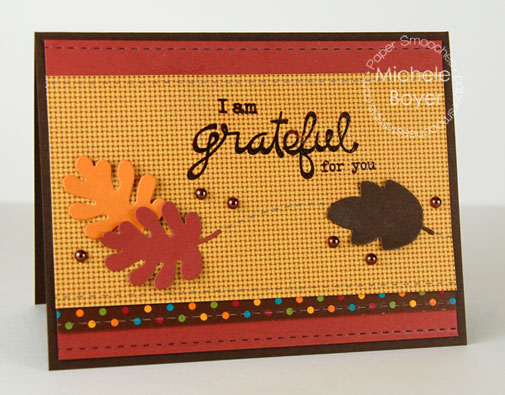
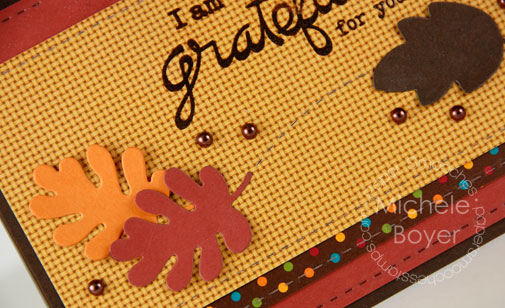
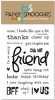
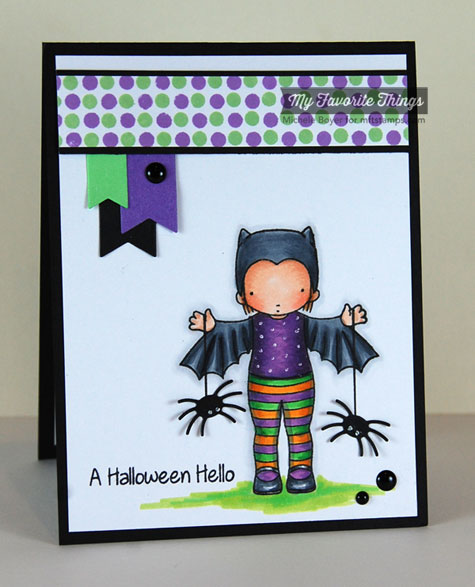
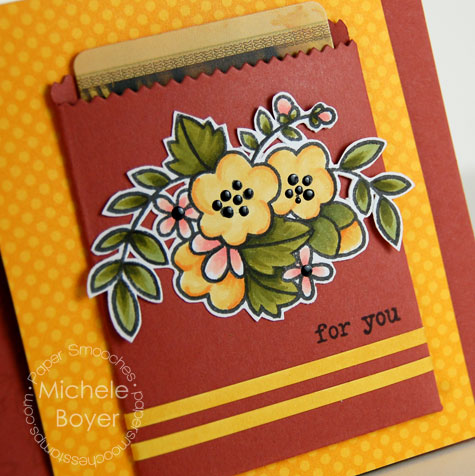
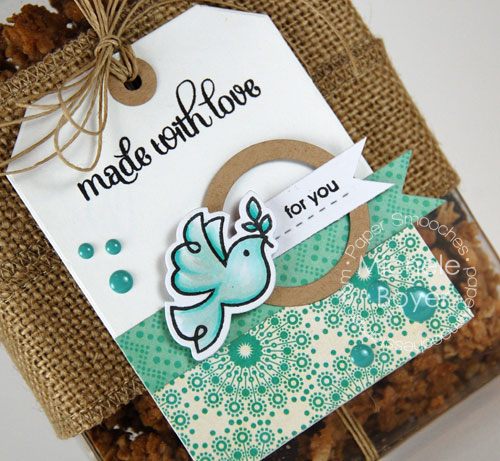
I created a tag for my homemade granola, packaged in a clear A2 card box.  I used  Just for You and A Blessed Christmas stamp sets as well as Blessed Icons, Quote Tag, Flag Tags, new Ornaments dies and just a wee bit of new Stitched Frames dies.    

Made-with-Love-500

The bird, from A Blessed Christmas, was cut from X-Press It Blending Card using Blessed Icons, colored with Copic markers and raised on foam tape.   The sentiments were both stamped from Just for You.

Made-with-Love-CU

 Be sure to check out the other Paper Smooches designer blogs (listed above) and comment for your chance to win!

Thanks for visiting!  🙂

Additional supplies/info:  Copic markers (BG10, BG11, BG13, W00, W1), burlap, MME enamel dots, clear A2 card box.  Finished tag size:  3″ x 4″.

Thank You

Hi all!  I took time this morning to play along with MFT‘s Wednesday Stamp Club.  It’s been a while, and I miss it.

I used Pure Innocence Sending Big Hugs with Spotlight Sentiments, Mini Scallop Edge and Diagonal Stripes Background.

Note:  The “blue-ish” enamel dots are actually purple.   They seem to be showing as blue only on some devices (i.e. my iPad).  ?

Thank-You-WSC191-475

 The PI girl was die-cut from X-Press It Blending Card using Sending Big Hugs Die-namics, stamped in Black Licorice Hybrid ink then colored with Copic markers.  I nipped off her legs (eep!) and placed her inside an opening cut using Circle STAX 2.

The sentiment was stamped in Grape Jelly ink onto Grapesicle card stock then layered atop Sour Apple.  I cut the Sweet Tooth border using Mini Scallop Edge, and stripes were stamped in Sno Cone onto Berrylicious card stock.

Thank-You-WSC191-CU

I finished the inside very simply with a partial sentiment from Words of Inspiration and a silhouette stamped in Berrylicious ink.

Thank-You-WSC191-In

 Here’s this week’s sketch.  All details about the sketch challenge can be found on the MFT blog and in this week’s newsletter.

MFTWSC191

Thanks for stopping by! 

Additional supplies/info:  Copic markers (E00, E11, BV000, Y21, E31, E35, R01, R02, V12, V15, V17, E41), Doodlebug Design enamel dots.  Finished size 4 1/4″ x 5 1/2″.

MFT August Creative Challenge, Watercolor

Hi everyone!  I’m back today with MFT‘s August Creative Challenge.

Watercolor is a medium that’s been around forever but is experiencing a resurgence in popularity in the crafting, card-making, and scrapbooking world. This month, our team will show you ways to achieve the look with stamps, stencils, and inks.

My first card uses Floral Fusion Cover-Up with Razzle Berry, Banana Split, Pink Lemonade and Cotton Candy dye inks showing from beneath.

Happy-Happy-BD-CC-475 

The inks were stamped onto an acrylic block then picked up with a watercolor brush and added to dampened watercolor paper.  The sentiment, stamped in Black Licorice ink, is from Celebrate You.

Happy-Happy-BD-CC-CU

Inside, I stamped an additional sentiment from Celebrate You and included a leftover piece of watercolored paper/Floral Fusion.

Happy-Happy-BD-CC-In

 The background on my second card was created by stamping Confetti Background in Versamark ink onto watercolor paper.  I clear embossed then watercolored over as above.  My first thought was to iron off the embossed dots but I decided I liked the shine so I left the embossing on the panel.

Happy-for-You-CC-WC-475

 Watercoloring was done with Banana Split, Grape Jelly, Berrylicious and Sour Apple inks.

I used Happy Birthday Die-namics along with Tag Talk to create the sentiment.

Happy-for-You-CC-WC-CU

On the inside, I added an additional watercolored panel and a Birthday Sentiment.

Happy-for-You-CC-WC-In

Be sure to check out the MFT Blog for direct links to more watercolored samples!

Thanks for stopping by!

Happy Happy Happy Birthday card

Happy for You card

What’s up, friend? And I am Grateful

Hi everyone!  I hope you’ve been enjoying your summer.  It’s the last ‘free’ week here, with the kids going back to school next week.  I think the lack of noise/activity will be strange.  (I’m sure I’ll adjust quickly.)  😉

I have two cards to share today.  The first uses Paper Smooches‘ current TAM (Thanks a Million) set, Bosom Buddy, free this month with any $60 purchase.  I also used the coordinating Big Friend Word die.

Whats-Up-Friend-505

 Phrases were stamped in Sour Apple, Berrylicious, Orange Fizz and Razzle Berry inks. After die-cutting and adhering the word friend, I covered the letters with Glossy Accents. 

Whats-Up-Friend-CU

My next card uses Blossoming Buds, Stitched dies and Large Leaves dies.

I-am-Grateful-for-You-505

After stamping the sentiment in Chocolate Brown ink, I clear embossed to create a darker appearance on the patterned paper.  I used the curved stitched die to create a wind trail for the leaves and the straight stitched die along the top and bottom paper edges.

I-am-Grateful-for-You-CU

Thanks for stopping by today!

What’s Up? Friend card

I am Grateful for you card

hello, hello, hello

Hi everyone.    I’ve had a short stack of Stamping Bella stamps just waiting to be used.  I’m finally, slowly, attacking that pile.  I was also in need of a bit of color therapy.  🙂  

Uptown Girl Jayden Loves to Journal caught my attention because of the dreamy look on her face.   Maybe she’s journaling, or just has a lot to say to an old friend she’s missing.  Or maybe she’s thinking about how yummy that cupcake is going to be.  😉

Hello-Jayden-Journals

After stamping onto X-Press It Blending Card with MFT’s Black Licorice hybrid ink, I colored with Copic markers and rounded the bottom corners.  The top was finished off with a Nightshift Blue button.

I decided not to include a sentiment on the front and instead let the “hello” patterned paper do the talking.

Hello-Jayden-Journals-CU

Thanks for visiting! Have a great day!

Additional supplies/info:  Copic markers (E00, E11, BV000, R01, R02, Y21, E31, E35, B91, B93, B95, B97, B99, R24, R27, R89, YR23, E40, E41, E42, E43, E50, C00, C1, C3).  Finished size 4 1/4″ x 5 1/2″.

Mwaa-haaha-haaa!

Hi everyone!   As  you can tell, I’ve been in a bit of a Halloween mood lately.   My card today using several stamps and dies from Paper Smooches.

I die-cut the Seasonal Tree and leaves from Black Licorice card stock, adding Halloween colored crystals as decoration.  The dotted lines were created using Dots & Dashes dies and the cat was stamped from Feline Friends.

Mwaahaaha-475

After cutting the spider (from Halloween Icons), I drew a string using a Copic 0.25 black multi-liner and popped the spider up on a clear foam square.

To help the sentiment stand out against the patterned paper, I clear embossed after stamping in black.

Mwaahaaha-CU

Thanks so much for visiting today!  I’ll be back soon!  🙂

MFT August Release Rewind – Spooky Spiders

Hi everyone!  I’m back for Day 2 of MFT‘s August Release Rewind.  It was such a fun release, I welcome the chance to play some more!

First, I used new Pure Innocence Batty About You with the tiny spider from Centerpieces Spooky Window.

The Batty girl was stamped onto X-Press It Blending Card using Black Licorice hybrid ink then colored with Copic markers.  I drew “strings” using a black Copic Multi-liner and adhered the tiny spiders. To create the dotted pattern along the top, I first stamped Darling Dots in Limeade, then Grape Jelly dye ink.

Flag shapes were cut using Fishtail Flags and Fishtail Flags Layers.

Inside, I adhered a leftover strip of dotted paper, stamped the image again and added a sentiment from Witch Way is the Candy?

Next I used Spider Web Cover-Up, the spider from Centerpieces Spooky Window and a Spooky Sentiment.

When stamping the sentiment, I masked off the tiny tip at the bottom of the “hi” speech bubble to create a plain block.

I added clear dots of Glossy Accents to the web along with some orange and purple pearls, and the spider is raised on a clear foam square for added dimension.

Because one spider isn’t enough, I added another to the inside along with a second Spooky Sentiment.  (I like spiders as long as they’re paper.)

Be sure to check out the MFT Blog for direct links to more Release Rewind posts.

Thanks for stopping by today!  🙂

A Halloween Hello card

Additional supplies/info:  Copic markers (E00, E11, BV000, R01, R02, E35, C3, C5, N9, V15, V17, V99, YG06, YG17, G09, YG06), 0.5 black Copic Multi-liner, Signo white pigment pen, Doodlebug Sprinkles.  Finished size 4 1/4″ x 5 1/2″.
.
Creeping By to Say Hi card

Additional supplies/info:  Doodlebug mini pearls, Kool Tak clear foam squares.  Finished size 4 1/4″ x 5 1/2″.

MFT August New Product Launch – Witch Way is the Candy? (Three Ways)

Welcome to MFT‘s August New Product Launch!  All new products you’ve seen previewed over the last week are now available to you right HERE!

Be sure to visit each of the MFT Designers’ August Product Launch posts linked on the MFT Blog and leave a comment by the end of the day on Thursday, August 14th for your chance to win one of two $100 Gift Vouchers. (You can do some fun shopping with $100!) The winners will be chosen at random and the prizes will be sent out on August 15th.

I have three cards to share tonight, all using new Birdie Brown Designs Witch Way is the Candy?

First I used the cute little witch, stamping her with Black Licorice hybrid ink onto X-Press It Blending Card and colored with Copic markers.

The surrounding blue was airbrushed and the tiny dots were added to her dress using a white pigment pen. I used Diagonal Stripes Background and Limeade ink, stamping once, then rotating my paper before stamping a second time to create the grid.

Inside, I stamped a silhouette in Limeade ink and added a sentiment from Pure Innocence Batty About You.

Next, I used the bat from Witch Way is the Candy, die-cutting with coordinating Die-namics.

I used Cloud Cover-Up with Black Licorice and Steel Grey card stock for the background, and the sentiment was stamped on the flag shape from Blueprints 18.

Inside, I stamped/colored an additional bat, stamped a second sentiment from BBD Let’s Hang Out and added a couple of leftover clouds.

On my last card, I focused on the frog and ‘spell’ sentiment, using Sun Ray Cover-Up to draw attention to the frog.


The sun rays were first die-cut in Black Licorice and Grape Jelly.  Before removing the Grape Jelly pieces, I heavily sprayed with Sheer Shimmer Mist, allowed to dry, then removed and inserted the pieces into the black frame. Clear dots were added using Glossy Accents.

I also used a Wine Copic Multi-liner to add a few freckles to the frog.

On the inside, I stamped the frog again, a couple clouds and a sentiment from You Make My Day.

Don’t forget to check out the MFT Blog for direct links to samples using all of the new products!   And as you look, don’t forget to comment for your chance to win one of TWO $100 Gift Vouchers!!! :)

Thanks SO much for stopping by!

Witch Way is the Candy? card

Additional supplies/info:  Copic Air Brush System, Copic markers (E00, E11, BV000, R01, R02, YR14, YR18, E09, E29, YG06, YG17, G09, Y21, YR23, YR68, V17, N3, N5, N7, N9, E31, E33, E35, BG11), Recollections enamel dots, X-Press It 1/4″ foam tape.  Finished size 4 1/4″ x 5 1/2″.
.
I’m Bats About You card

Additional supplies/info:  Copic markers (C3, C5, N9, R01, BG11), Baker’s Twine, X-Press It 1/2″ foam tape.  Finished size 4 1/4″ x 5 1/2″.
.
I’m Under Your Spell card

Additional supplies/info:  Copic markers (YG06, YG17, G09, E41, E42, E43), Wine Copic 0.1 Multi-liner, Glossy Accents, Kool Tak clear foam squares. Finished size 4 1/4″ x 5 1/2″.

MFT August Previews, Spooky Scene

Hi everyone!  I have one last preview to share before MFT‘s August New Product Launch tonight at 10 p.m. EST.  Today I’ve used Spooky Scene Die-namics, a 12-piece scene building set of dies.  There are so many possibilities!


I began my scene by using a Copic air brush and three gray markers to add color to a block of X-Press It Blending Card, concentrating the darker shades at the bottom.  I die-cut a tree and fence from Black Licorice card stock, using a clear glaze pen to color over the fence for dimension and shine.

The ghosts were cut from Sweet Tooth with additional black eyes cut to insert into the holes.  A few enamel dots were used to ‘decorate’ the tree, and the clear embossed Spooky Sentiment was stamped in Black Licorice dye ink.

Inside, I stamped a second Spooky Sentiment and added a little die-cut black cat with Limeade eyes, also from Spooky Scene Die-namics.

Thanks so much for stopping by!  I’ll be back tonight at 10 p.m. EST for the New Product Launch!

Please note that links to new products will not be in effect until time of release, August 12, 10 p.m. EST.

Additional supplies/info:  Copic ABS w/C5, C7, N9; clear embossing powder; MME enamel dots; Sakura clear 3-d glaze pen.  Finished size 4 1/4″ x 5 1/2″.

Grateful for you

Hi everyone!  Today’s card uses Paper Smooches Blossoming Buds along with Deco Bag die to create a focal point gift card pocket.


I stamped the flowers onto X-Press It Blending Card then colored with Copic markers and added glossy dots to the centers.  Once the dots were thoroughly dried, I carefully cut out the image, using a kraft knife to cut away the inside areas.   It was a bit tedious, but I think it was worth the additional effort.

Thanks so much for stopping by!  Have a great day!

Additional info/supplies:  Copic markers (Y21, YR15, R12, R22, YG93, YG95, YG97, YG99).  Finished size 5 1/2″ x 4 1/4″.