
Hi everyone! Today each member of the Copic education and blog team will be joining up for a virtual tour of their crafty spaces in celebration of a new Copic program.
Copic in the Craft Room is a new community brought to you by Imagination International Inc., distributor of Copic products in the United States and Canada.
Our program goals are:
- To Inspire Copic crafters, both new and experienced, to use their Copic products and get crafty.
- To Educate crafters, no matter their skill level, teaching proper product use for success and new ways to use Copic products.
- To Grow both as a community and as individual crafters.
Since getting crafty can take place anywhere, we thought it would be fun to share our own crafty spaces. I cleaned, just for you. Please come in. 🙂
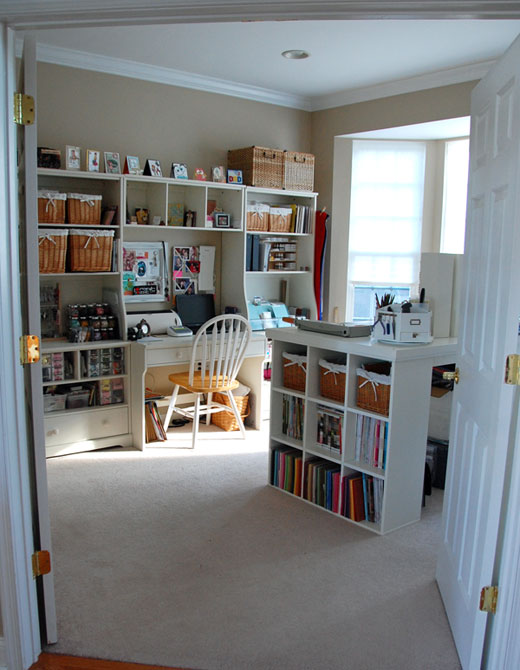
My craft room is technically our “library/office.” Luckily there are doors to close when I’m super-messy (which is most of the time).
I have shelves and a desk, wrapping around two walls with a large craft table in the center. On the left and right sides of my craft table, there are cubbies where I store my MFT card stock, magazines and baskets holding 6×6 paper pads. In the second side of my table I store Copic supplies, extra/unopened packages of card stock, embossing powders, heat gun and other miscellaneous supplies.
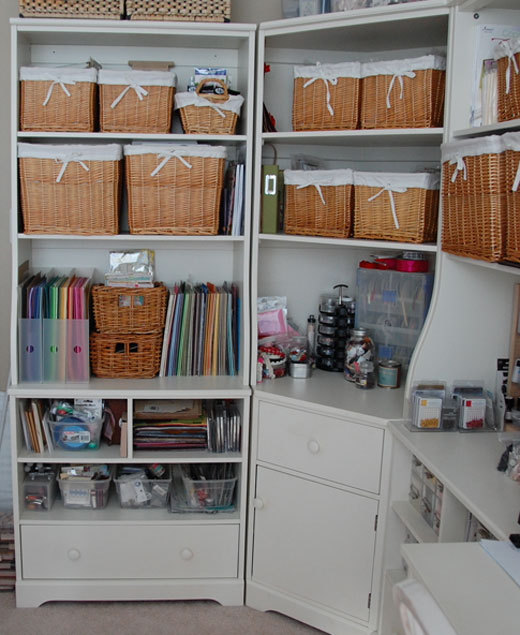
Above is the view just inside the door and to the left. I have baskets holding stamps and alterables, some 12 x 12 card stock, felt and bins of various embellishments. In the corner piece I have baskets which hold some MFT stamps (separated by line). Below the baskets I have ribbon and miscellaneous brads and buttons. More storage below. 🙂
To the left of my desk there are more baskets, some holding my daughter’s craft supplies, some holding more stamps. I have a little “embellishment rack” my husband made, holding brads, etc. from Clip-It-Up clips. MFT buttons are stored in little Ikea jars and below more ribbon.
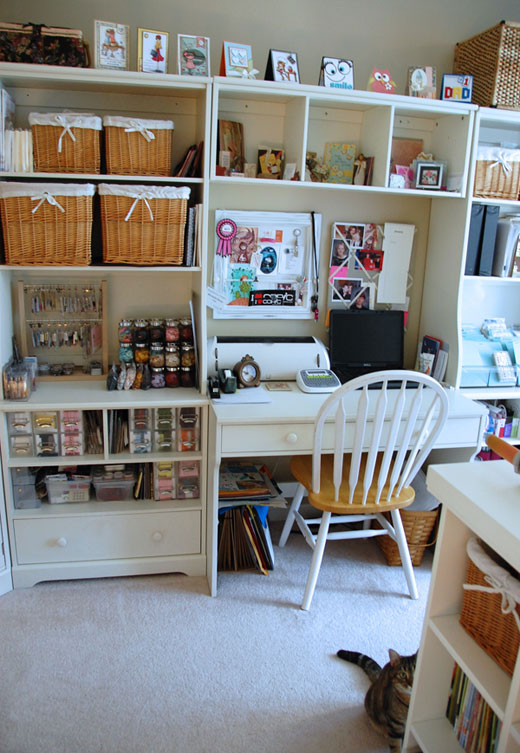
Next is my desk, where I rarely sit other than to update computer files. Above I have some favorite cards and projects (some of my own, some from friends). At the bottom of the picture you can see our nosy little kitty peeking around the corner. 🙂
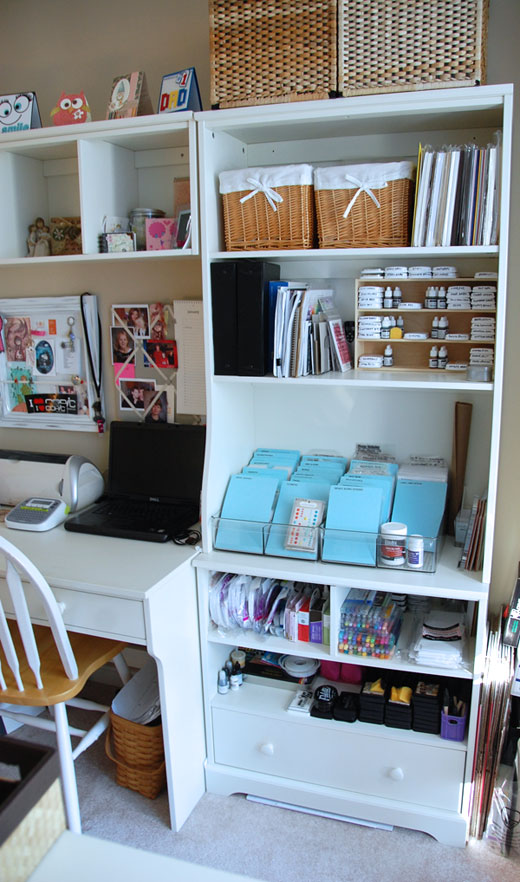
Moving to the right, I have my most used/basic colors of card stock…whites, creams, black, kraft and Blending Card. Nice and handy. Below the paper I have color charts, sketches and MFT inks. On the next shelf down is my favorite new Die-namics organization (with blue dividers). ALL of my dies (and I have a LOT), along with coordinating stamp sets are filed neatly away. I can’t tell you how happy I am with this. ♥ I can see and find everything so quickly and easily. Thank you, Jennifer McGuire. You are a rock star and I bow to your creativity and knowledge. (You can find her post HERE.)
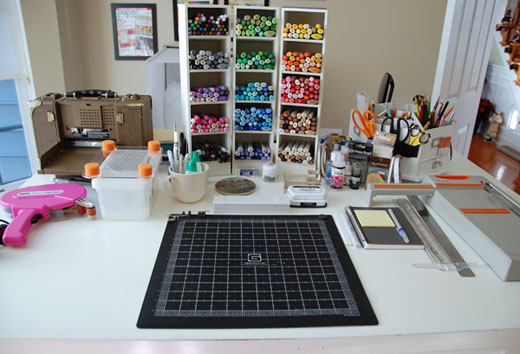
Spinning around to the center of the room is my work area. I have my Vagabond on the left, Copics front and center (where they belong) and miscellaneous tools on each side. (I’m challenging myself to keep my space at least close to this neat and tidy.)
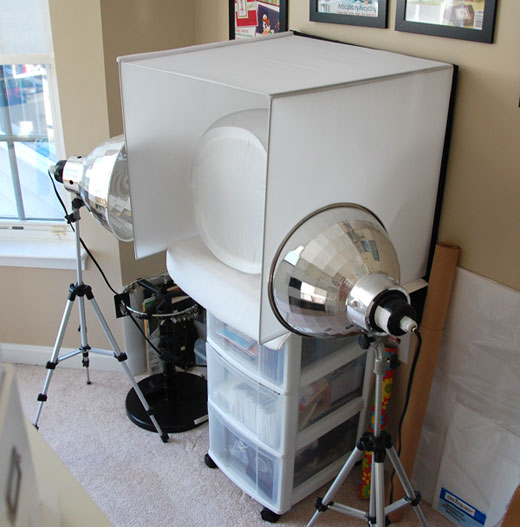
Behind my work space is my photo booth. (I keep the smaller cube inside to keep the cat out.) There isn’t much on the wall to the left other than a big bay window looking out into our backyard.
Click the links below to hit the cyber roads and travel all across the continent to see where the rest of the team makes the magic happen.
- Lori Craig
- Sharon Harnist
- Cindy Lawrence
- Debbie Olson
- Colleen Schaan
- Sherrie Siemens
- Marianne Walker
Be sure to stop at the Copic in the Craft Room Facebook page and like us to share your own crafty spaces photos. Check us out of Pinterest too!
Thanks for visiting my crafty space! 🙂


23 responses to “Copic in the Classroom – Sharing Crafty Spaces”