
Hi everyone. This week with Kraftin Kimmie, Tara has challenged us to use distressing on our cards. It’s been quite a while since I’ve done this, and it used to be one of my favorite techniques so I was happy to revisit it. 🙂
Watch It!
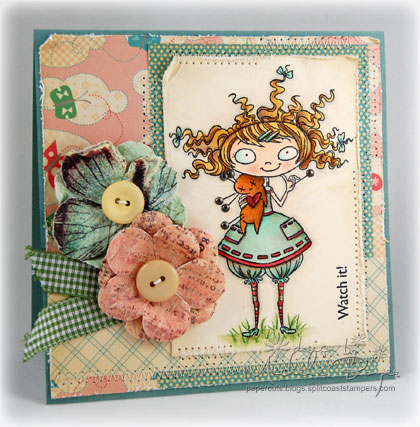
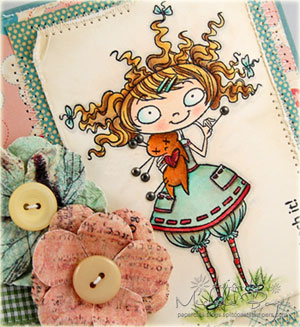
It’s also been a while since I pulled out one of my all-time favorite Kimmie images, Drucilla. She’s so sweet yet…not. 🙂
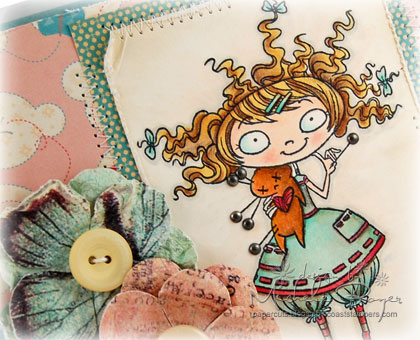
After coloring her with markers, I added some shading (dirt) to her dress (she’s been playing outside after all) with pencils and added tiny brads for pin heads. I distressed the edges and added lots of stitching.
I plucked the little green things from the flower centers, scrunched the flowers and attached each with buttons and string.
To see more design team samples, you can check out the Krafty Blog HERE. If you’d like to play along, please post a link to your creation on the Krafty Blog for your chance to win a free stamp from Kraftin Kimmie!
Also, November previews begin on Thursday!
Thanks for ALL the suggestions yesterday on the coffee! That was a big help! Some flavors were mentioned that I’m very eager to track down. And I’ve created an account with Big Cat and started filling my cart. I like that you can create your own assortment! 🙂
As always, thanks so much for stopping by! Have a great day!
Stamps: Kraftin Kimmie “Drucilla” and “Steampunk Sentiments” Ink: Memento Tuxedo Black and VersaMagic Wheat Paper: Prism Island Mist Medium, Papertrey Ink Vintage Cream, Cosmo Cricket Togetherness 6×6 paper pad Accessories: Copic markers (E000, E00, E31, E33, E35, YR23, YR24, BG10, BG23, R20, R35, R37, Y21, B000, W00, W1), Prismacolor pencils, Prima “Flight of Fancy” flowers, buttons/string, ribbon scrap, Michaels mini brads, edge distresser, sewing machine. Finished size 5 1/4″ x 5 1/4″.


10 responses to “How Distressing”